Nepedia

Tuscan-style bread

A lean, salt-free loaf with an overnight preferment and a mild wheat flavour. This home version uses instant yeast; it is not a certified Pane Toscano PDO loaf.

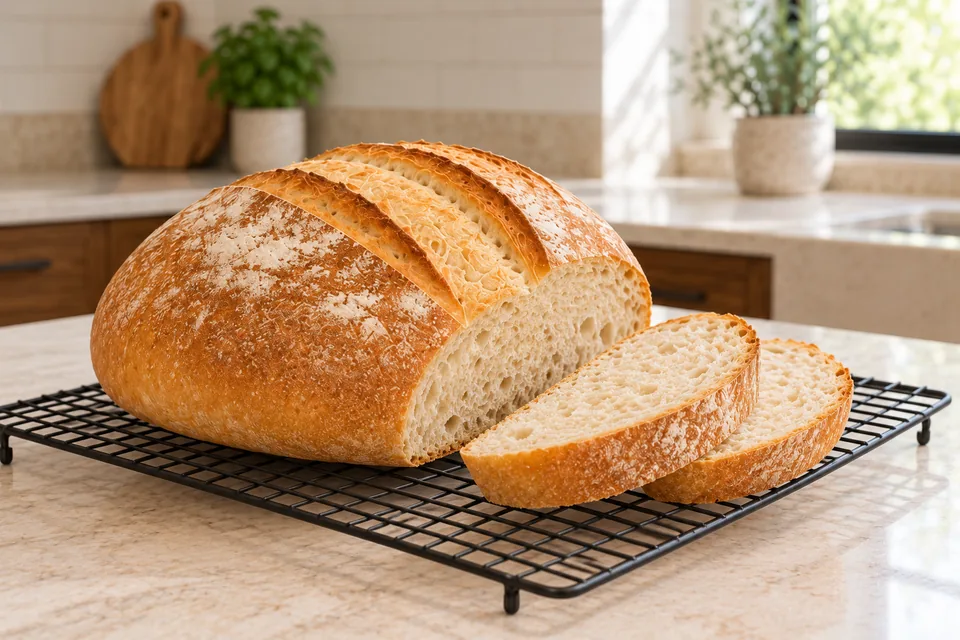
Golden round bread with two parallel crust openings and two slices showing an open creamy crumb.
Makes
1 loaf
Heat
230°C conventional for 15 min, then 205°C conventional
Baking time
35–40 min total
Cuisine / style
Italy

Bake 15 min at 230°C, release steam briefly, then bake 20–25 min at 205°C.

Explore variations · 1 →Jump to ingredients & method ↓
View

Tuscan-style salt-free bread

Makes
1 loaf
Heat
230°C conventional for 15 min, then 205°C conventional
Baking time
35–40 min total
Cuisine / style
Italy

Bake 15 min at 230°C, release steam briefly, then bake 20–25 min at 205°C.

Italy · Tuscan-style bread

Tuscan-style salt-free bread

A lean, salt-free loaf with an overnight preferment and a mild wheat flavour. This home version uses instant yeast; it is not a certified Pane Toscano PDO loaf.

Method

  1. 01 · Mix and ferment the overnight sponge

    600–840 min

    Use: Strong white bread flour; Water; Instant dried yeast

    Stir the preferment flour, water and 0.6 g yeast in a roomy container until evenly mixed. Cover and leave for 10–14 hours at about 18–21°C.

    Ready when: The mixture has expanded, with many visible bubbles and a gently rounded or just-level surface. Use it before it collapses heavily.
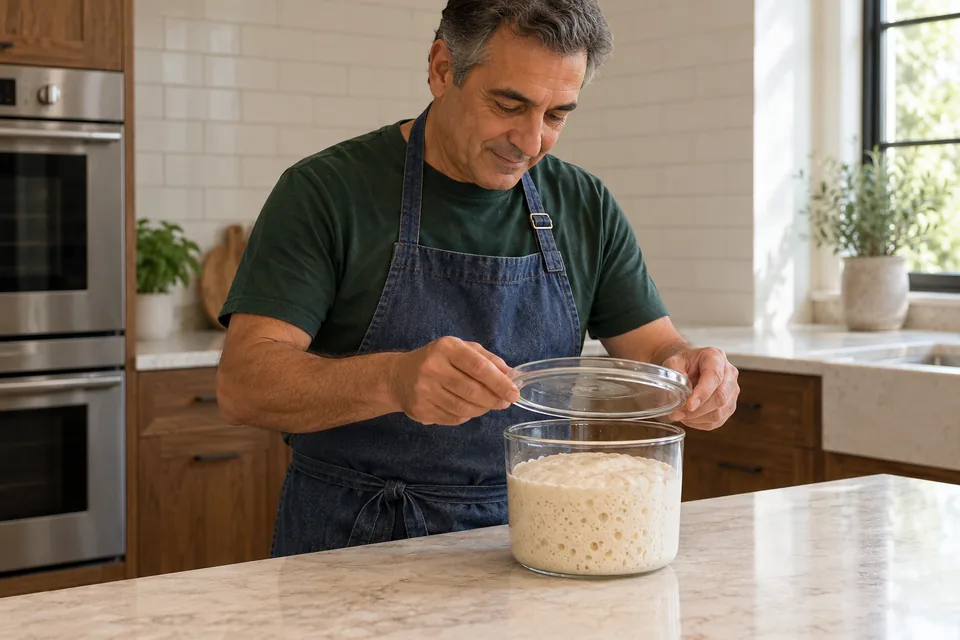
    Baker lifts a clear lid above a small glass container of pale bubbly preferment.
    01 Tuscan-style salt-free bread — step 1Use the preferment while expanded and bubbly.
  2. 02 · Mix and develop the dough

    10–15 min

    Use: Strong white bread flour; Water; Instant dried yeast

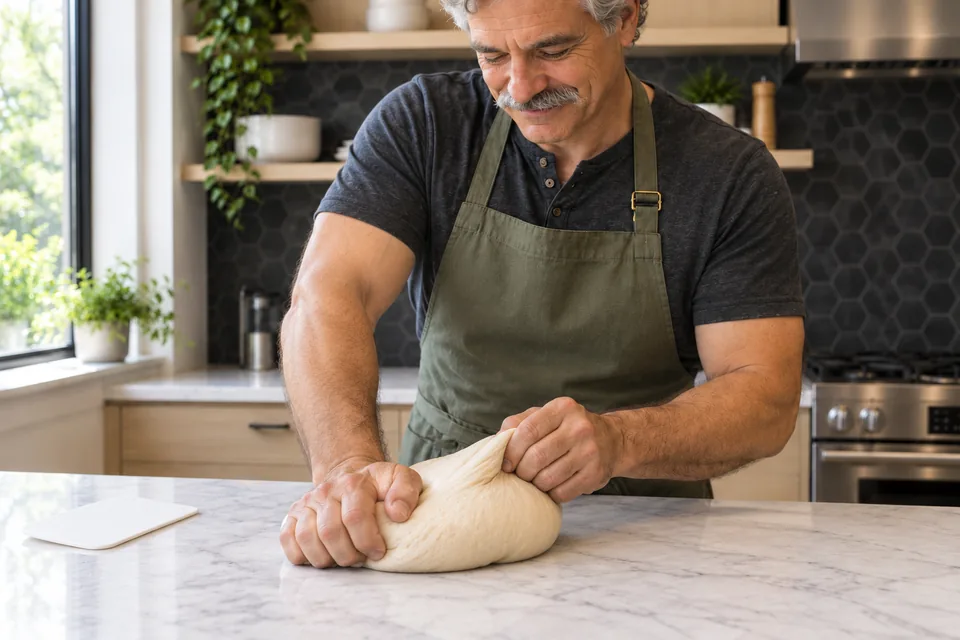
    Add the final flour, water and yeast to the preferment. Mix until combined, then knead for 8–10 minutes with a dough hook at the mixer’s recommended speed, or by lifting and folding on a clean worktop. Use a scraper instead of adding extra flour.

    Ready when: The dough is soft and sticky but stretches into a coherent elastic sheet.
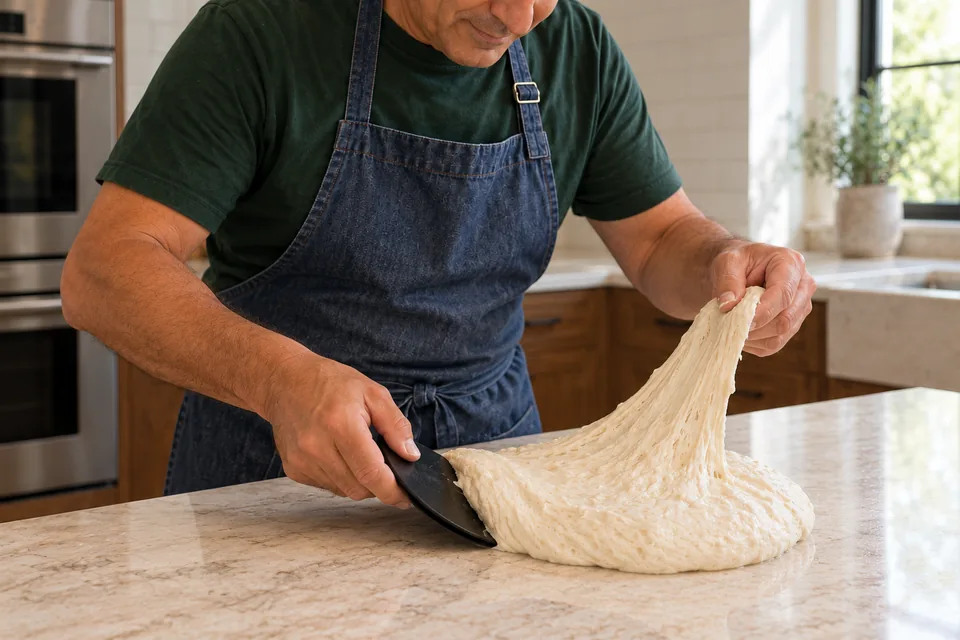
    Baker lifts a soft sheet of sticky pale dough while supporting its base with a black scraper.
    02 Tuscan-style salt-free bread — step 2Develop the soft dough until it stretches coherently.
  3. 03 · Let the dough rise

    45–75 min

    Use: Olive oil for the bowl

    Coat a clean bowl with the handling oil and add the dough. Cover and leave at 22–25°C for 45–75 minutes. Check early in a warm kitchen.

    Ready when: The dough has nearly doubled and contains visible gas bubbles; it still has some surface tension.
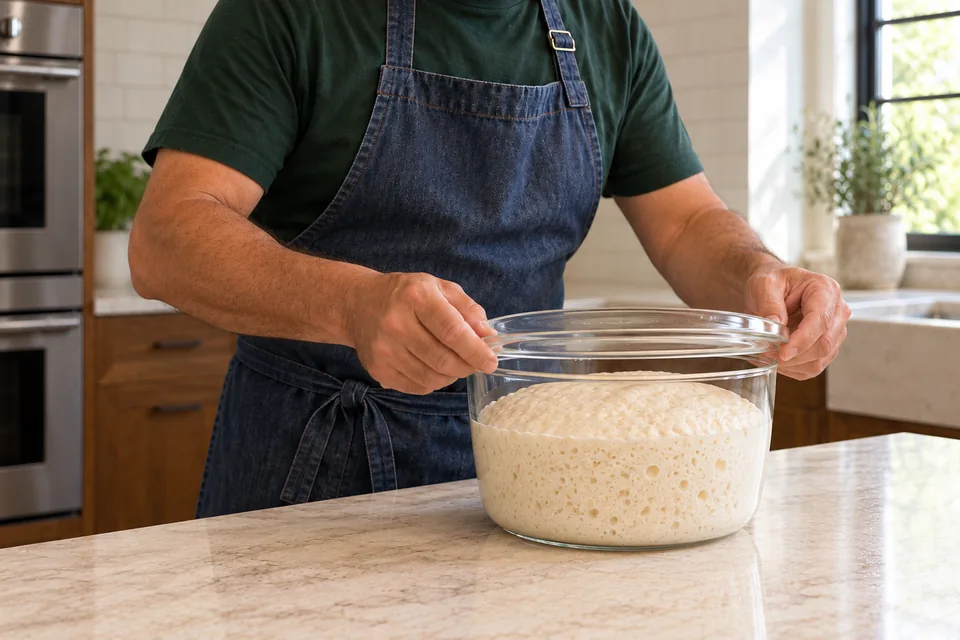
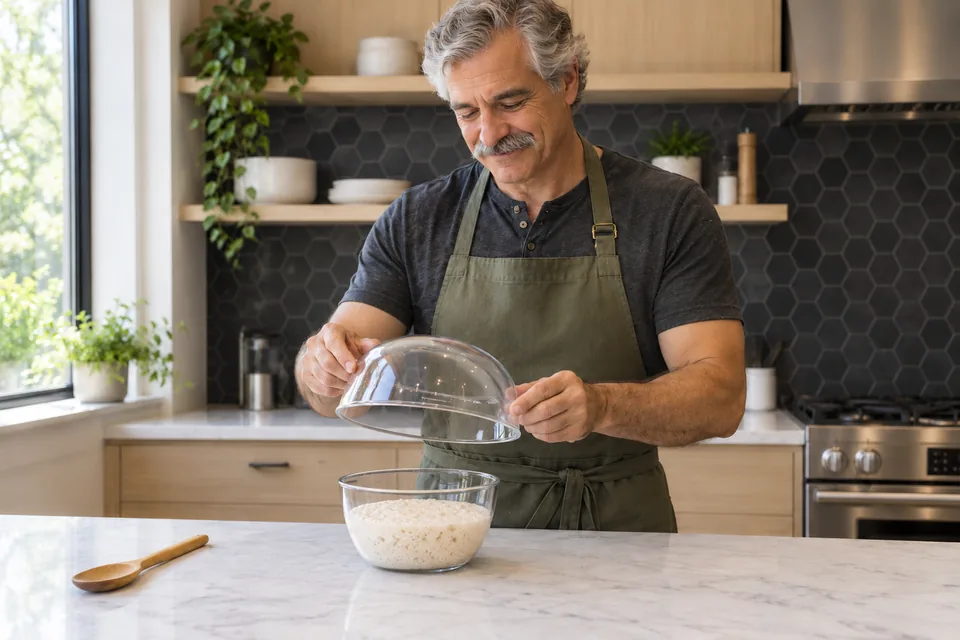
    Hands lower a clear lid above aerated pale dough in a large glass container.
    03 Tuscan-style salt-free bread — step 3Cover and let the dough nearly double.
  4. 04 · Shape one round loaf

    5–8 min

    Use: Flour for shaping

    Line a baking tray with baking paper. Lightly dust the worktop with some shaping flour. Turn out the dough gently, draw its edges into the centre, then turn it seam-side down. Cup it with your hands and draw it across the surface to make one round loaf. Move it onto the lined tray.

    Ready when: The loaf is rounded with a taut top and a sealed underside. It may relax slightly, but should not flatten into a puddle.
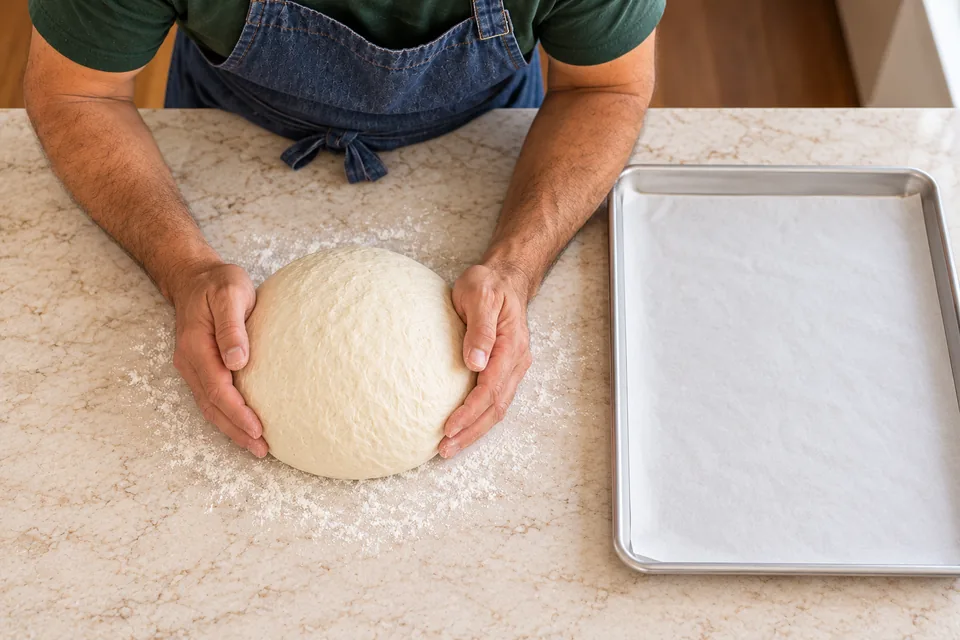
    Baker cups one pale round dough loaf on a lightly floured worktop beside a lined tray.
    04 Tuscan-style salt-free bread — step 4Shape one rounded loaf with a taut top.
  5. 05 · Proof and heat the oven

    45–75 min

    Use:

    Cover the loaf loosely without pressing on its surface. Leave for 45–75 minutes at 22–25°C. During the final 30 minutes, heat the oven to 230°C conventional with an empty sturdy metal tray on the lowest shelf and a clear middle shelf for the bread.

    Ready when: The loaf is noticeably expanded; a light fingertip dent recovers slowly instead of disappearing at once.
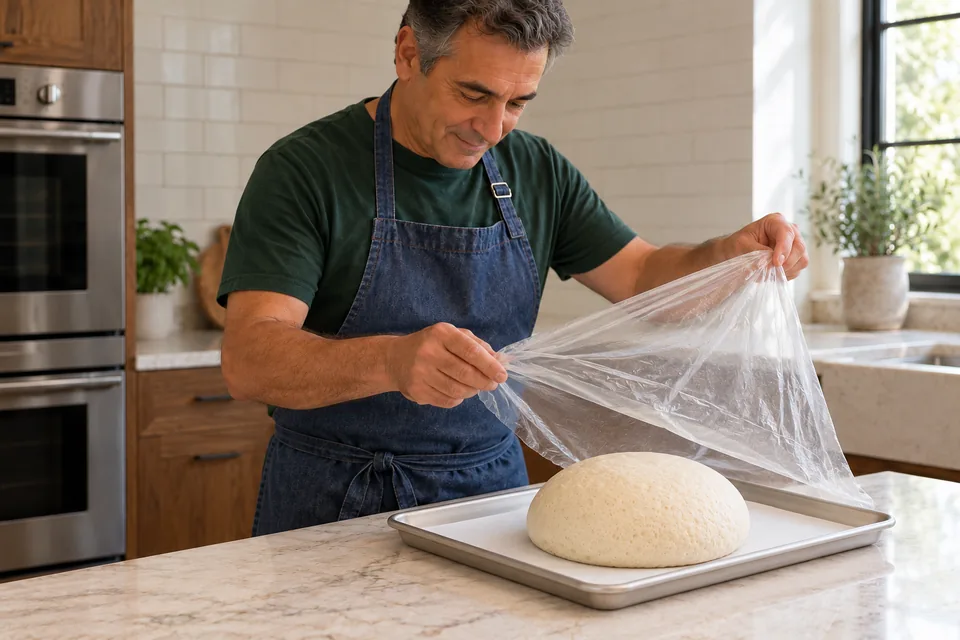
    Baker lifts a loose transparent cover above one puffy pale round loaf on a lined tray.
    05 Tuscan-style salt-free bread — step 5Let the round loaf expand before scoring.
  6. 06 · Score and bake with steam

    35–40 min

    Use: Flour for shaping; Boiling water for oven steam

    Remove the cover and dust lightly with the remaining shaping flour. Make two shallow parallel slashes across the top. Put the bread tray on the middle shelf. Wearing oven gloves and keeping your face back, pour the steam water into the lower metal tray and close the door. Bake for 15 minutes, then briefly open the door to release steam and reduce the setting to 205°C. Continue for 20–25 minutes.

    Ready when: The crust is golden and firm, and the centre reaches about 96°C on a probe thermometer. The base sounds hollow when tapped.
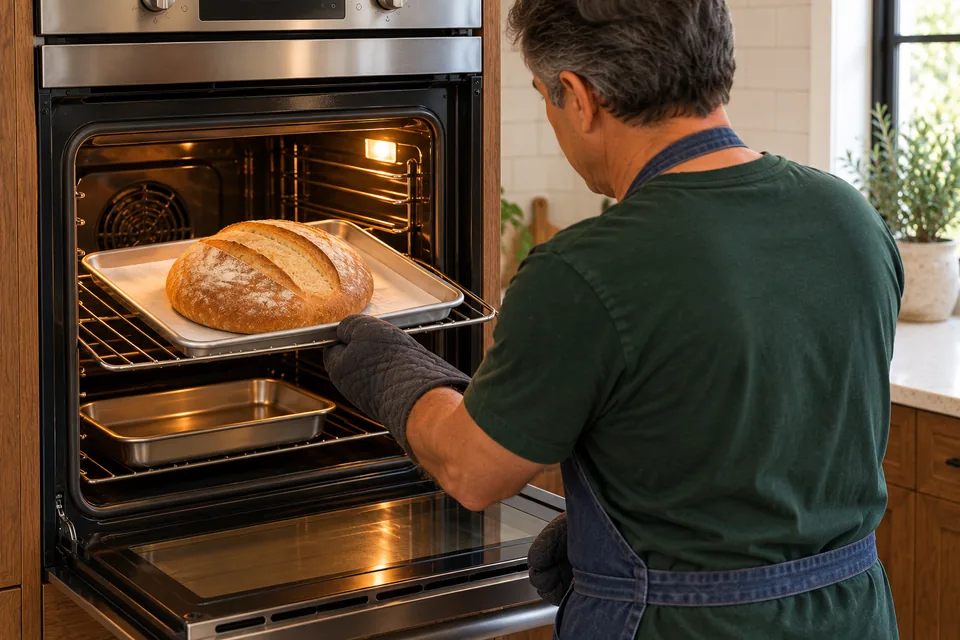
    Baker draws an oven rack holding one golden round loaf with two parallel openings, above a separate metal steam tray.
    06 Tuscan-style salt-free bread — step 6Score twice and bake with a separate lower steam tray.
  7. 07 · Cool before slicing

    60 min

    Use:

    Transfer the loaf to a rack and leave it for at least 1 hour before cutting. Serve with the toppings or accompaniments of your choice.

    Ready when: The crumb is set and slices cleanly. Its mild, unsalted flavour is intentional.
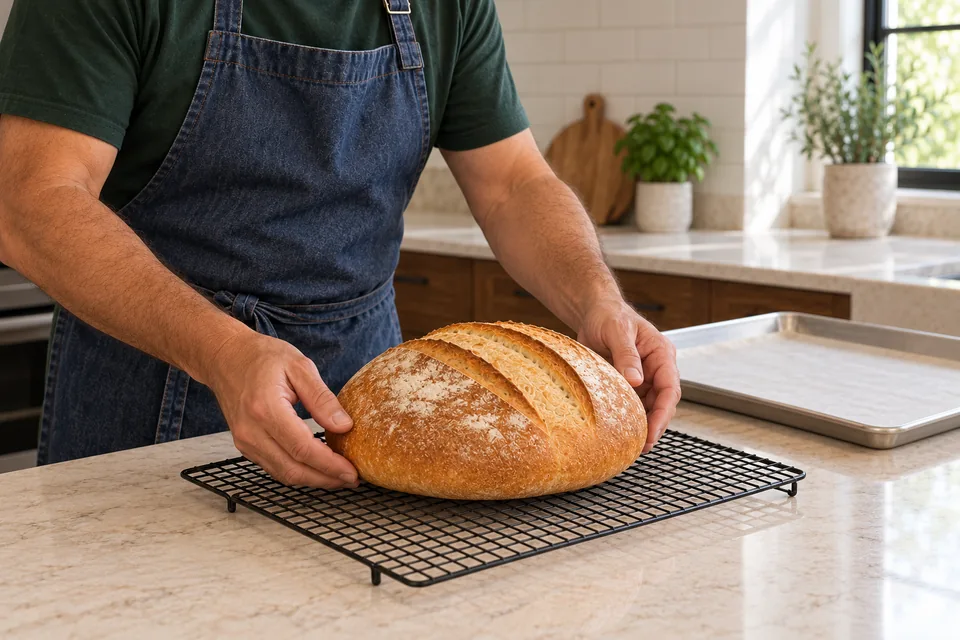
    Hands lower one golden round loaf with two parallel crust openings onto a wire rack.
    07 Tuscan-style salt-free bread — step 7Cool the loaf on a rack before cutting.

What to look for

StageLook / feel forNeeds attention
Mix and ferment the overnight spongeThe mixture has expanded, with many visible bubbles and a gently rounded or just-level surface. Use it before it collapses heavily.
Mix and develop the doughThe dough is soft and sticky but stretches into a coherent elastic sheet.
Let the dough riseThe dough has nearly doubled and contains visible gas bubbles; it still has some surface tension.
Shape one round loafThe loaf is rounded with a taut top and a sealed underside. It may relax slightly, but should not flatten into a puddle.
Proof and heat the ovenThe loaf is noticeably expanded; a light fingertip dent recovers slowly instead of disappearing at once.
Score and bake with steamThe crust is golden and firm, and the centre reaches about 96°C on a probe thermometer. The base sounds hollow when tapped.
Cool before slicingThe crumb is set and slices cleanly. Its mild, unsalted flavour is intentional.

Troubleshooting

If you see thisLikely causeWhat to do nowNext time
The dough rises sooner than the stated range.Salt-free dough ferments quickly, especially in a warm room.Move to the next step when the readiness cue is met.Use the measured yeast and monitor actual room temperature.
The shaped loaf spreads very flat.Weak flour, insufficient dough development or excess proofing.Bake it as a lower loaf once it is ready.Use strong bread flour, develop the dough and shape with a taut surface.
The crumb feels gummy.The loaf may be underbaked or cut while hot.If still whole and underbaked, return it to the oven; otherwise toast slices after cooling.Check the centre and allow the full cooling period.

Storage: Cool fully and keep wrapped at room temperature for up to 2 days. Slice and freeze for up to 2 months. Toast thawed slices to refresh their texture.; Contains: wheat.; This Nepedia version has not been kitchen-tested.

Ingredient choices & substitutions

No brand is specified.

Match the ingredient’s function and weight. See the flour, gluten, yeast and salt guide.

Other approaches to this recipe
Cook / recipeUseWhat differs

The working ingredients and method form one recipe. Different formulas are compared without averaging their quantities or rise schedules.
Nepedia

Recipe

Tuscan-style salt-free bread

A lean, salt-free loaf with an overnight preferment and a mild wheat flavour. This home version uses instant yeast; it is not a certified Pane Toscano PDO loaf.

How do I make it?

  1. Mix and ferment the overnight sponge

    600–840 min

    Stir the preferment flour, water and 0.6 g yeast in a roomy container until evenly mixed. Cover and leave for 10–14 hours at about 18–21°C.

    Baker lifts a clear lid above a small glass container of pale bubbly preferment.
    Use the preferment while expanded and bubbly.

    Ready when: The mixture has expanded, with many visible bubbles and a gently rounded or just-level surface. Use it before it collapses heavily.

  2. Mix and develop the dough

    10–15 min

    Add the final flour, water and yeast to the preferment. Mix until combined, then knead for 8–10 minutes with a dough hook at the mixer’s recommended speed, or by lifting and folding on a clean worktop. Use a scraper instead of adding extra flour.

    Baker lifts a soft sheet of sticky pale dough while supporting its base with a black scraper.
    Develop the soft dough until it stretches coherently.

    Ready when: The dough is soft and sticky but stretches into a coherent elastic sheet.

  3. Let the dough rise

    45–75 min

    Coat a clean bowl with the handling oil and add the dough. Cover and leave at 22–25°C for 45–75 minutes. Check early in a warm kitchen.

    Hands lower a clear lid above aerated pale dough in a large glass container.
    Cover and let the dough nearly double.

    Ready when: The dough has nearly doubled and contains visible gas bubbles; it still has some surface tension.

  4. Shape one round loaf

    5–8 min

    Line a baking tray with baking paper. Lightly dust the worktop with some shaping flour. Turn out the dough gently, draw its edges into the centre, then turn it seam-side down. Cup it with your hands and draw it across the surface to make one round loaf. Move it onto the lined tray.

    Baker cups one pale round dough loaf on a lightly floured worktop beside a lined tray.
    Shape one rounded loaf with a taut top.

    Ready when: The loaf is rounded with a taut top and a sealed underside. It may relax slightly, but should not flatten into a puddle.

  5. Proof and heat the oven

    45–75 min

    Cover the loaf loosely without pressing on its surface. Leave for 45–75 minutes at 22–25°C. During the final 30 minutes, heat the oven to 230°C conventional with an empty sturdy metal tray on the lowest shelf and a clear middle shelf for the bread.

    Baker lifts a loose transparent cover above one puffy pale round loaf on a lined tray.
    Let the round loaf expand before scoring.

    Ready when: The loaf is noticeably expanded; a light fingertip dent recovers slowly instead of disappearing at once.

  6. Score and bake with steam

    35–40 min

    Remove the cover and dust lightly with the remaining shaping flour. Make two shallow parallel slashes across the top. Put the bread tray on the middle shelf. Wearing oven gloves and keeping your face back, pour the steam water into the lower metal tray and close the door. Bake for 15 minutes, then briefly open the door to release steam and reduce the setting to 205°C. Continue for 20–25 minutes.

    Baker draws an oven rack holding one golden round loaf with two parallel openings, above a separate metal steam tray.
    Score twice and bake with a separate lower steam tray.

    Ready when: The crust is golden and firm, and the centre reaches about 96°C on a probe thermometer. The base sounds hollow when tapped.

  7. Cool before slicing

    60 min

    Transfer the loaf to a rack and leave it for at least 1 hour before cutting. Serve with the toppings or accompaniments of your choice.

    Hands lower one golden round loaf with two parallel crust openings onto a wire rack.
    Cool the loaf on a rack before cutting.

    Ready when: The crumb is set and slices cleanly. Its mild, unsalted flavour is intentional.

What can go wrong, and how can I fix it?

What you noticeLikely causeWhat to do
The dough rises sooner than the stated range.Salt-free dough ferments quickly, especially in a warm room.Move to the next step when the readiness cue is met. Use the measured yeast and monitor actual room temperature.
The shaped loaf spreads very flat.Weak flour, insufficient dough development or excess proofing.Bake it as a lower loaf once it is ready. Use strong bread flour, develop the dough and shape with a taut surface.
The crumb feels gummy.The loaf may be underbaked or cut while hot.If still whole and underbaked, return it to the oven; otherwise toast slices after cooling. Check the centre and allow the full cooling period.
Useful recipe notes

Storage: Cool fully and keep wrapped at room temperature for up to 2 days. Slice and freeze for up to 2 months. Toast thawed slices to refresh their texture.

Contains: wheat.

This Nepedia version has not been kitchen-tested.

See the detailed method and ratios in , or follow ingredients through the .

Ingredient proportions & recipe details

Tuscan-style salt-free bread at a glance

Makes
1 loaf
Heat
230°C conventional for 15 min, then 205°C conventional
Baking time
35–40 min total
Cuisine / style
Italy
Dough hydration
74%
Prefermented flour
26% of total flour
Leavening
Yeast
How do the ingredient proportions compare?

Core dough totals include the flour and water in the portion of starter or preferment used. Do not add them again. Toppings, fillings and dusting flour are separate.

Formula componentGramsFlour = 100%
Total flour500 g100%
Total water370 g74%
Instant yeast3.6 g0.7%

Dolcelatte bread ring

Makes
1 ring, about 16 slices
Heat
220°C conventional
Baking time
30–40 min
Cuisine / style
Italy
Italy · Tuscan-style bread

Dolcelatte bread ring

An olive-oil bread ring with soft blue cheese worked through the dough. An overnight preferment develops the dough before the cheese is added the following day.

Method

  1. 01 · Make and mature the preferment

    600–840 min

    Use: Strong white bread flour; Water; Instant dried yeast

    Stir the preferment flour, water and 0.6 g yeast in a bowl until no dry flour remains. Cover with space for expansion and leave at 18–21°C for 10–14 hours.

    Ready when: The mixture is expanded and bubbly, with a surface that is just beginning to level.

    The cook lifts a clear cover over a small glass bowl of bubbly, expanded preferment.
    01 PrefermentLet the covered preferment expand and become bubbly.
  2. 02 · Mix and develop the final dough

    10–13 min

    Use: Strong white bread flour; Water; Instant dried yeast; Olive oil

    Mix the final flour, water, 3 g yeast and olive oil into the preferment. Knead by hand for 8–10 minutes, or use a dough hook at the machine’s recommended speed until the dough becomes elastic.

    Ready when: The dough holds together and stretches instead of breaking immediately.

    The cook stretches and folds one smooth pale dough on the counter.
    02 DevelopDevelop the olive-oil dough before adding cheese.
  3. 03 · Fold in the chilled cheese

    3–5 min

    Use: Dolcelatte cheese

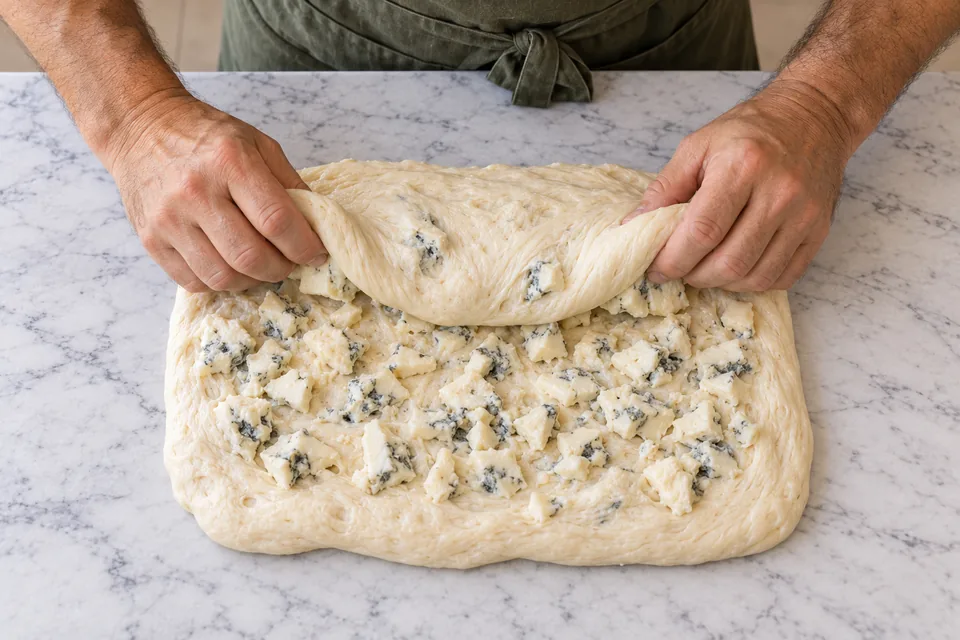
    Spread the dough into a thick rectangle. Scatter over the chilled cheese, fold the dough around it and knead gently for 2–3 minutes to distribute it. Avoid adding extra flour to absorb every soft patch.

    Ready when: Small cheese pieces are distributed through the dough; occasional creamy streaks are expected.

    The cook folds a thick dough rectangle over small cream-and-blue pieces of Dolcelatte.
    03 Add CheeseFold the chilled cheese through the developed dough.
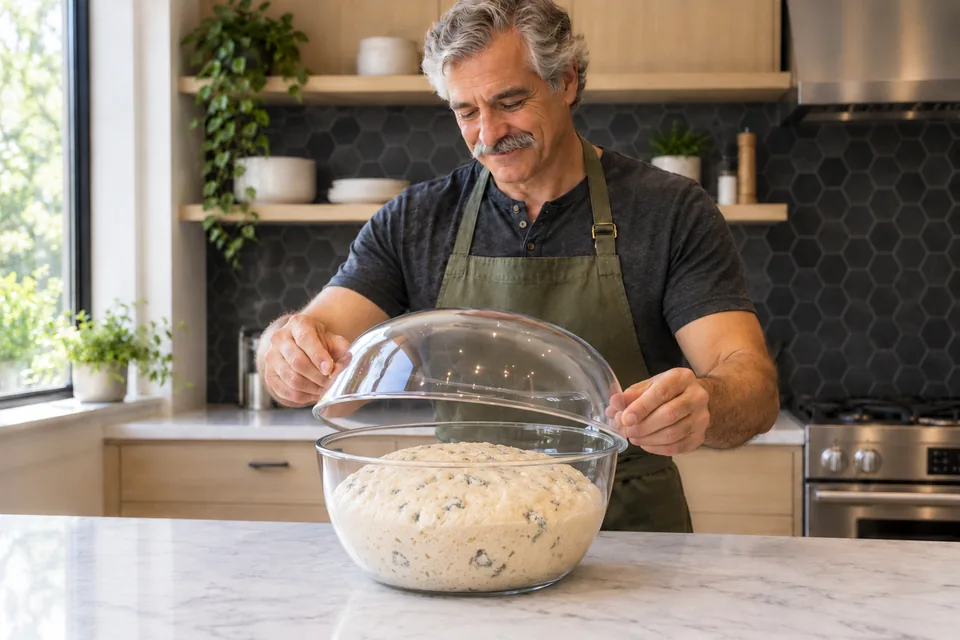
  4. 04 · Let the cheese dough rise

    60–90 min

    Use: Olive oil for the bowl

    Coat a bowl with the separate oil, add the dough and cover. Leave at 22–24°C for 60–90 minutes.

    Ready when: The dough is visibly aerated and roughly doubled in volume.

    The cook holds a clear cover above an aerated pale dough flecked with small pieces of blue cheese.
    04 Bulk RiseCover and let the cheese dough roughly double.
  5. 05 · Shape a rope and join into a ring

    10–15 min

    Use: Flour for shaping

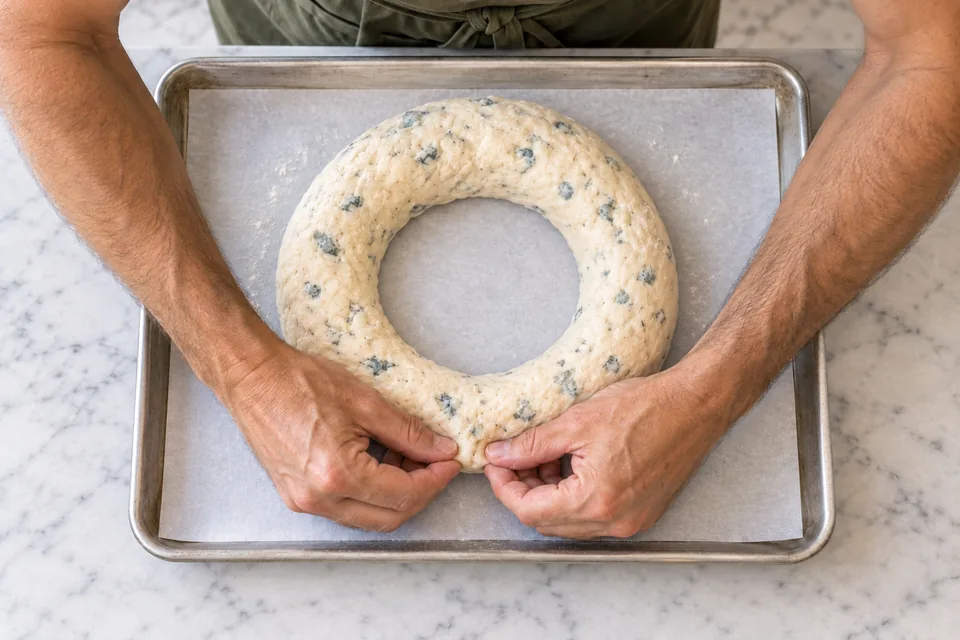
    Line a 30×40 cm baking tray with baking paper. On a lightly floured worktop, gently flatten the dough and roll it into an even rope about 55 cm long. Bring the ends together and pinch them firmly closed. Move the ring to the tray with the join underneath, leaving a central opening about 12 cm across. Dust lightly with the remaining shaping flour as needed.

    Ready when: One continuous ring sits evenly on the tray, with a sealed join and a generous central opening.

    The cook pinches the join beneath one raw cheese-dough ring with a wide round centre opening.
    05 Shape RingSeal the rope into a ring with a generous centre opening.
  6. 06 · Proof and heat the oven

    45–75 min

    Use:

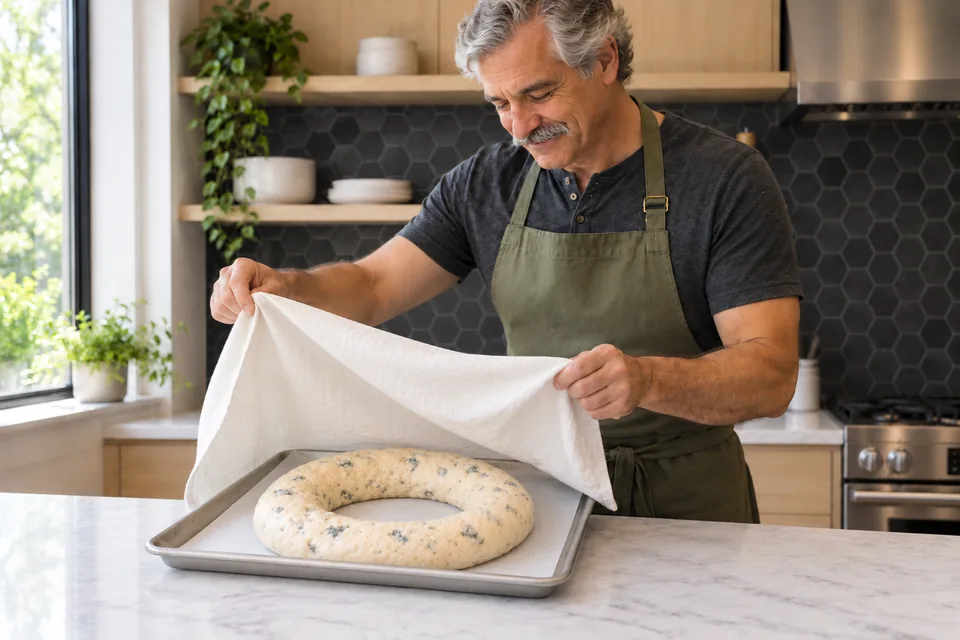
    Cover loosely and leave at 22–24°C for 45–75 minutes. Heat the oven to 220°C conventional during the final 20 minutes.

    Ready when: The ring is puffy and a gentle fingertip dent fills slowly. The central opening is still clearly visible.

    The cook lifts a loose cloth over one puffy pale bread ring with a clear open centre.
    06 ProofLet the ring become puffy while keeping the centre open.
  7. 07 · Bake the ring

    30–40 min

    Use:

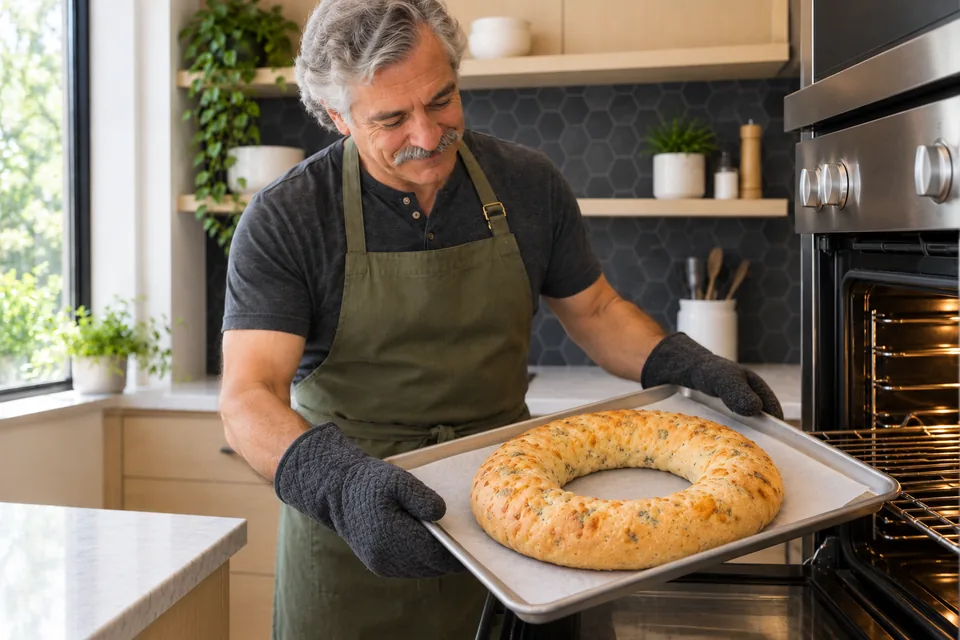
    Bake on the middle rack for 30–40 minutes. If the cheese on top darkens early, cover loosely with foil for the remaining time. Check a thick part of the bread with a probe, avoiding a melted-cheese pocket.

    Ready when: The crust is golden brown, the base is firm, and the bread crumb reaches about 96°C.

    Using two oven mitts, the cook holds one golden bread ring flecked with baked cheese on a lined tray.
    07 BakeBake until the crust is golden brown and the base is firm.
  8. 08 · Cool before slicing

    60 min

    Use:

    Transfer the ring to a rack and leave for at least 1 hour before slicing.

    Ready when: The underside has cooled and the crumb holds together around the cheese.

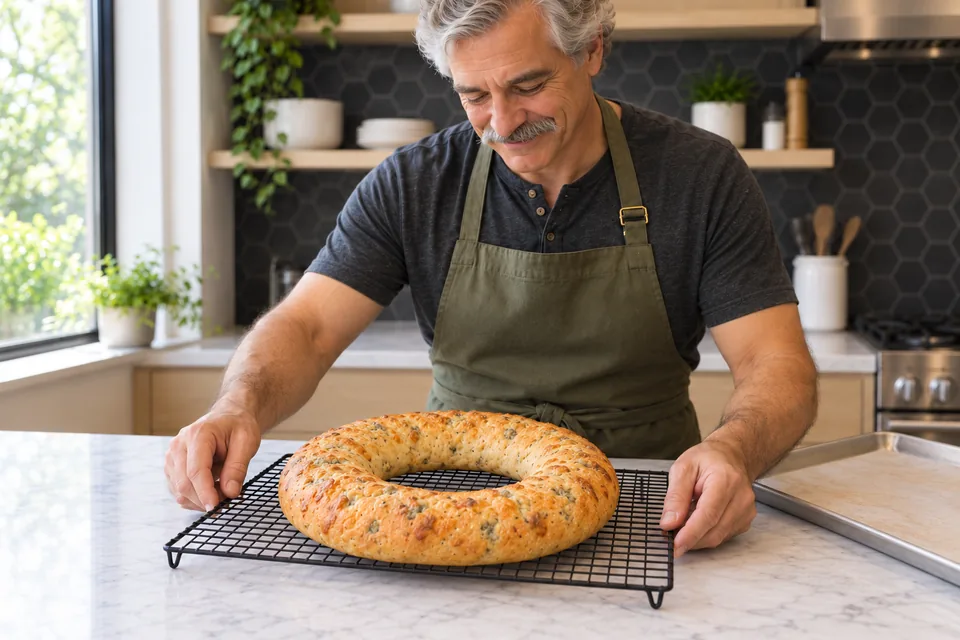
    The cook steadies a wire rack holding one whole golden cheese-bread ring with an open centre.
    08 CoolCool the ring on a rack before slicing.

What to look for

StageLook / feel forNeeds attention
Make and mature the prefermentThe mixture is expanded and bubbly, with a surface that is just beginning to level.
Mix and develop the final doughThe dough holds together and stretches instead of breaking immediately.
Fold in the chilled cheeseSmall cheese pieces are distributed through the dough; occasional creamy streaks are expected.
Let the cheese dough riseThe dough is visibly aerated and roughly doubled in volume.
Shape a rope and join into a ringOne continuous ring sits evenly on the tray, with a sealed join and a generous central opening.
Proof and heat the ovenThe ring is puffy and a gentle fingertip dent fills slowly. The central opening is still clearly visible.
Bake the ringThe crust is golden brown, the base is firm, and the bread crumb reaches about 96°C.
Cool before slicingThe underside has cooled and the crumb holds together around the cheese.

Troubleshooting

If you see thisLikely causeWhat to do nowNext time
The dough smears after adding cheese.Soft cheese and fat were worked too aggressively.Pause for 5 minutes, then fold gently with a scraper.Develop the plain dough first and use chilled cheese.
The central hole closes.The ring began with too small an opening.Before the final proof, gently widen the centre and reseal any loose join.Start with the stated generous opening and leave room for expansion.
Cheese on top browns early.Exposed cheese colours faster than the bread cooks.Cover loosely with foil and continue until the bread is set.Keep most cheese enclosed and check the loaf near the lower end of the baking range.

Storage: Let the bread cool, then wrap and refrigerate for up to 2 days. Warm slices before serving. Freeze wrapped slices for up to 1 month and reheat from frozen until hot through.; Contains: wheat, milk.; This Nepedia version has not been kitchen-tested.

Ingredient choices & substitutions

No brand is specified.

Match the ingredient’s function and weight. See the flour, gluten, yeast and salt guide.

Other approaches to this recipe
Cook / recipeUseWhat differs

The working ingredients and method form one recipe. Different formulas are compared without averaging their quantities or rise schedules.
Nepedia
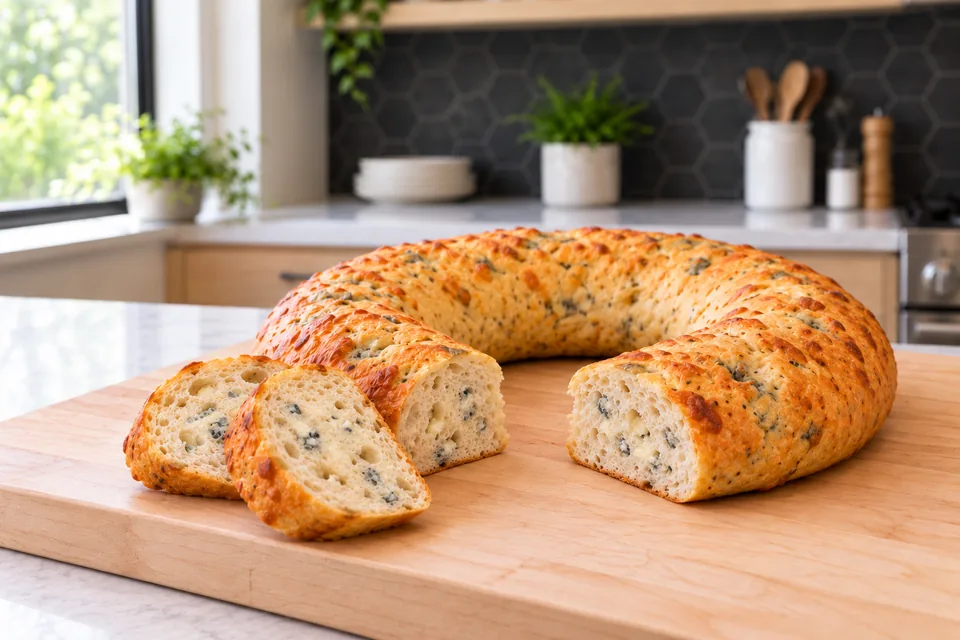
One golden ring with a small cut-out gap and two removed slices shows a set cream crumb with scattered small blue-cheese pockets.
Dolcelatte bread ring with soft cheese through the crumb.

Recipe

Dolcelatte bread ring

An olive-oil bread ring with soft blue cheese worked through the dough. An overnight preferment develops the dough before the cheese is added the following day.

How do I make it?

  1. Make and mature the preferment

    600–840 min

    Stir the preferment flour, water and 0.6 g yeast in a bowl until no dry flour remains. Cover with space for expansion and leave at 18–21°C for 10–14 hours.

    The cook lifts a clear cover over a small glass bowl of bubbly, expanded preferment.
    Let the covered preferment expand and become bubbly.

    Ready when: The mixture is expanded and bubbly, with a surface that is just beginning to level.

  2. Mix and develop the final dough

    10–13 min

    Mix the final flour, water, 3 g yeast and olive oil into the preferment. Knead by hand for 8–10 minutes, or use a dough hook at the machine’s recommended speed until the dough becomes elastic.

    The cook stretches and folds one smooth pale dough on the counter.
    Develop the olive-oil dough before adding cheese.

    Ready when: The dough holds together and stretches instead of breaking immediately.

  3. Fold in the chilled cheese

    3–5 min

    Spread the dough into a thick rectangle. Scatter over the chilled cheese, fold the dough around it and knead gently for 2–3 minutes to distribute it. Avoid adding extra flour to absorb every soft patch.

    The cook folds a thick dough rectangle over small cream-and-blue pieces of Dolcelatte.
    Fold the chilled cheese through the developed dough.

    Ready when: Small cheese pieces are distributed through the dough; occasional creamy streaks are expected.

  4. Let the cheese dough rise

    60–90 min

    Coat a bowl with the separate oil, add the dough and cover. Leave at 22–24°C for 60–90 minutes.

    The cook holds a clear cover above an aerated pale dough flecked with small pieces of blue cheese.
    Cover and let the cheese dough roughly double.

    Ready when: The dough is visibly aerated and roughly doubled in volume.

  5. Shape a rope and join into a ring

    10–15 min

    Line a 30×40 cm baking tray with baking paper. On a lightly floured worktop, gently flatten the dough and roll it into an even rope about 55 cm long. Bring the ends together and pinch them firmly closed. Move the ring to the tray with the join underneath, leaving a central opening about 12 cm across. Dust lightly with the remaining shaping flour as needed.

    The cook pinches the join beneath one raw cheese-dough ring with a wide round centre opening.
    Seal the rope into a ring with a generous centre opening.

    Ready when: One continuous ring sits evenly on the tray, with a sealed join and a generous central opening.

  6. Proof and heat the oven

    45–75 min

    Cover loosely and leave at 22–24°C for 45–75 minutes. Heat the oven to 220°C conventional during the final 20 minutes.

    The cook lifts a loose cloth over one puffy pale bread ring with a clear open centre.
    Let the ring become puffy while keeping the centre open.

    Ready when: The ring is puffy and a gentle fingertip dent fills slowly. The central opening is still clearly visible.

  7. Bake the ring

    30–40 min

    Bake on the middle rack for 30–40 minutes. If the cheese on top darkens early, cover loosely with foil for the remaining time. Check a thick part of the bread with a probe, avoiding a melted-cheese pocket.

    Using two oven mitts, the cook holds one golden bread ring flecked with baked cheese on a lined tray.
    Bake until the crust is golden brown and the base is firm.

    Ready when: The crust is golden brown, the base is firm, and the bread crumb reaches about 96°C.

  8. Cool before slicing

    60 min

    Transfer the ring to a rack and leave for at least 1 hour before slicing.

    The cook steadies a wire rack holding one whole golden cheese-bread ring with an open centre.
    Cool the ring on a rack before slicing.

    Ready when: The underside has cooled and the crumb holds together around the cheese.

What can go wrong, and how can I fix it?

What you noticeLikely causeWhat to do
The dough smears after adding cheese.Soft cheese and fat were worked too aggressively.Pause for 5 minutes, then fold gently with a scraper. Develop the plain dough first and use chilled cheese.
The central hole closes.The ring began with too small an opening.Before the final proof, gently widen the centre and reseal any loose join. Start with the stated generous opening and leave room for expansion.
Cheese on top browns early.Exposed cheese colours faster than the bread cooks.Cover loosely with foil and continue until the bread is set. Keep most cheese enclosed and check the loaf near the lower end of the baking range.
Useful recipe notes

Storage: Let the bread cool, then wrap and refrigerate for up to 2 days. Warm slices before serving. Freeze wrapped slices for up to 1 month and reheat from frozen until hot through.

Contains: wheat, milk.

This Nepedia version has not been kitchen-tested.

See the detailed method and ratios in , or follow ingredients through the .

Ingredient proportions & recipe details

Dolcelatte bread ring at a glance

Makes
1 ring, about 16 slices
Heat
220°C conventional
Baking time
30–40 min
Cuisine / style
Italy
Leavening
Yeast
Bulk fermentation (including folding)
60–90 min · The dough is visibly aerated and roughly doubled in volume.
How do the ingredient proportions compare?

Percentages compare each listed weight with the combined flour weight (100%). These are ingredient ratios, not dough hydration; milk, eggs and fillings contain other ingredients as well as water.

Formula componentGramsFlour = 100%
Strong white bread flour130 g26%
Water125 g25%
Instant dried yeast0.6 g0.1%
Strong white bread flour370 g74%
Water180 g36%
Instant dried yeast3 g0.6%
Olive oil50 g10%
Dolcelatte cheese150 g30%