Nepedia

Enriched fruit bread

A lightly enriched yeast loaf with sultanas, candied citrus peel and a little cinnamon. Cool it fully before slicing; the firm crumb also suits toasting the next day.

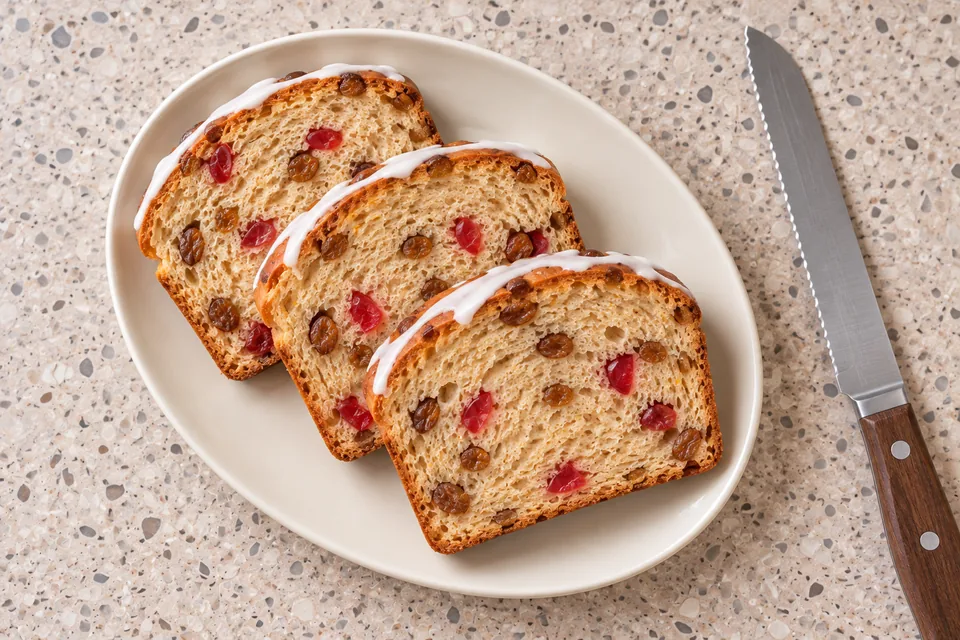
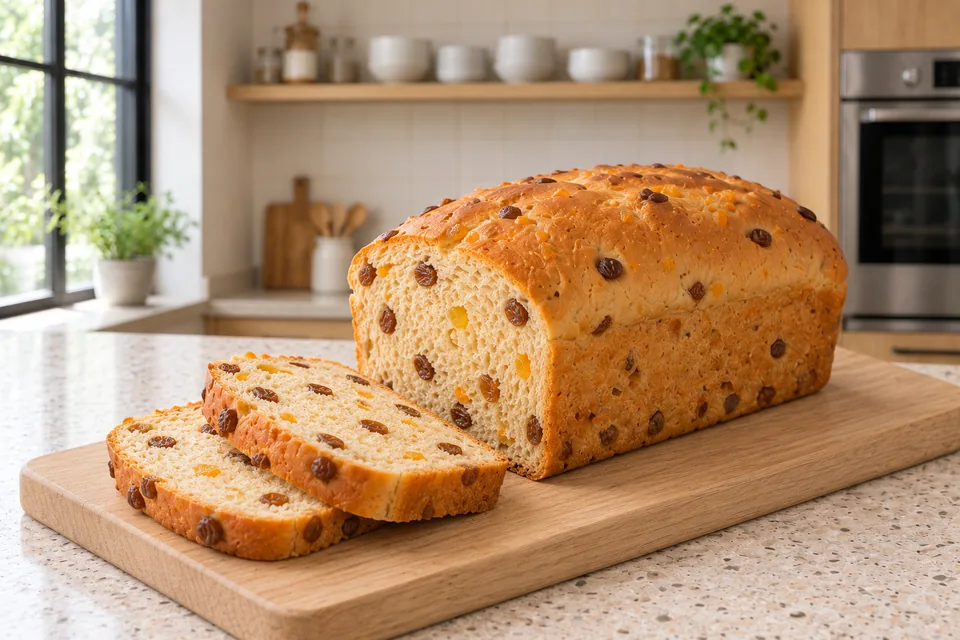
A citrus and sultana loaf with two slices showing fruit through the soft crumb.
Makes
1 loaf, about 12 slices
Heat
175°C conventional
Baking time
45–55 min
Cuisine / style
International
Explore variations · 7 →Jump to ingredients & method ↓
View

Citrus and sultana fruit loaf

Makes
1 loaf, about 12 slices
Heat
175°C conventional
Baking time
45–55 min
Cuisine / style
International
International · Enriched fruit bread

Citrus and sultana fruit loaf

A lightly enriched yeast loaf with sultanas, candied citrus peel and a little cinnamon. Cool it fully before slicing; the firm crumb also suits toasting the next day.

Method

  1. 01 · Develop the enriched dough

    12–16 min

    Use: Plain flour; Caster sugar; Instant dried yeast; Fine salt; Ground cinnamon; Unsalted butter; Beaten whole egg; Whole milk; Water; Orange zest; Lemon zest

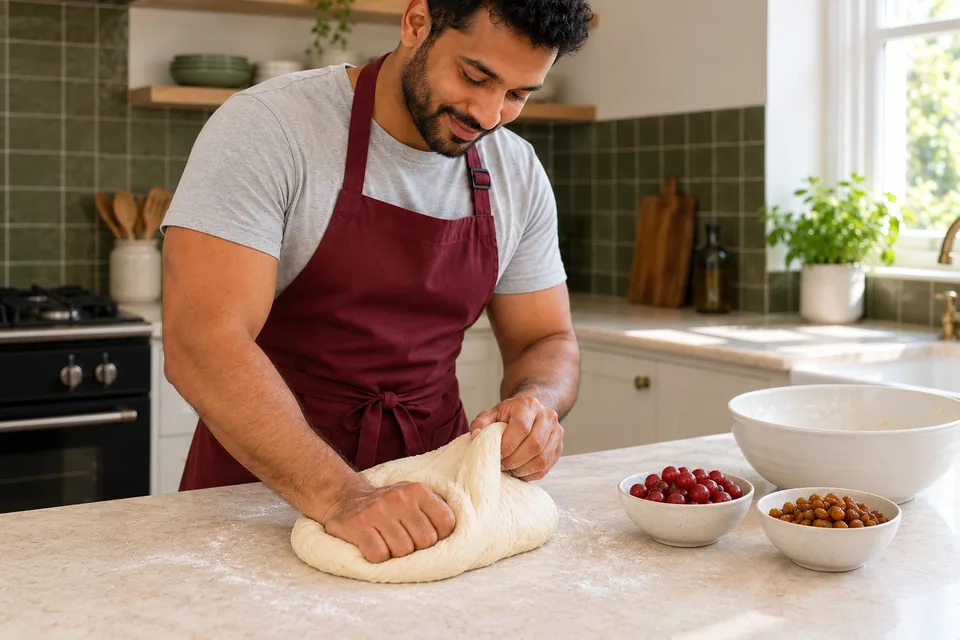
    Combine the flour, sugar, yeast, salt and cinnamon. Rub in the soft butter, then add the egg, milk, water and both zests. Mix until no dry flour remains. Knead by hand or with a dough hook for 8–12 minutes, until smooth and elastic.

    Ready when: The dough is soft and slightly tacky; a small piece stretches into a thin film before tearing.
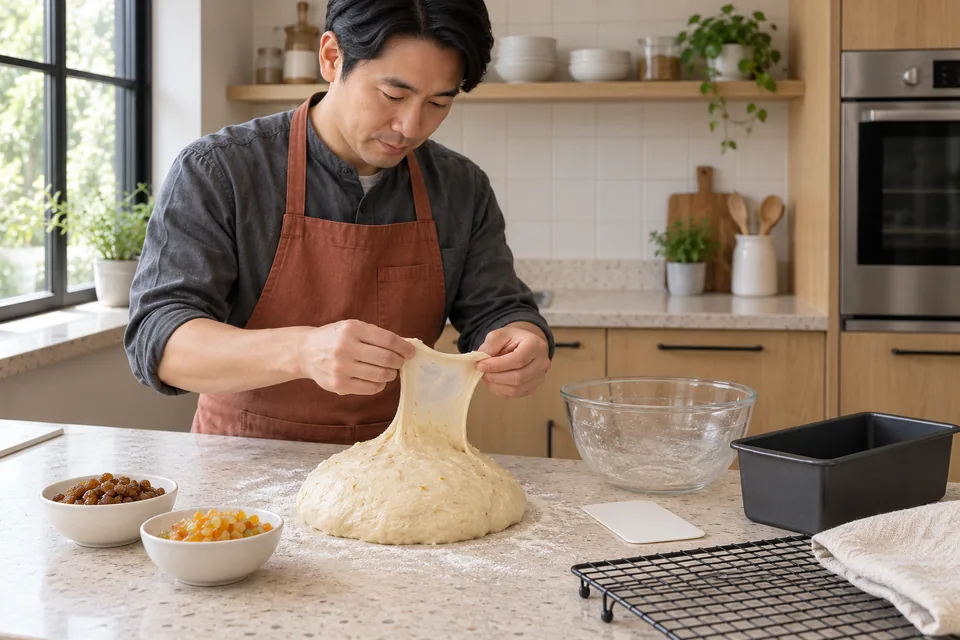
    Cook stretching a thin windowpane from the enriched dough, with sultanas and peel kept separate.
    01 Develop the doughDevelop a smooth, elastic dough before adding the fruit.
  2. 02 · Fold in the dried fruit and peel

    3–5 min

    Use: Sultanas; Candied mixed citrus peel

    Flatten the dough gently and scatter over the sultanas and chopped peel. Fold it over itself several times, then knead gently just until the fruit is evenly enclosed.

    Ready when: Fruit is spread throughout the dough rather than forming one clump; most pieces are inside the surface.
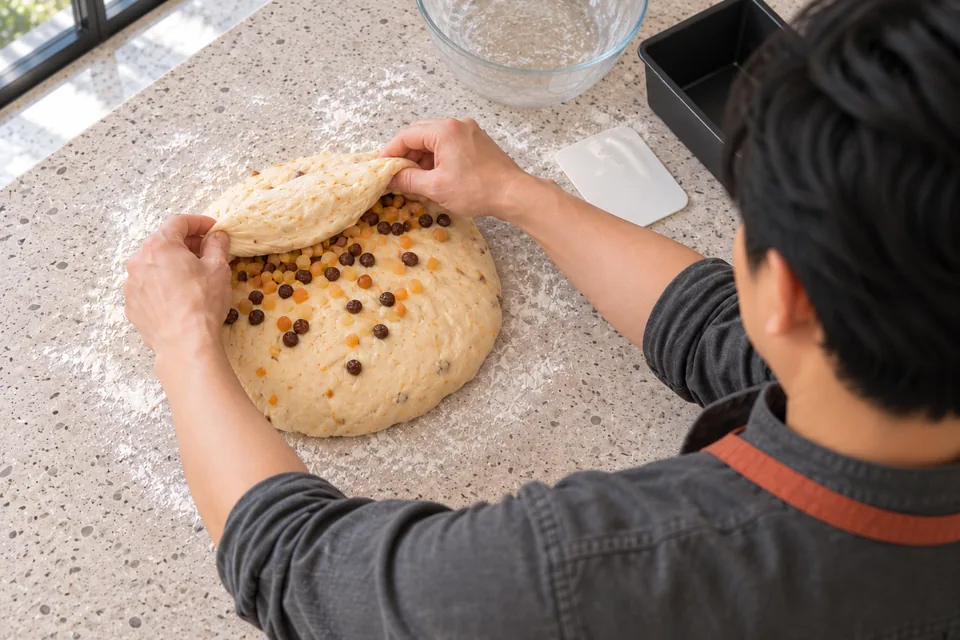
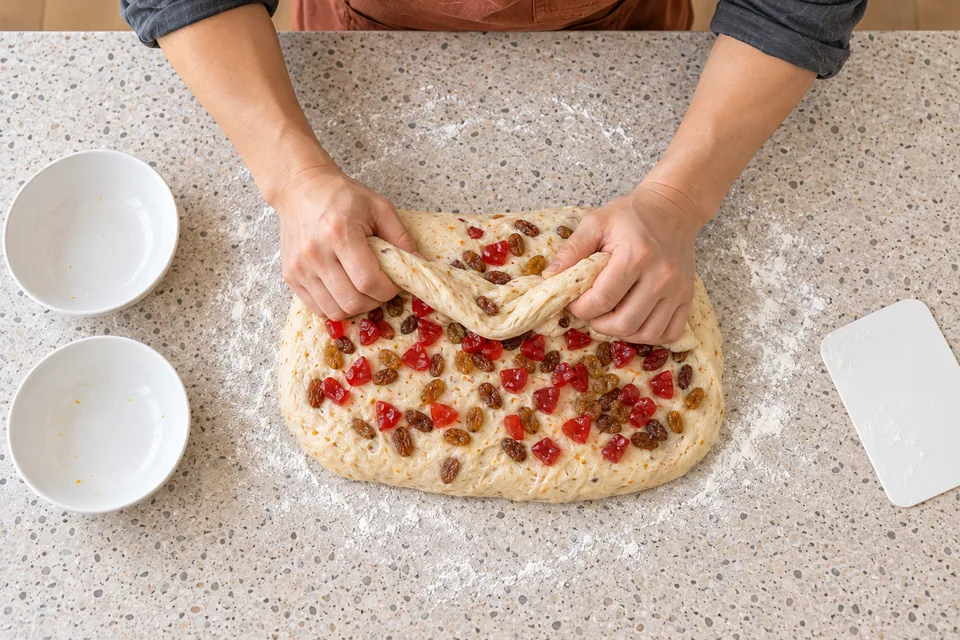
    Hands folding sultanas and finely chopped candied peel through the dough.
    02 Fold in the fruitGently enclose and distribute the sultanas and candied peel.
  3. 03 · Let the fruit dough rise

    90–120 min

    Use: Butter for the bowl and tin

    Grease a bowl with a little of the handling butter and keep the rest for the tin. Put in the dough, cover and leave at about 24–26°C for 90–120 minutes.

    Ready when: The dough is clearly aerated and roughly doubled in volume. Allow longer if it remains dense.
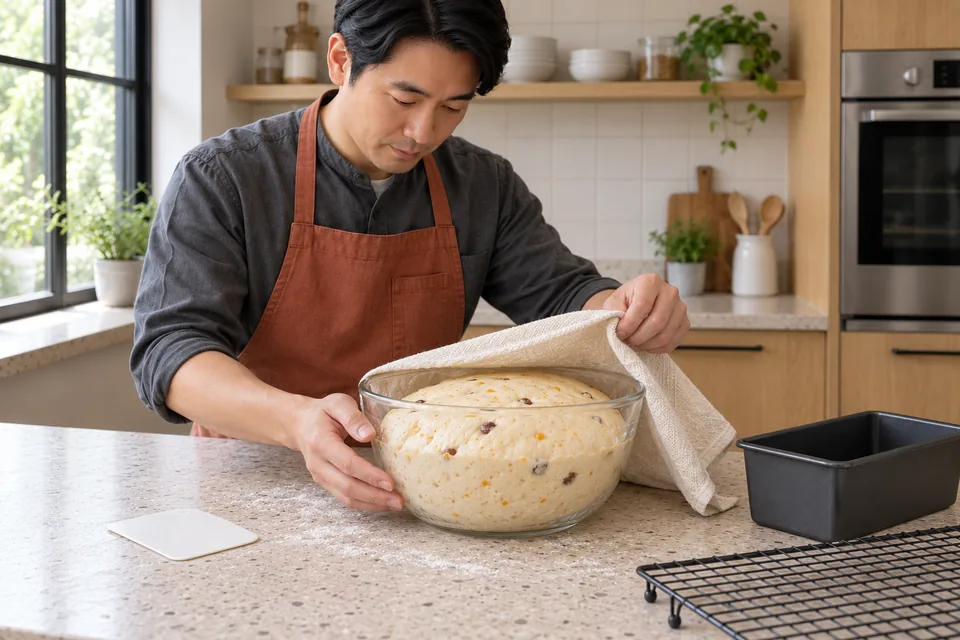
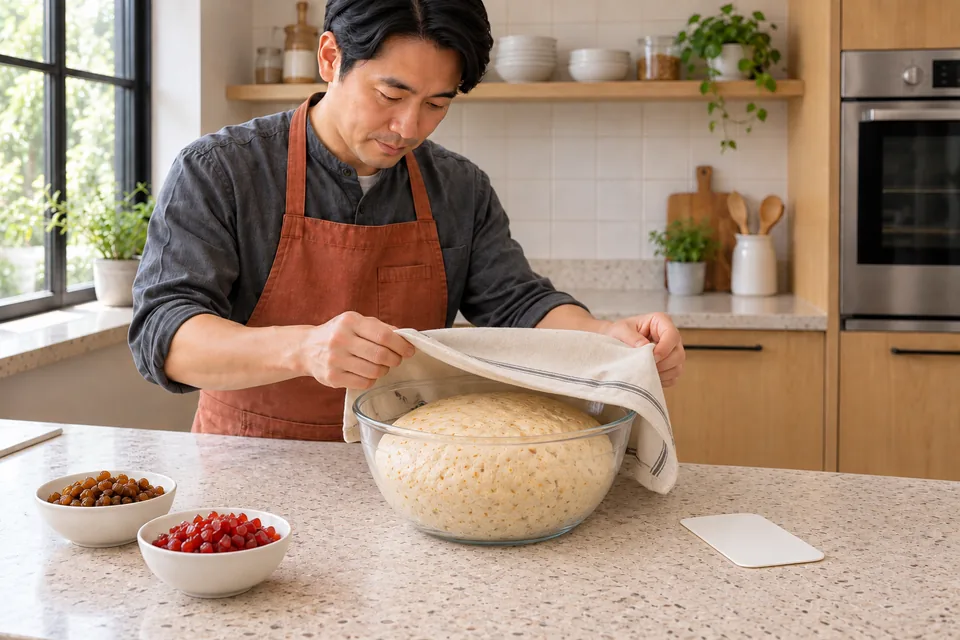
    Cook lifting a cloth to reveal risen fruit dough in a glass bowl.
    03 Let the fruit dough riseLet the covered fruit dough rise until roughly doubled.
  4. 04 · Shape one tin loaf

    8–12 min

    Use: Butter for the bowl and tin; Flour for shaping

    Grease a 23×13×8 cm loaf tin with the remaining handling butter. Lightly flour the worktop. Press out large gas pockets, pat the dough into a rectangle and roll it into a firm log about 21 cm long. Pinch the seam closed and place it underneath in the tin.

    Ready when: The log fits evenly along the tin; loose fruit is tucked beneath the surface.
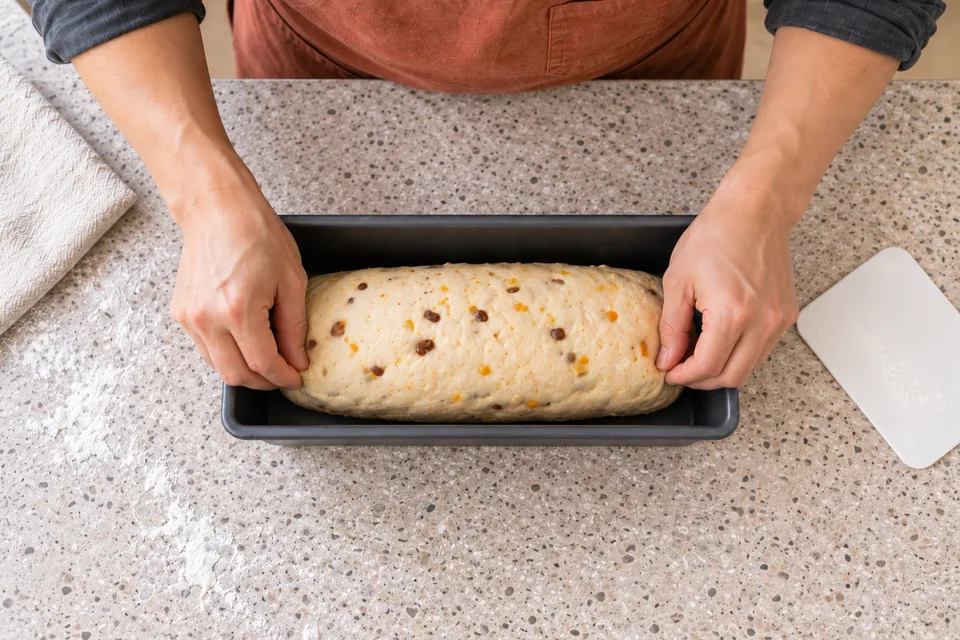
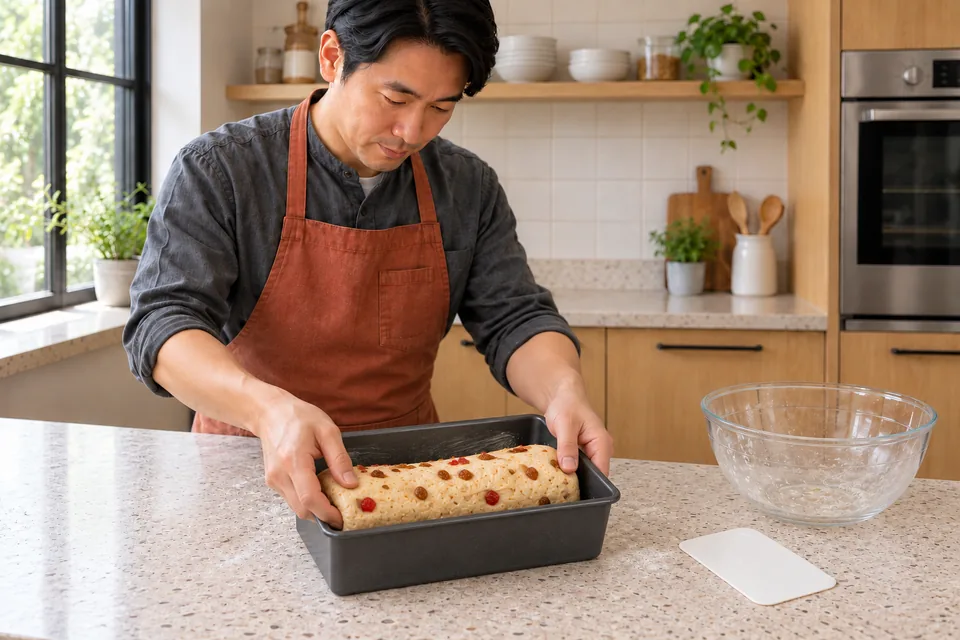
    One raw fruit loaf fitted evenly into a rectangular tin.
    04 Shape in the tinShape a firm log and place it seam-side down in the greased tin.
  5. 05 · Proof and heat the oven

    60–90 min

    Use:

    Cover loosely and leave at about 24–26°C for 60–90 minutes. Heat the oven to 175°C conventional during the last 20 minutes.

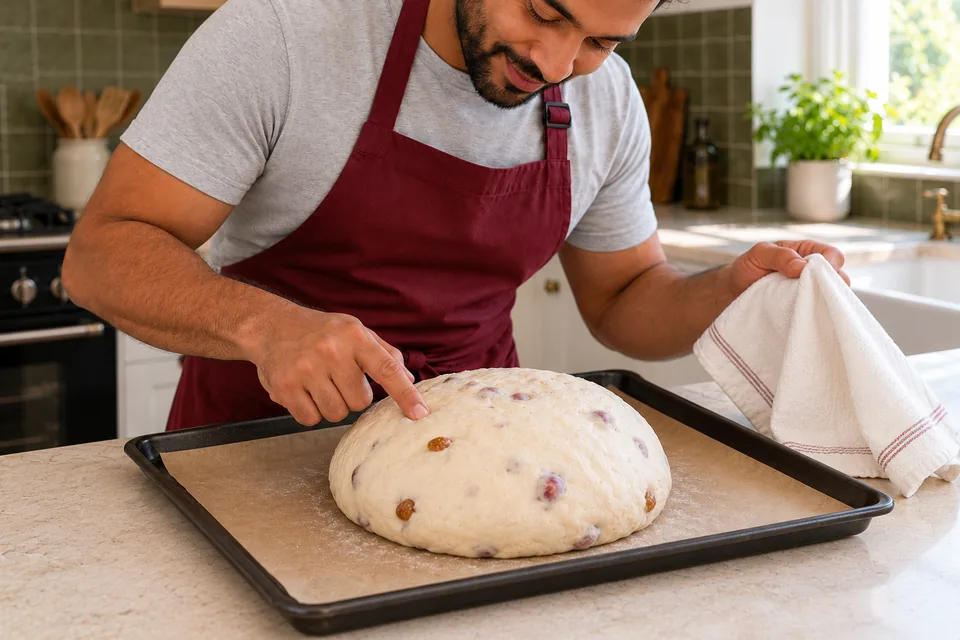
    Ready when: The loaf is noticeably fuller with a rounded top; a shallow fingertip dent returns slowly. Bake before the surface becomes slack.
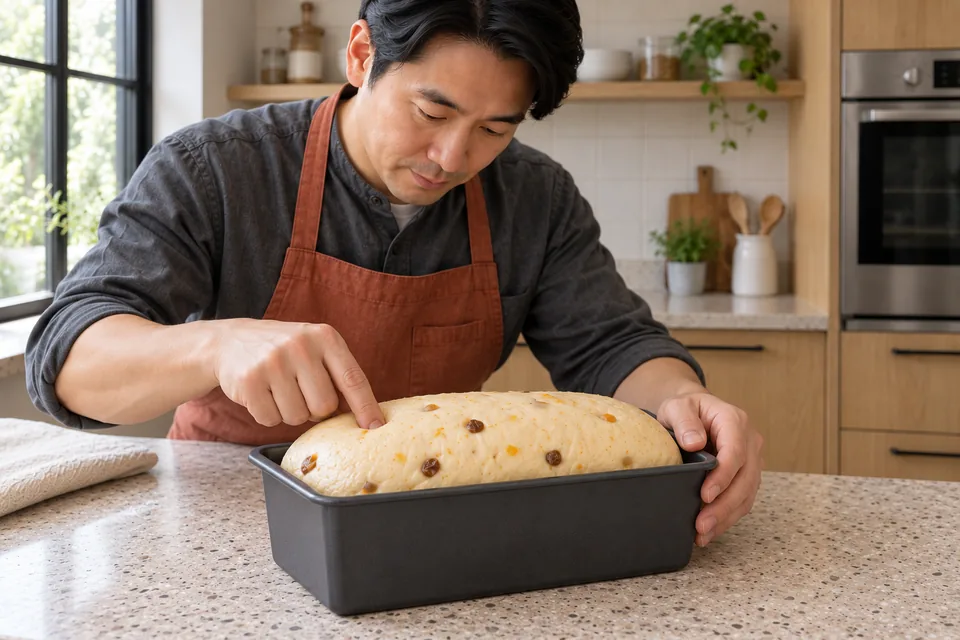
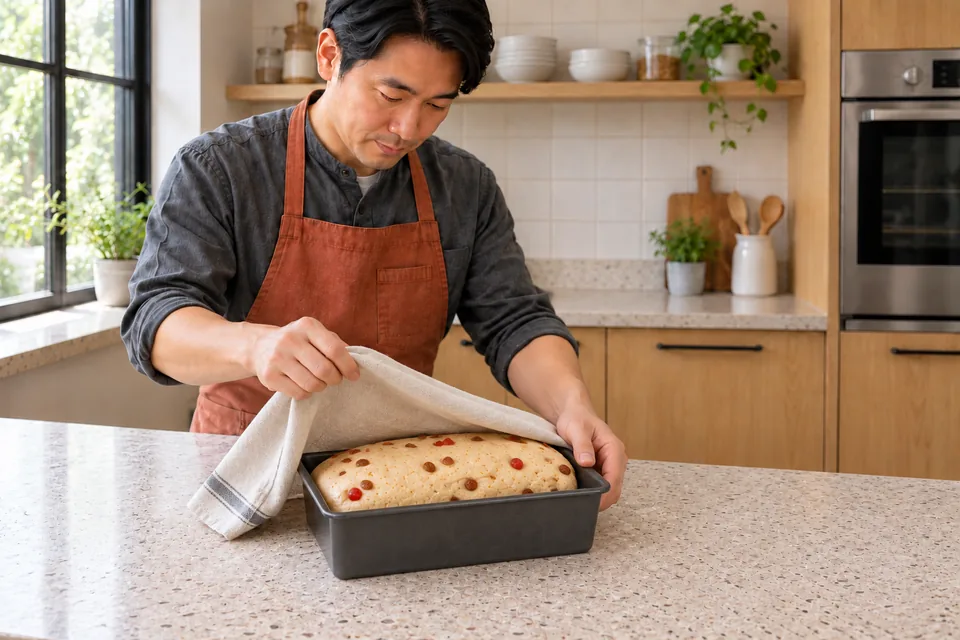
    Cook gently checking the rounded fruit loaf in its tin.
    05 Check the final proofProof until puffy and a shallow fingertip dent returns slowly.
  6. 06 · Brush and bake

    46–57 min

    Use: Milk for brushing

    Brush the top lightly with the separate milk wash. Bake for 45–55 minutes. After about 25 minutes, cover loosely with foil if the fruit or crust is becoming dark.

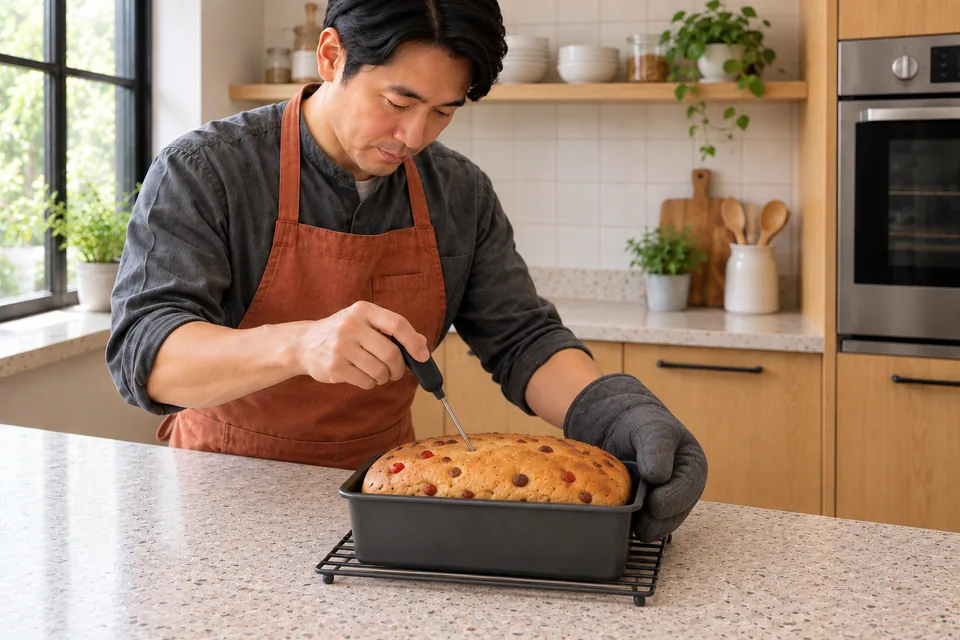
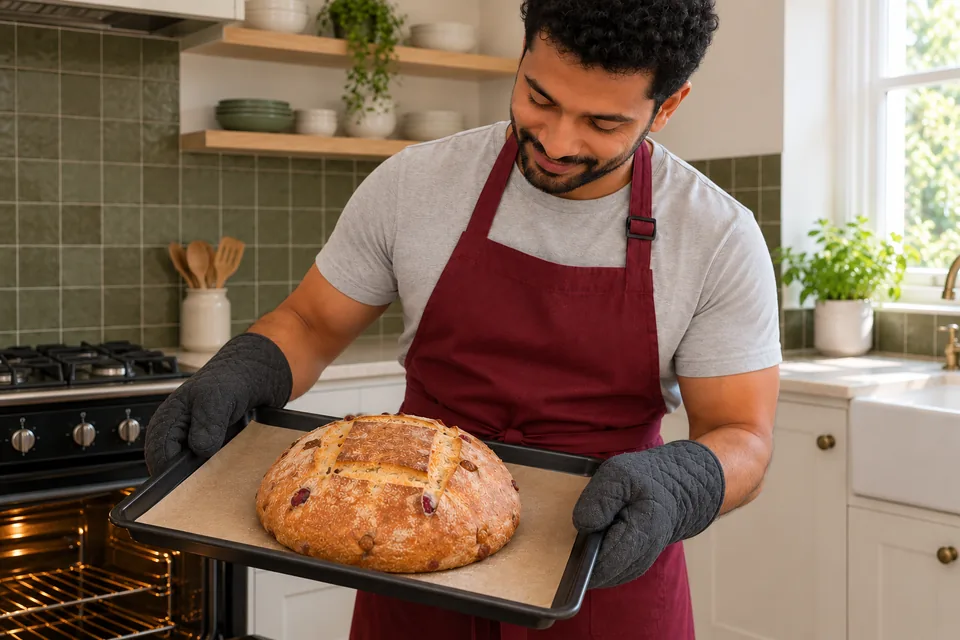
    Ready when: The sides are firm, the crust is brown and a probe placed into the centre between fruit pieces reads about 93°C.

    Cook using two oven gloves to support a tin of baked fruit loaf.
    06 Bake the fruit loafBrush lightly with milk and bake until the loaf is set and brown.
  7. 07 · Cool fully before slicing

    100 min

    Use:

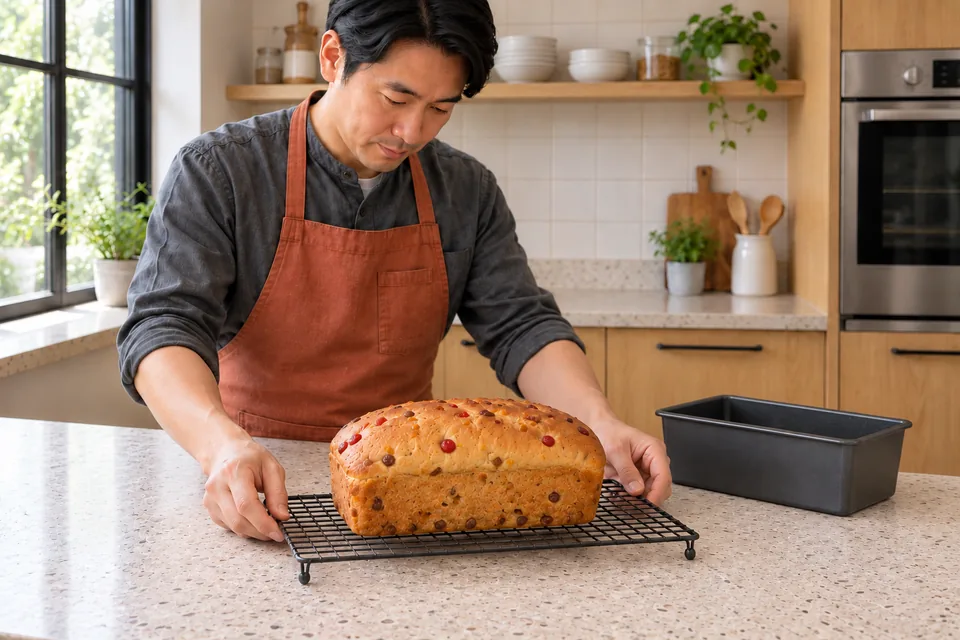
    Leave the loaf in its tin for 10 minutes, then turn it onto a rack. Cool for at least 90 minutes before slicing.

    Ready when: The loaf no longer steams inside and slices cleanly without a gummy band near the base.
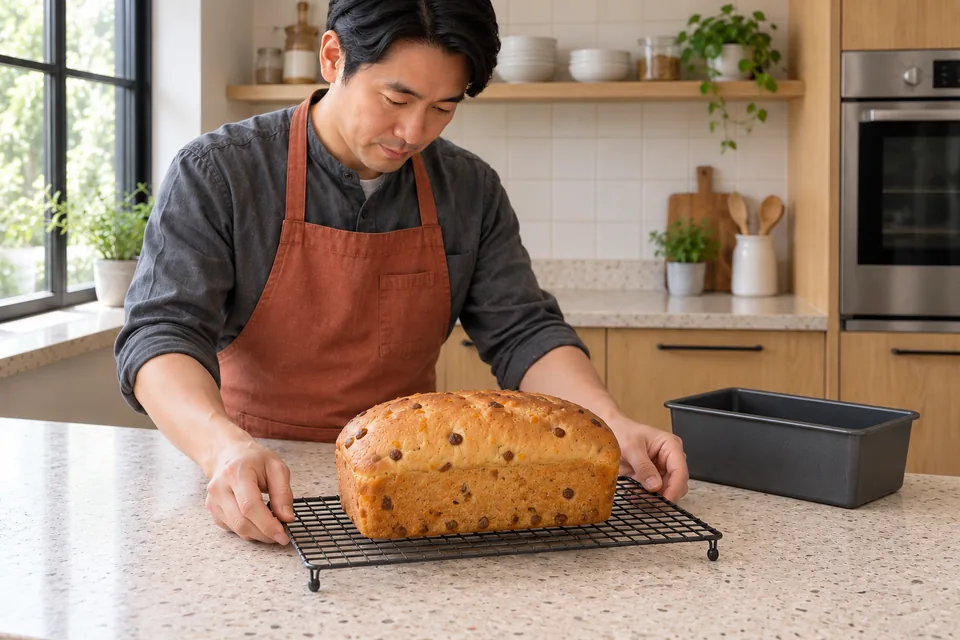
    One golden-brown citrus and sultana loaf cooling on a rack.
    07 Cool completelyRemove from the tin and cool fully before slicing.

What to look for

StageLook / feel forNeeds attention
Develop the enriched doughThe dough is soft and slightly tacky; a small piece stretches into a thin film before tearing.
Fold in the dried fruit and peelFruit is spread throughout the dough rather than forming one clump; most pieces are inside the surface.
Let the fruit dough riseThe dough is clearly aerated and roughly doubled in volume. Allow longer if it remains dense.
Shape one tin loafThe log fits evenly along the tin; loose fruit is tucked beneath the surface.
Proof and heat the ovenThe loaf is noticeably fuller with a rounded top; a shallow fingertip dent returns slowly. Bake before the surface becomes slack.
Brush and bakeThe sides are firm, the crust is brown and a probe placed into the centre between fruit pieces reads about 93°C.
Cool fully before slicingThe loaf no longer steams inside and slices cleanly without a gummy band near the base.

Troubleshooting

If you see thisLikely causeWhat to do nowNext time
The dough rises slowly.Sugar, cinnamon or a cool room has slowed the yeast.Keep it covered at the stated warm room temperature and wait for the expansion cue.Use fresh yeast and check the room temperature; do not add extra cinnamon to this base.
Fruit burns on the surface.Exposed dried fruit colours faster than the dough.Cover loosely with foil while the centre finishes baking.Tuck protruding fruit beneath the surface during shaping.
The sliced loaf has a gummy lower layer.The centre was underbaked or the loaf was sliced hot.Toast slices if the loaf is fully baked but was cut too soon.Check the centre between fruit pieces and allow the full cooling period.

Storage: Cool completely, then wrap and keep at room temperature for up to 3 days. Toast older slices. Freeze sliced bread for up to 2 months and toast from frozen or thaw while wrapped.; Contains: wheat, milk, egg, sulphites if present in the dried fruit or candied peel.; This Nepedia version has not been kitchen-tested.

Ingredient choices & substitutions

No brand is specified.

Match the ingredient’s function and weight. See the flour, gluten, yeast and salt guide.

Other approaches to this recipe
Cook / recipeUseWhat differs

The working ingredients and method form one recipe. Different formulas are compared without averaging their quantities or rise schedules.
Nepedia

Recipe

Citrus and sultana fruit loaf

A lightly enriched yeast loaf with sultanas, candied citrus peel and a little cinnamon. Cool it fully before slicing; the firm crumb also suits toasting the next day.

How do I make it?

  1. Develop the enriched dough

    12–16 min

    Combine the flour, sugar, yeast, salt and cinnamon. Rub in the soft butter, then add the egg, milk, water and both zests. Mix until no dry flour remains. Knead by hand or with a dough hook for 8–12 minutes, until smooth and elastic.

    Cook stretching a thin windowpane from the enriched dough, with sultanas and peel kept separate.
    Develop a smooth, elastic dough before adding the fruit.

    Ready when: The dough is soft and slightly tacky; a small piece stretches into a thin film before tearing.

  2. Fold in the dried fruit and peel

    3–5 min

    Flatten the dough gently and scatter over the sultanas and chopped peel. Fold it over itself several times, then knead gently just until the fruit is evenly enclosed.

    Hands folding sultanas and finely chopped candied peel through the dough.
    Gently enclose and distribute the sultanas and candied peel.

    Ready when: Fruit is spread throughout the dough rather than forming one clump; most pieces are inside the surface.

  3. Let the fruit dough rise

    90–120 min

    Grease a bowl with a little of the handling butter and keep the rest for the tin. Put in the dough, cover and leave at about 24–26°C for 90–120 minutes.

    Cook lifting a cloth to reveal risen fruit dough in a glass bowl.
    Let the covered fruit dough rise until roughly doubled.

    Ready when: The dough is clearly aerated and roughly doubled in volume. Allow longer if it remains dense.

  4. Shape one tin loaf

    8–12 min

    Grease a 23×13×8 cm loaf tin with the remaining handling butter. Lightly flour the worktop. Press out large gas pockets, pat the dough into a rectangle and roll it into a firm log about 21 cm long. Pinch the seam closed and place it underneath in the tin.

    One raw fruit loaf fitted evenly into a rectangular tin.
    Shape a firm log and place it seam-side down in the greased tin.

    Ready when: The log fits evenly along the tin; loose fruit is tucked beneath the surface.

  5. Proof and heat the oven

    60–90 min

    Cover loosely and leave at about 24–26°C for 60–90 minutes. Heat the oven to 175°C conventional during the last 20 minutes.

    Cook gently checking the rounded fruit loaf in its tin.
    Proof until puffy and a shallow fingertip dent returns slowly.

    Ready when: The loaf is noticeably fuller with a rounded top; a shallow fingertip dent returns slowly. Bake before the surface becomes slack.

  6. Brush and bake

    46–57 min

    Brush the top lightly with the separate milk wash. Bake for 45–55 minutes. After about 25 minutes, cover loosely with foil if the fruit or crust is becoming dark.

    Cook using two oven gloves to support a tin of baked fruit loaf.
    Brush lightly with milk and bake until the loaf is set and brown.

    Ready when: The sides are firm, the crust is brown and a probe placed into the centre between fruit pieces reads about 93°C.

  7. Cool fully before slicing

    100 min

    Leave the loaf in its tin for 10 minutes, then turn it onto a rack. Cool for at least 90 minutes before slicing.

    One golden-brown citrus and sultana loaf cooling on a rack.
    Remove from the tin and cool fully before slicing.

    Ready when: The loaf no longer steams inside and slices cleanly without a gummy band near the base.

What can go wrong, and how can I fix it?

What you noticeLikely causeWhat to do
The dough rises slowly.Sugar, cinnamon or a cool room has slowed the yeast.Keep it covered at the stated warm room temperature and wait for the expansion cue. Use fresh yeast and check the room temperature; do not add extra cinnamon to this base.
Fruit burns on the surface.Exposed dried fruit colours faster than the dough.Cover loosely with foil while the centre finishes baking. Tuck protruding fruit beneath the surface during shaping.
The sliced loaf has a gummy lower layer.The centre was underbaked or the loaf was sliced hot.Toast slices if the loaf is fully baked but was cut too soon. Check the centre between fruit pieces and allow the full cooling period.
Useful recipe notes

Storage: Cool completely, then wrap and keep at room temperature for up to 3 days. Toast older slices. Freeze sliced bread for up to 2 months and toast from frozen or thaw while wrapped.

Contains: wheat, milk, egg, sulphites if present in the dried fruit or candied peel.

This Nepedia version has not been kitchen-tested.

See the detailed method and ratios in , or follow ingredients through the .

Ingredient proportions & recipe details

Citrus and sultana fruit loaf at a glance

Makes
1 loaf, about 12 slices
Heat
175°C conventional
Baking time
45–55 min
Cuisine / style
International
Leavening
Yeast
How do the ingredient proportions compare?

Percentages compare each listed weight with the combined flour weight (100%). These are ingredient ratios, not dough hydration; milk, eggs and fillings contain other ingredients as well as water.

Formula componentGramsFlour = 100%
Plain flour360 g100%
Caster sugar50 g13.9%
Instant dried yeast4.5 g1.2%
Fine salt7 g1.9%
Unsalted butter28 g7.8%
Beaten whole egg50 g13.9%
Whole milk120 g33.3%
Water65 g18.1%
Ground cinnamon2 g0.6%
Orange zest4 g1.1%
Lemon zest2 g0.6%
Sultanas75 g20.8%
Candied mixed citrus peel60 g16.7%

Grape and sultana bread

Makes
1 loaf, about 16 slices
Heat
200°C conventional
Baking time
40–50 min
Cuisine / style
International
International · Enriched fruit bread

Grape and sultana bread

A lightly sweet round loaf with whole red grapes and soft sultanas. Fold in the fresh grapes gently so they remain in distinct pockets.

Method

  1. 01 · Measure and prepare the separate additions

    5–10 min

    Use: Small red seedless grapes; Soft sultanas

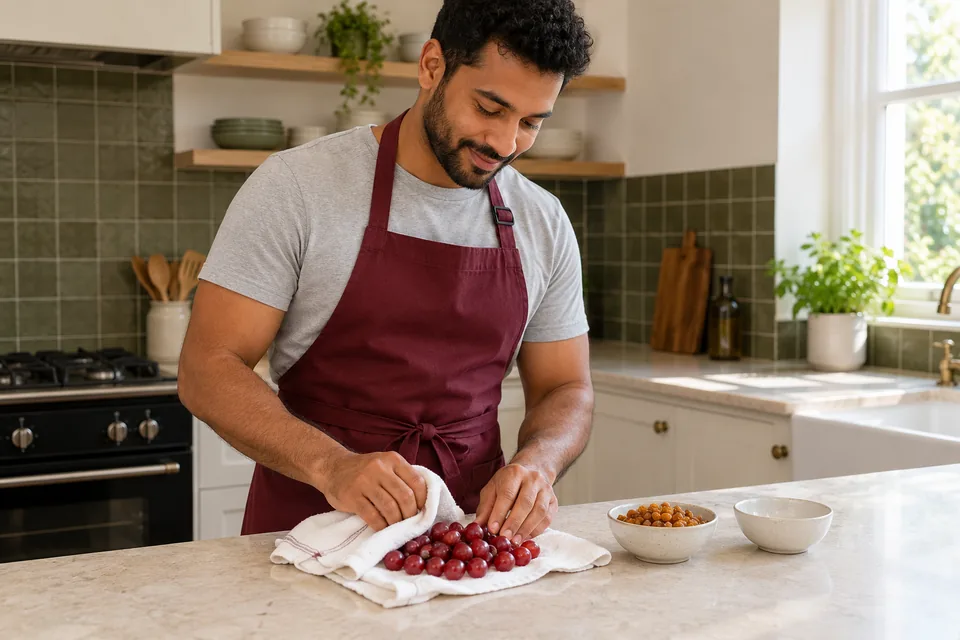
    Wash and thoroughly dry the grapes, then remove the stems. Keep them whole. Separate any clumps of soft sultanas.

    Ready when: The additions are measured and ready, with no stems, stones or unwanted surface liquid.

    The cook dries small red grapes beside a bowl of soft sultanas.
    01 Prepare AdditionsDry the whole grapes and separate the sultanas.
  2. 02 · Mix and develop the dough

    11–14 min

    Use: Strong white bread flour; Water; Fine salt; Instant dried yeast; Unsalted butter; Caster sugar

    Mix the dough flour, water, salt, yeast, softened butter and sugar. Knead by hand or with a dough hook at the machine’s recommended speed for 8–10 minutes after the flour is moistened.

    Ready when: The dough is cohesive, soft and elastic; it stretches before tearing.

    Two hands knead pale dough before the grapes and sultanas are added.
    02 Mix KneadKnead a soft, elastic dough.
  3. 03 · Let the dough rise

    60–90 min

    Use:

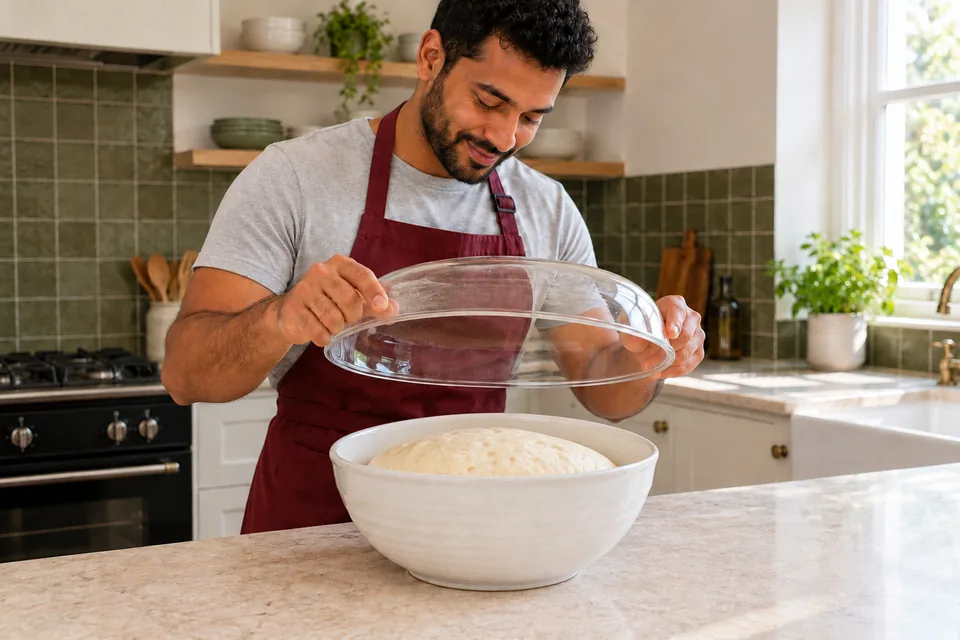
    Cover the bowl and leave at 22–24°C for 60–90 minutes.

    Ready when: The dough is visibly aerated and approximately doubled in volume.

    The cook lifts a cover from a risen mound of plain dough.
    03 Bulk RiseLet the dough rise until roughly doubled.
  4. 04 · Fold in the reserved additions

    3–5 min

    Use: Small red seedless grapes; Soft sultanas

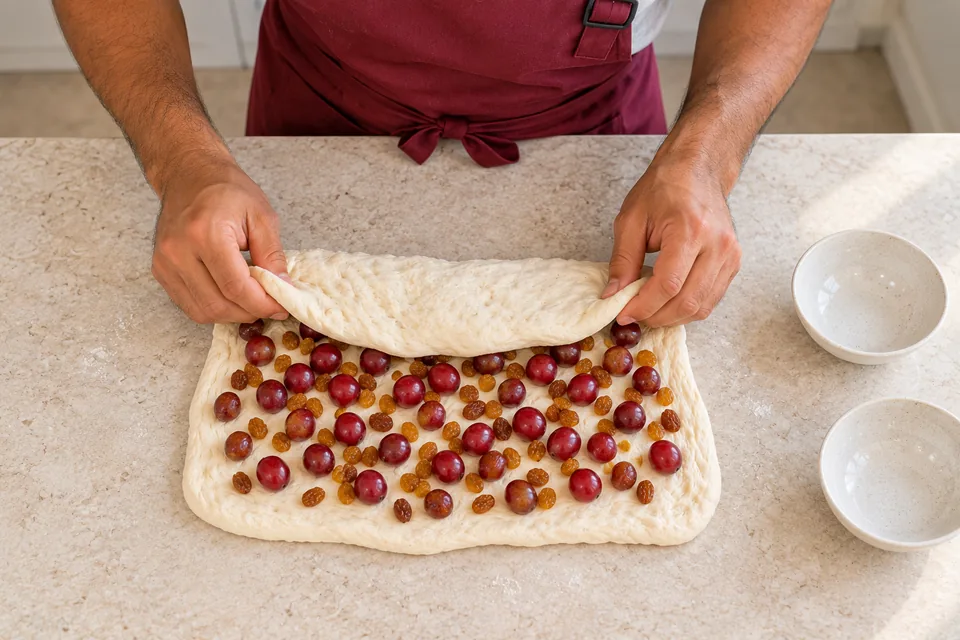
    Gently spread the dough into a thick rectangle. Scatter the sultanas and whole grapes over it, fold the sides over the fruit and repeat two or three gentle folds. Avoid squeezing or kneading the grapes.

    Ready when: The additions are distributed without large clumps; most grapes remain intact.

    Whole small red grapes and sultanas are folded into a thick rectangle of dough.
    04 Fold AdditionsFold the fruit in gently.
  5. 05 · Shape the fruit round

    7–12 min

    Use: Flour for shaping

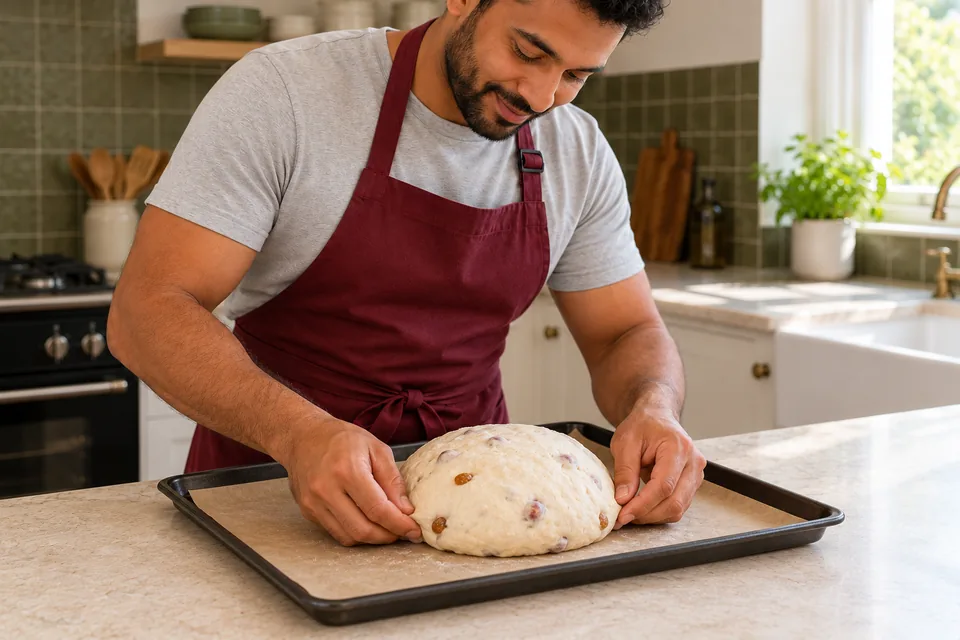
    Line a 30×40 cm tray with baking paper. Use the shaping flour sparingly. Fold the dough edges underneath to make one round about 20 cm across. Put seam-side down on the tray and dust lightly.

    Ready when: The dough holds its shape and the additions are mostly enclosed.

    One lightly floured grape-and-sultana round sits on a lined tray.
    05 ShapeShape one round loaf.
  6. 06 · Proof and heat the oven

    45–75 min

    Use:

    Cover loosely and leave at 22–24°C for 45–75 minutes. Heat the oven to 200°C conventional during the final 20 minutes.

    Ready when: The dough is puffy and a light fingertip dent recovers slowly.

    The cook lightly checks the risen round of fruit dough.
    06 ProofProof until puffy.
  7. 07 · Bake until the bread centre is set

    40–50 min

    Use:

    Make four shallow cuts about 5 mm deep to outline a square on top, avoiding any exposed grapes. Bake for 40–50 minutes. Cover loosely with foil if the top colours before the centre is cooked. Probe the bread in a thick section, avoiding fruit.

    Ready when: The base is firm and browned, and the bread centre reaches about 95°C.

    The cook holds one browned fruit loaf with a square score on its tray.
    07 BakeScore a square and bake until browned.
  8. 08 · Cool fully before slicing

    90 min

    Use:

    Move to a rack and cool for at least 90 minutes. Slice only when the centre is cool.

    Ready when: The crumb is set.

    One whole square-scored fruit loaf cools on a wire rack.
    08 CoolCool fully before slicing.

What to look for

StageLook / feel forNeeds attention
Measure and prepare the separate additionsThe additions are measured and ready, with no stems, stones or unwanted surface liquid.
Mix and develop the doughThe dough is cohesive, soft and elastic; it stretches before tearing.
Let the dough riseThe dough is visibly aerated and approximately doubled in volume.
Fold in the reserved additionsThe additions are distributed without large clumps; most grapes remain intact.
Shape the fruit roundThe dough holds its shape and the additions are mostly enclosed.
Proof and heat the ovenThe dough is puffy and a light fingertip dent recovers slowly.
Bake until the bread centre is setThe base is firm and browned, and the bread centre reaches about 95°C.
Cool fully before slicingThe crumb is set.

Troubleshooting

If you see thisLikely causeWhat to do nowNext time
The additions break down during mixing.The dough was kneaded strongly after adding the fruit or flakes.Stop mixing once evenly distributed and use a scraper for handling.Develop the dough first and fold the additions in gently.
The crust colours before the centre is cooked.Exposed fruit, chocolate or nuts brown quickly.Cover loosely with foil and continue to the bread-centre and firm-base cues.Check from the lower stated bake time and keep most additions inside the dough.

Storage: Once cool, refrigerate in a closed container within 2 hours of baking and use within 2 days. Freeze slices for up to 2 months.; Contains: wheat, milk, sulphites if present in the fruit.; This Nepedia version has not been kitchen-tested.

Ingredient choices & substitutions

No brand is specified.

Match the ingredient’s function and weight. See the flour, gluten, yeast and salt guide.

Other approaches to this recipe
Cook / recipeUseWhat differs

The working ingredients and method form one recipe. Different formulas are compared without averaging their quantities or rise schedules.
Nepedia
A single pale slice with small cooked red-grape pockets and sultanas lies on a plain white plate, viewed from above.
One slice of grape-and-sultana bread.

Recipe

Grape and sultana bread

A lightly sweet round loaf with whole red grapes and soft sultanas. Fold in the fresh grapes gently so they remain in distinct pockets.

How do I make it?

  1. Measure and prepare the separate additions

    5–10 min

    Wash and thoroughly dry the grapes, then remove the stems. Keep them whole. Separate any clumps of soft sultanas.

    The cook dries small red grapes beside a bowl of soft sultanas.
    Dry the whole grapes and separate the sultanas.

    Ready when: The additions are measured and ready, with no stems, stones or unwanted surface liquid.

  2. Mix and develop the dough

    11–14 min

    Mix the dough flour, water, salt, yeast, softened butter and sugar. Knead by hand or with a dough hook at the machine’s recommended speed for 8–10 minutes after the flour is moistened.

    Two hands knead pale dough before the grapes and sultanas are added.
    Knead a soft, elastic dough.

    Ready when: The dough is cohesive, soft and elastic; it stretches before tearing.

  3. Let the dough rise

    60–90 min

    Cover the bowl and leave at 22–24°C for 60–90 minutes.

    The cook lifts a cover from a risen mound of plain dough.
    Let the dough rise until roughly doubled.

    Ready when: The dough is visibly aerated and approximately doubled in volume.

  4. Fold in the reserved additions

    3–5 min

    Gently spread the dough into a thick rectangle. Scatter the sultanas and whole grapes over it, fold the sides over the fruit and repeat two or three gentle folds. Avoid squeezing or kneading the grapes.

    Whole small red grapes and sultanas are folded into a thick rectangle of dough.
    Fold the fruit in gently.

    Ready when: The additions are distributed without large clumps; most grapes remain intact.

  5. Shape the fruit round

    7–12 min

    Line a 30×40 cm tray with baking paper. Use the shaping flour sparingly. Fold the dough edges underneath to make one round about 20 cm across. Put seam-side down on the tray and dust lightly.

    One lightly floured grape-and-sultana round sits on a lined tray.
    Shape one round loaf.

    Ready when: The dough holds its shape and the additions are mostly enclosed.

  6. Proof and heat the oven

    45–75 min

    Cover loosely and leave at 22–24°C for 45–75 minutes. Heat the oven to 200°C conventional during the final 20 minutes.

    The cook lightly checks the risen round of fruit dough.
    Proof until puffy.

    Ready when: The dough is puffy and a light fingertip dent recovers slowly.

  7. Bake until the bread centre is set

    40–50 min

    Make four shallow cuts about 5 mm deep to outline a square on top, avoiding any exposed grapes. Bake for 40–50 minutes. Cover loosely with foil if the top colours before the centre is cooked. Probe the bread in a thick section, avoiding fruit.

    The cook holds one browned fruit loaf with a square score on its tray.
    Score a square and bake until browned.

    Ready when: The base is firm and browned, and the bread centre reaches about 95°C.

  8. Cool fully before slicing

    90 min

    Move to a rack and cool for at least 90 minutes. Slice only when the centre is cool.

    One whole square-scored fruit loaf cools on a wire rack.
    Cool fully before slicing.

    Ready when: The crumb is set.

What can go wrong, and how can I fix it?

What you noticeLikely causeWhat to do
The additions break down during mixing.The dough was kneaded strongly after adding the fruit or flakes.Stop mixing once evenly distributed and use a scraper for handling. Develop the dough first and fold the additions in gently.
The crust colours before the centre is cooked.Exposed fruit, chocolate or nuts brown quickly.Cover loosely with foil and continue to the bread-centre and firm-base cues. Check from the lower stated bake time and keep most additions inside the dough.
Useful recipe notes

Storage: Once cool, refrigerate in a closed container within 2 hours of baking and use within 2 days. Freeze slices for up to 2 months.

Contains: wheat, milk, sulphites if present in the fruit.

This Nepedia version has not been kitchen-tested.

See the detailed method and ratios in , or follow ingredients through the .

Ingredient proportions & recipe details

Grape and sultana bread at a glance

Makes
1 loaf, about 16 slices
Heat
200°C conventional
Baking time
40–50 min
Cuisine / style
International
Leavening
Yeast
Bulk fermentation (including folding)
60–90 min · The dough is visibly aerated and approximately doubled in volume.
How do the ingredient proportions compare?

Percentages compare each listed weight with the combined flour weight (100%). These are ingredient ratios, not dough hydration; milk, eggs and fillings contain other ingredients as well as water.

Formula componentGramsFlour = 100%
Strong white bread flour500 g100%
Water300 g60%
Fine salt10 g2%
Instant dried yeast7 g1.4%
Unsalted butter30 g6%
Caster sugar30 g6%
Small red seedless grapes75 g15%
Soft sultanas75 g15%

Chocolate and cherry bread

Makes
2 small loaves, about 20 slices total
Heat
200°C conventional
Baking time
30–40 min
Cuisine / style
International
International · Enriched fruit bread

Chocolate and cherry bread

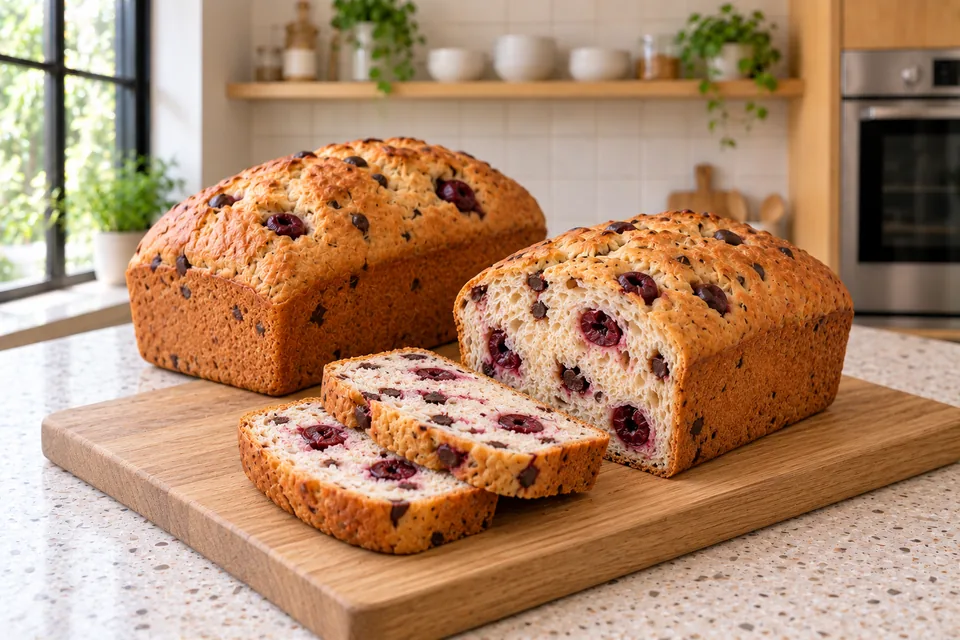
Two small yeast loaves with dark chocolate chips and tart cherries. Well-drained fruit and loaf tins help keep the soft dough manageable.

Method

  1. 01 · Measure and prepare the separate additions

    5–10 min

    Use: Pitted sour cherries in juice; Dark chocolate chips

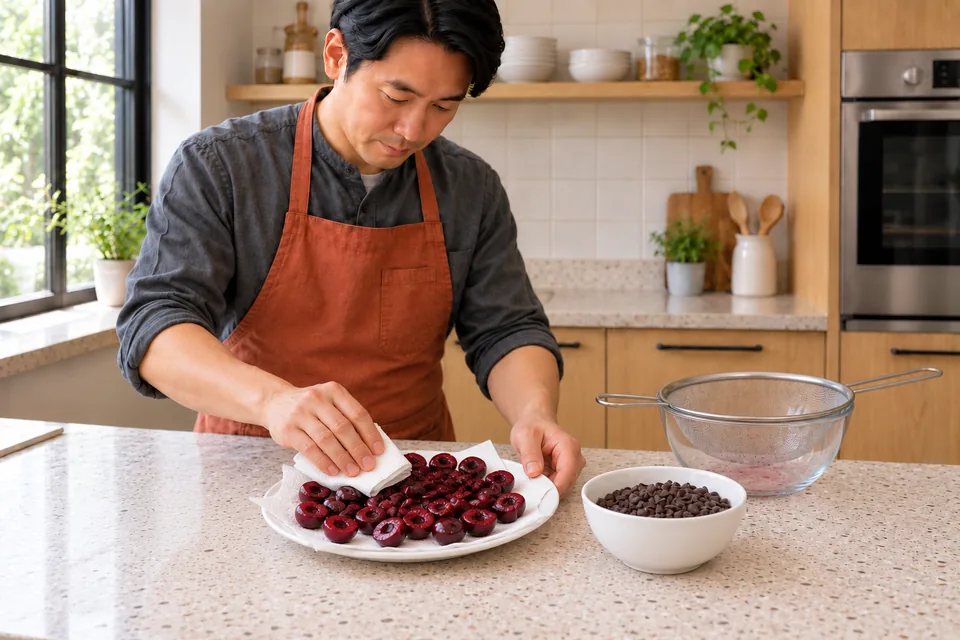
    Drain the cherries in a sieve, halve them and check for stone fragments. Pat dry on kitchen paper, then weigh 160 g. Keep the chocolate chips cool and dry.

    Ready when: The additions are measured and ready, with no stems, stones or unwanted surface liquid.

    Cook beside prepared dark-red sour cherry halves and a separate bowl of chocolate chips.
    01 Prepare the cherries and chocolateDrain, halve and dry the cherries, then measure the additions.
  2. 02 · Mix and develop the dough

    11–14 min

    Use: Strong white bread flour; Water; Fine salt; Instant dried yeast; Olive oil

    Mix the dough flour, water, salt, yeast and olive oil. Knead by hand or with a dough hook at the machine’s recommended speed for 8–10 minutes after the flour is moistened.

    Ready when: The dough is cohesive, soft and elastic; it stretches before tearing.

    Hands knead one soft pale yeast dough on the worktop.
    02 Develop the white doughKnead the white dough until soft and elastic.
  3. 03 · Let the dough rise

    60–120 min

    Use:

    Cover the bowl and leave at 22–24°C for 60–120 minutes.

    Ready when: The dough is visibly aerated and approximately doubled in volume.

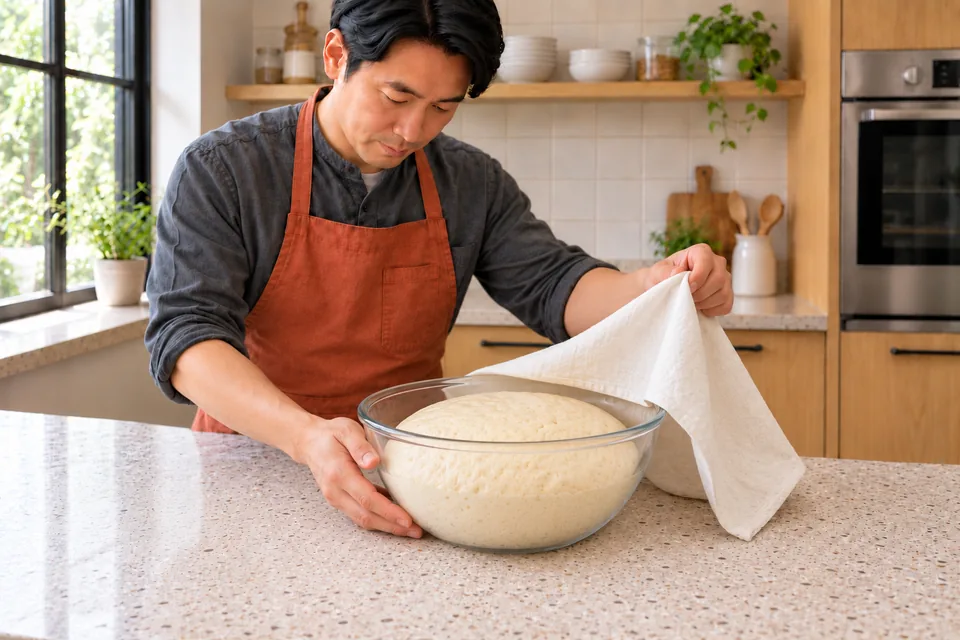
    Cook lifts a cloth above risen pale dough in a clear bowl.
    03 Let the plain dough riseLet the plain dough become aerated and roughly doubled.
  4. 04 · Fold in the reserved additions

    3–5 min

    Use: Pitted sour cherries in juice; Dark chocolate chips

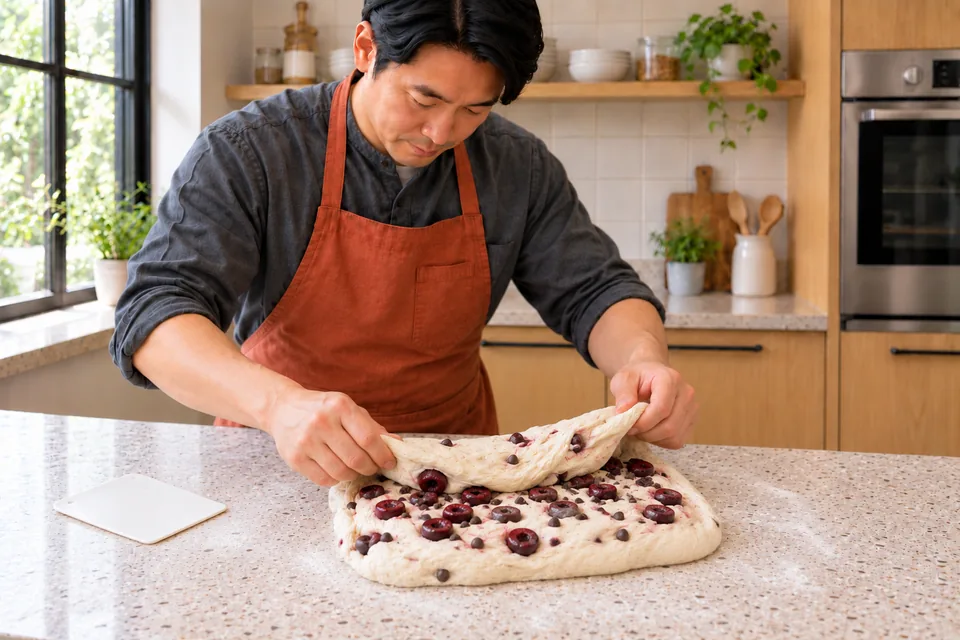
    Gently spread the dough into a thick rectangle. Scatter the dry cherry halves and chocolate chips over it, then fold the dough repeatedly until the additions are distributed. Use a scraper if it becomes sticky; avoid crushing the fruit.

    Ready when: The additions are distributed without large clumps.

    Hands fold cherry halves and dark chips into pale dough.
    04 Fold in the cherries and chipsFold the measured cherries and chips through gently.
  5. 05 · Divide and shape two tin loaves

    7–12 min

    Use: Flour for shaping; Olive oil for the tins

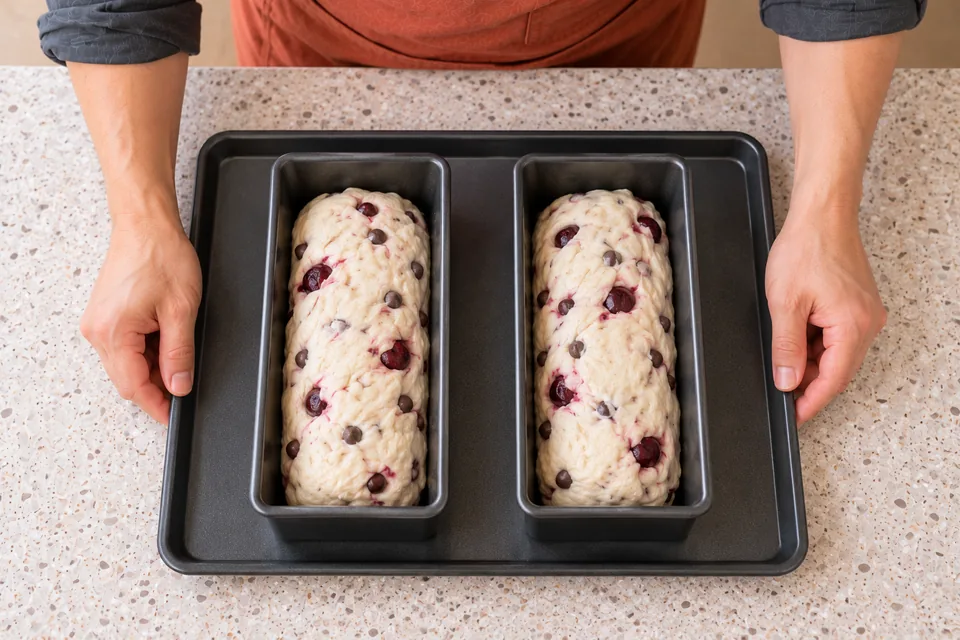
    Oil two 20×10×7 cm loaf tins with the separate tin oil. Use the shaping flour sparingly. Divide the dough equally, about 613 g per piece. Form each into a short log and place seam-side down in a tin.

    Ready when: The dough holds its shape and the additions are mostly enclosed.

    Two pale fruit-and-chocolate dough logs sit in separate small oiled tins.
    05 Shape two equal small loavesDivide equally and shape two small loaves.
  6. 06 · Proof and heat the oven

    45–75 min

    Use:

    Cover loosely and leave at 22–24°C for 45–75 minutes. Heat the oven to 200°C conventional during the final 20 minutes.

    Ready when: The dough is puffy and a light fingertip dent recovers slowly.

    Cook lifts a cloth from two risen small loaves.
    06 Proof both loavesLet both loaves become puffy before baking.
  7. 07 · Bake until the bread centre is set

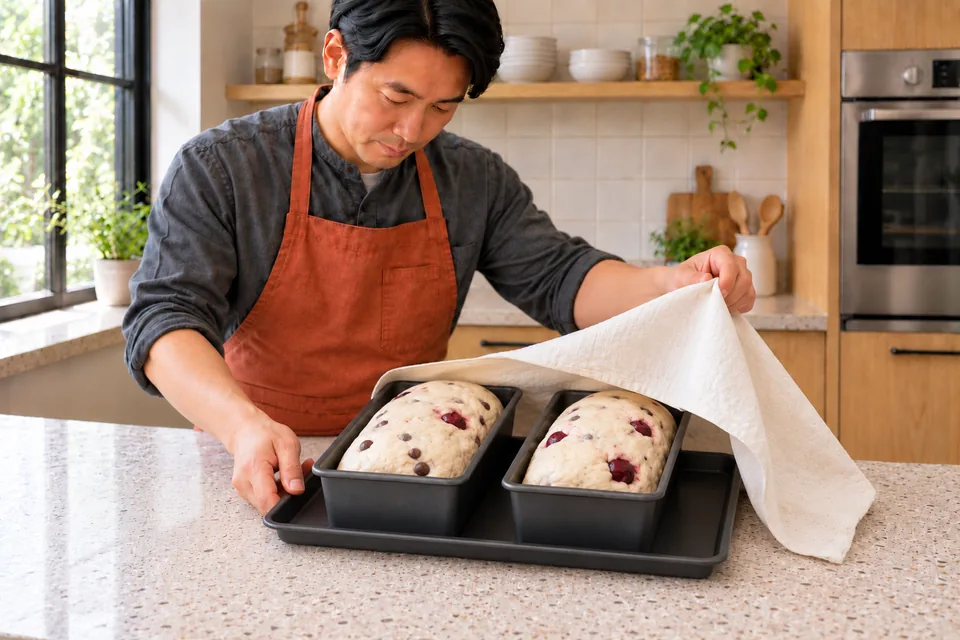
    30–40 min

    Use:

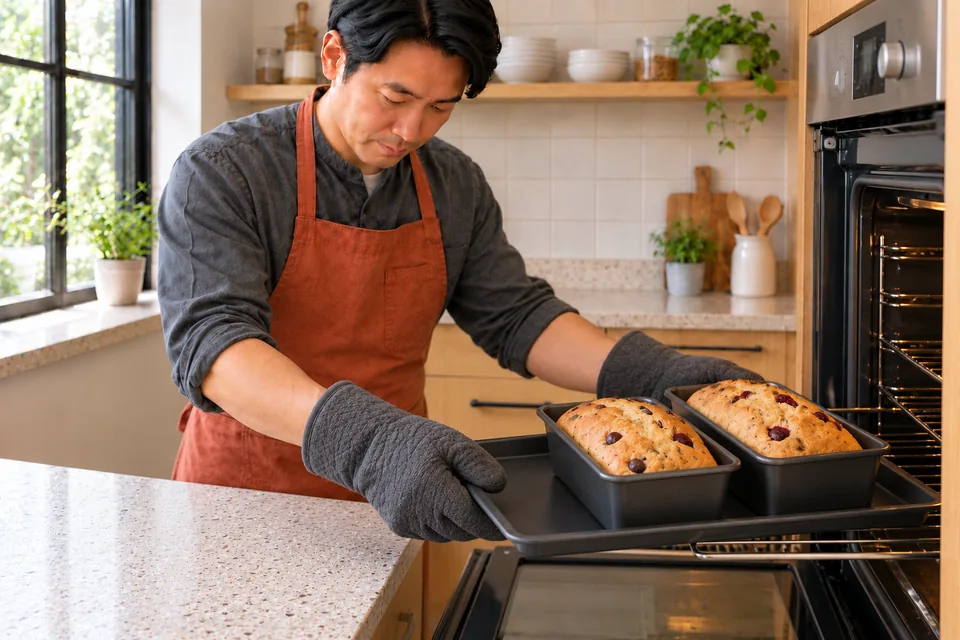
    Bake both tins together for 30–40 minutes. Cover loosely with foil if the top colours before the centre is cooked. Probe the bread in a thick section, avoiding cherries and melted chocolate.

    Ready when: The base is firm and browned, and the bread centre reaches about 95°C.

    Cook uses two oven gloves to support two baked loaves together on a carrier tray.
    07 Bake the two tins togetherBake both tins together until the bread is set.
  8. 08 · Cool fully before slicing

    90 min

    Use:

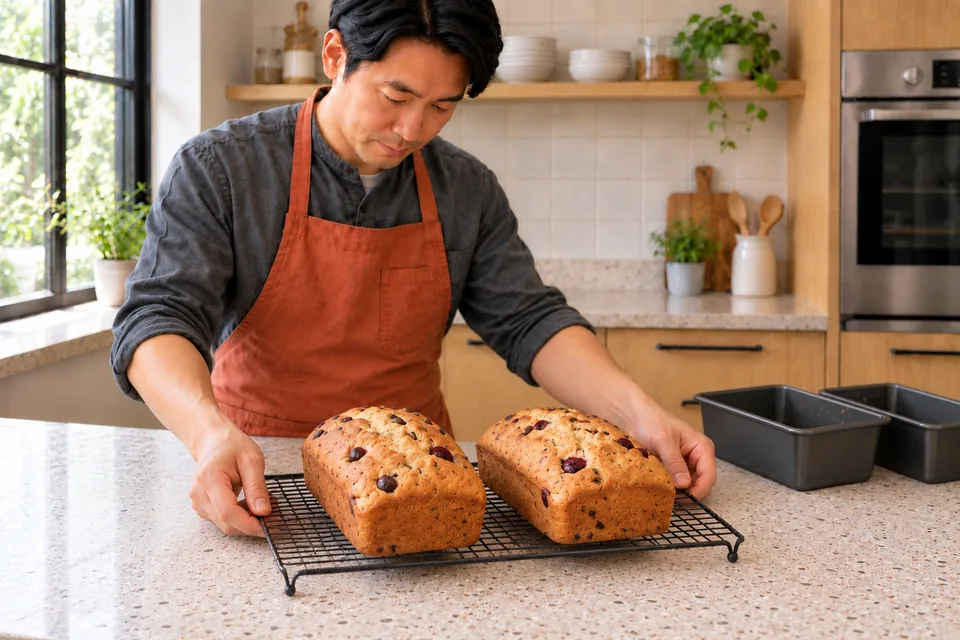
    Leave in the tins for 10 minutes, then turn out onto a rack for at least 80 minutes more. Slice only when the centre is cool.

    Ready when: The crumb is set and the chocolate has firmed.

    Two small golden chocolate-cherry loaves cool on a wire rack.
    08 Cool both loaves fullyCool fully so the crumb and chocolate set.

What to look for

StageLook / feel forNeeds attention
Measure and prepare the separate additionsThe additions are measured and ready, with no stems, stones or unwanted surface liquid.
Mix and develop the doughThe dough is cohesive, soft and elastic; it stretches before tearing.
Let the dough riseThe dough is visibly aerated and approximately doubled in volume.
Fold in the reserved additionsThe additions are distributed without large clumps.
Divide and shape two tin loavesThe dough holds its shape and the additions are mostly enclosed.
Proof and heat the ovenThe dough is puffy and a light fingertip dent recovers slowly.
Bake until the bread centre is setThe base is firm and browned, and the bread centre reaches about 95°C.
Cool fully before slicingThe crumb is set and the chocolate has firmed.

Troubleshooting

If you see thisLikely causeWhat to do nowNext time
The additions break down during mixing.The dough was kneaded strongly after adding the fruit or flakes.Stop mixing once evenly distributed and use a scraper for handling.Develop the dough first and fold the additions in gently.
The crust colours before the centre is cooked.Exposed fruit, chocolate or nuts brown quickly.Cover loosely with foil and continue to the bread-centre and firm-base cues.Check from the lower stated bake time and keep most additions inside the dough.

Storage: Once cool, refrigerate in a closed container within 2 hours of baking and use within 2 days. Freeze slices for up to 2 months.; Contains: wheat, milk and soya if present in the chocolate, sulphites if present in the fruit.; This Nepedia version has not been kitchen-tested.

Ingredient choices & substitutions

No brand is specified.

Match the ingredient’s function and weight. See the flour, gluten, yeast and salt guide.

Other approaches to this recipe
Cook / recipeUseWhat differs

The working ingredients and method form one recipe. Different formulas are compared without averaging their quantities or rise schedules.
Nepedia
Two golden small loaves and two slices show dark chocolate and sour cherry pockets.
Two small loaves with cherries and dark chocolate in a set white-bread crumb.

Recipe

Chocolate and cherry bread

Two small yeast loaves with dark chocolate chips and tart cherries. Well-drained fruit and loaf tins help keep the soft dough manageable.

How do I make it?

  1. Measure and prepare the separate additions

    5–10 min

    Drain the cherries in a sieve, halve them and check for stone fragments. Pat dry on kitchen paper, then weigh 160 g. Keep the chocolate chips cool and dry.

    Cook beside prepared dark-red sour cherry halves and a separate bowl of chocolate chips.
    Drain, halve and dry the cherries, then measure the additions.

    Ready when: The additions are measured and ready, with no stems, stones or unwanted surface liquid.

  2. Mix and develop the dough

    11–14 min

    Mix the dough flour, water, salt, yeast and olive oil. Knead by hand or with a dough hook at the machine’s recommended speed for 8–10 minutes after the flour is moistened.

    Hands knead one soft pale yeast dough on the worktop.
    Knead the white dough until soft and elastic.

    Ready when: The dough is cohesive, soft and elastic; it stretches before tearing.

  3. Let the dough rise

    60–120 min

    Cover the bowl and leave at 22–24°C for 60–120 minutes.

    Cook lifts a cloth above risen pale dough in a clear bowl.
    Let the plain dough become aerated and roughly doubled.

    Ready when: The dough is visibly aerated and approximately doubled in volume.

  4. Fold in the reserved additions

    3–5 min

    Gently spread the dough into a thick rectangle. Scatter the dry cherry halves and chocolate chips over it, then fold the dough repeatedly until the additions are distributed. Use a scraper if it becomes sticky; avoid crushing the fruit.

    Hands fold cherry halves and dark chips into pale dough.
    Fold the measured cherries and chips through gently.

    Ready when: The additions are distributed without large clumps.

  5. Divide and shape two tin loaves

    7–12 min

    Oil two 20×10×7 cm loaf tins with the separate tin oil. Use the shaping flour sparingly. Divide the dough equally, about 613 g per piece. Form each into a short log and place seam-side down in a tin.

    Two pale fruit-and-chocolate dough logs sit in separate small oiled tins.
    Divide equally and shape two small loaves.

    Ready when: The dough holds its shape and the additions are mostly enclosed.

  6. Proof and heat the oven

    45–75 min

    Cover loosely and leave at 22–24°C for 45–75 minutes. Heat the oven to 200°C conventional during the final 20 minutes.

    Cook lifts a cloth from two risen small loaves.
    Let both loaves become puffy before baking.

    Ready when: The dough is puffy and a light fingertip dent recovers slowly.

  7. Bake until the bread centre is set

    30–40 min

    Bake both tins together for 30–40 minutes. Cover loosely with foil if the top colours before the centre is cooked. Probe the bread in a thick section, avoiding cherries and melted chocolate.

    Cook uses two oven gloves to support two baked loaves together on a carrier tray.
    Bake both tins together until the bread is set.

    Ready when: The base is firm and browned, and the bread centre reaches about 95°C.

  8. Cool fully before slicing

    90 min

    Leave in the tins for 10 minutes, then turn out onto a rack for at least 80 minutes more. Slice only when the centre is cool.

    Two small golden chocolate-cherry loaves cool on a wire rack.
    Cool fully so the crumb and chocolate set.

    Ready when: The crumb is set and the chocolate has firmed.

What can go wrong, and how can I fix it?

What you noticeLikely causeWhat to do
The additions break down during mixing.The dough was kneaded strongly after adding the fruit or flakes.Stop mixing once evenly distributed and use a scraper for handling. Develop the dough first and fold the additions in gently.
The crust colours before the centre is cooked.Exposed fruit, chocolate or nuts brown quickly.Cover loosely with foil and continue to the bread-centre and firm-base cues. Check from the lower stated bake time and keep most additions inside the dough.
Useful recipe notes

Storage: Once cool, refrigerate in a closed container within 2 hours of baking and use within 2 days. Freeze slices for up to 2 months.

Contains: wheat, milk and soya if present in the chocolate, sulphites if present in the fruit.

This Nepedia version has not been kitchen-tested.

See the detailed method and ratios in , or follow ingredients through the .

Ingredient proportions & recipe details

Chocolate and cherry bread at a glance

Makes
2 small loaves, about 20 slices total
Heat
200°C conventional
Baking time
30–40 min
Cuisine / style
International
Leavening
Yeast
Bulk fermentation (including folding)
60–120 min · The dough is visibly aerated and approximately doubled in volume.
How do the ingredient proportions compare?

Percentages compare each listed weight with the combined flour weight (100%). These are ingredient ratios, not dough hydration; milk, eggs and fillings contain other ingredients as well as water.

Formula componentGramsFlour = 100%
Strong white bread flour500 g100%
Water320 g64%
Fine salt10 g2%
Instant dried yeast5 g1%
Olive oil30 g6%
Pitted sour cherries in juice160 g32%
Dark chocolate chips200 g40%

Orange, lemon and cherry bread

Makes
1 loaf, about 16 slices
Heat
200°C conventional
Baking time
35–45 min
Cuisine / style
International
International · Enriched fruit bread

Orange, lemon and cherry bread

A two-strand bread scented with orange and lemon zest, with soft dried sour cherries through the crumb. It is lightly enriched with butter.

Method

  1. 01 · Measure and prepare the separate additions

    5–10 min

    Use: Finely grated orange zest; Finely grated lemon zest; Soft dried sour cherries

    Wash and dry the citrus fruit, then weigh the finely grated coloured zest. Check the soft dried cherries for stones and halve any large pieces.

    Ready when: The additions are measured and ready, with no stems, stones or unwanted surface liquid.

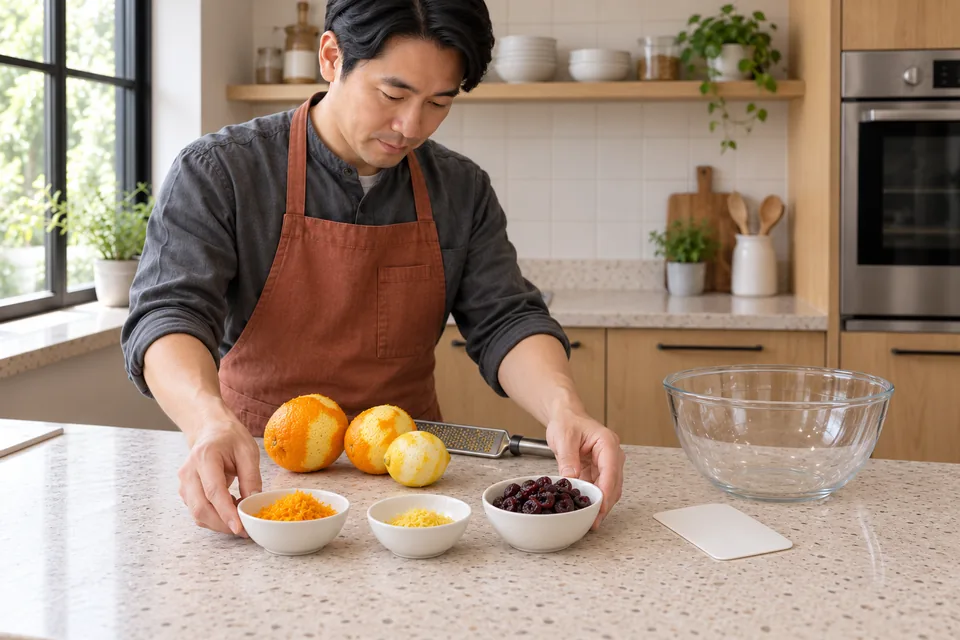
    Fine citrus zest and pitted dried cherries are kept in separate bowls.
    01 Orange, lemon and cherry breadPrepare the citrus zest and cherries.
  2. 02 · Mix and develop the dough

    11–14 min

    Use: Strong white bread flour; Water; Fine salt; Instant dried yeast; Unsalted butter; Caster sugar; Finely grated orange zest; Finely grated lemon zest

    Mix the dough flour, water, salt, yeast, softened butter, sugar and both zests. Knead by hand or with a dough hook at the machine’s recommended speed for 8–10 minutes after the flour is moistened.

    Ready when: The dough is cohesive, soft and elastic; it stretches before tearing.

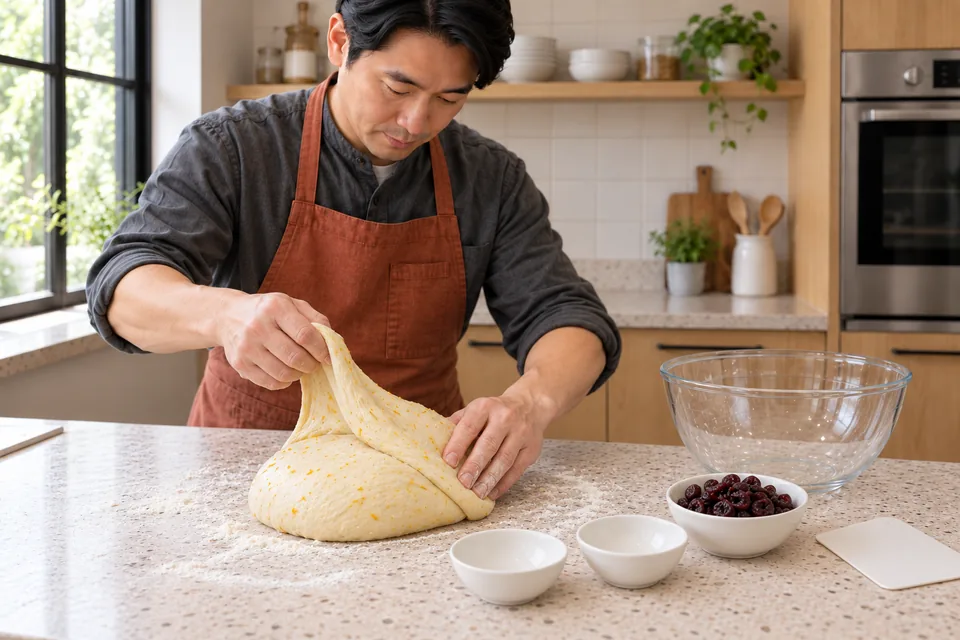
    Hands stretch citrus-scented dough before adding the cherries.
    02 Orange, lemon and cherry breadKnead until the dough is elastic.
  3. 03 · Let the dough rise

    60–90 min

    Use:

    Cover the bowl and leave at 22–24°C for 60–90 minutes.

    Ready when: The dough is visibly aerated and approximately doubled in volume.

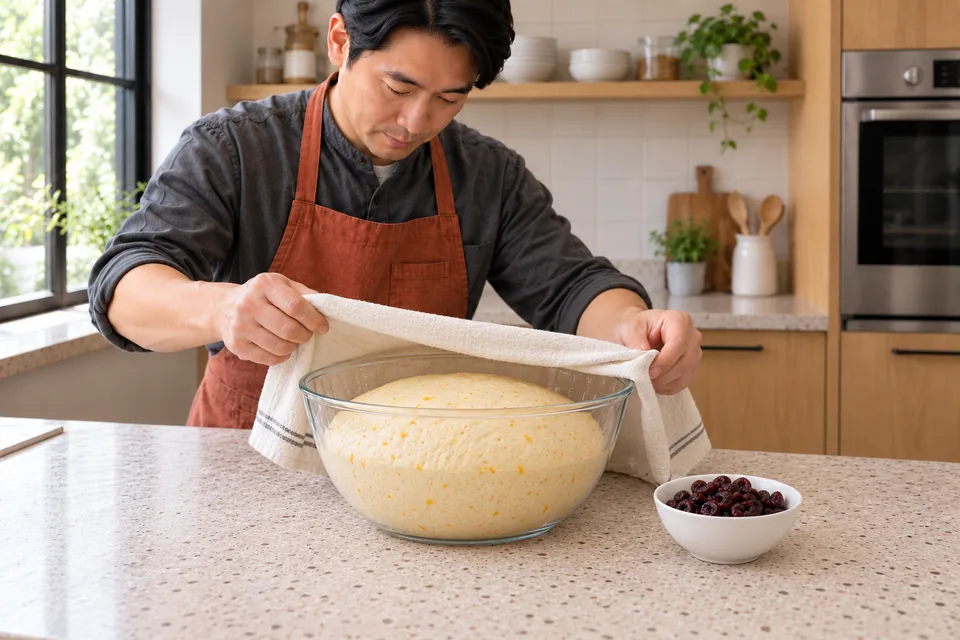
    The citrus dough has risen before the cherries are added.
    03 Orange, lemon and cherry breadLet the dough rise until airy.
  4. 04 · Fold in the reserved additions

    3–5 min

    Use: Soft dried sour cherries

    Gently spread the dough into a thick rectangle. Scatter the dried cherries over it, fold the edges inward and knead lightly just until the fruit is evenly distributed.

    Ready when: The additions are distributed without large clumps.

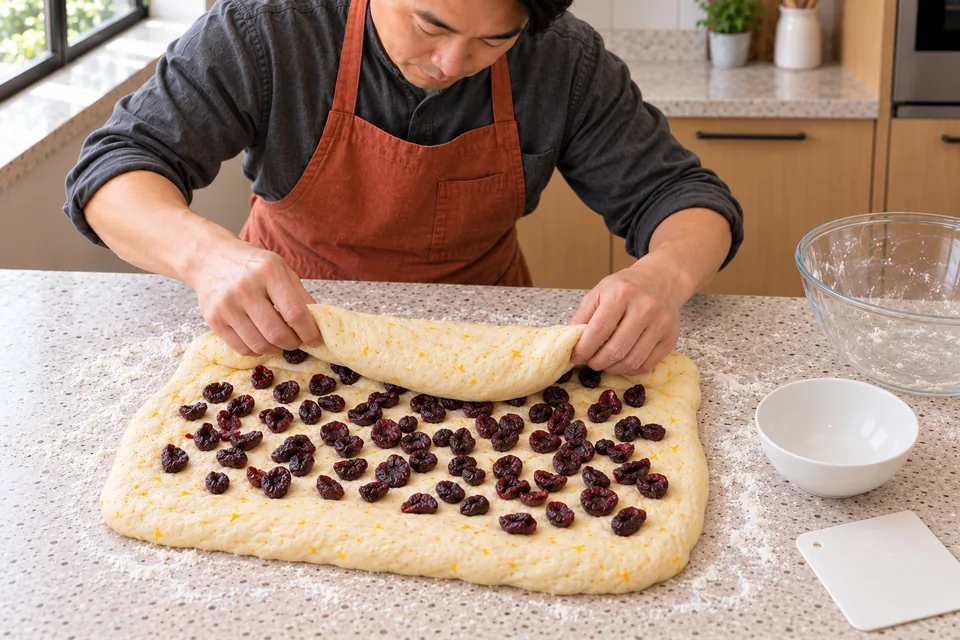
    Hands distribute pitted dried cherries through the risen dough.
    04 Orange, lemon and cherry breadFold in the dried cherries.
  5. 05 · Shape the two-strand braid

    7–12 min

    Use: Flour for shaping

    Line a 30×40 cm tray with baking paper. Use the shaping flour sparingly. Divide the dough into two equal pieces, about 502 g each, and roll into 35 cm ropes. Cross them over one another to make a loose two-strand twist. Pinch the ends and tuck them underneath, then place on the tray.

    Ready when: The dough holds its shape and the additions are mostly enclosed.

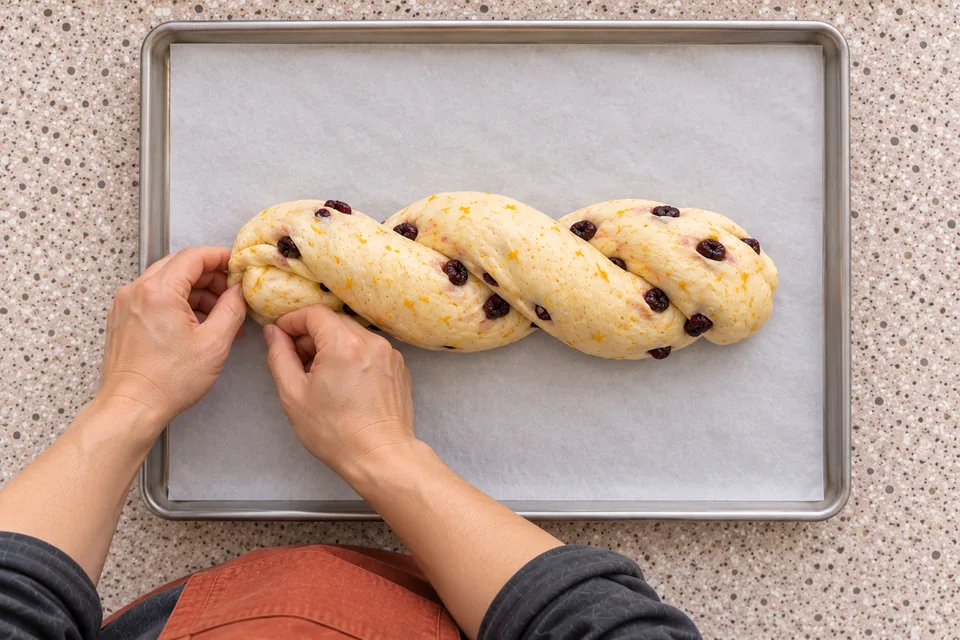
    Two ropes form a citrus-and-cherry twist with tucked ends.
    05 Orange, lemon and cherry breadMake one loose two-strand twist.
  6. 06 · Proof and heat the oven

    45–75 min

    Use:

    Cover loosely and leave at 22–24°C for 45–75 minutes. Heat the oven to 200°C conventional during the final 20 minutes.

    Ready when: The dough is puffy and a light fingertip dent recovers slowly.

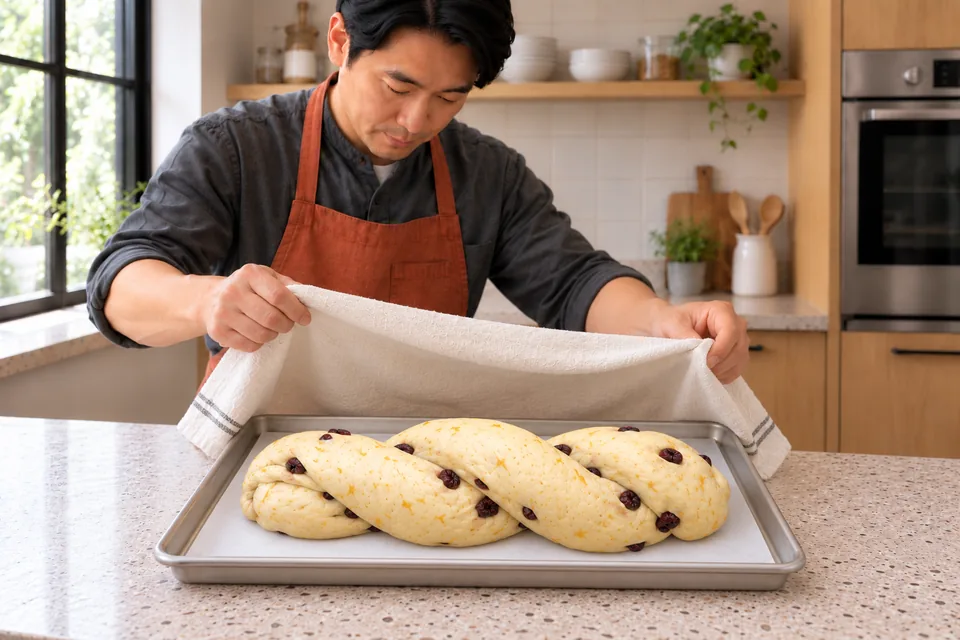
    The raw two-strand twist has increased in volume.
    06 Orange, lemon and cherry breadProof until the twist is puffy.
  7. 07 · Bake until the bread centre is set

    35–45 min

    Use:

    Bake for 35–45 minutes. Cover loosely with foil if the top colours before the centre is cooked. Probe the bread in a thick section, avoiding fruit.

    Ready when: The base is firm and browned, and the bread centre reaches about 95°C.

    The cook holds a tray with one browned citrus-and-cherry twist.
    07 Orange, lemon and cherry breadBake until the bread centre is set.
  8. 08 · Cool fully before slicing

    90 min

    Use:

    Move to a rack and cool for at least 90 minutes. Slice only when the centre is cool.

    Ready when: The crumb is set.

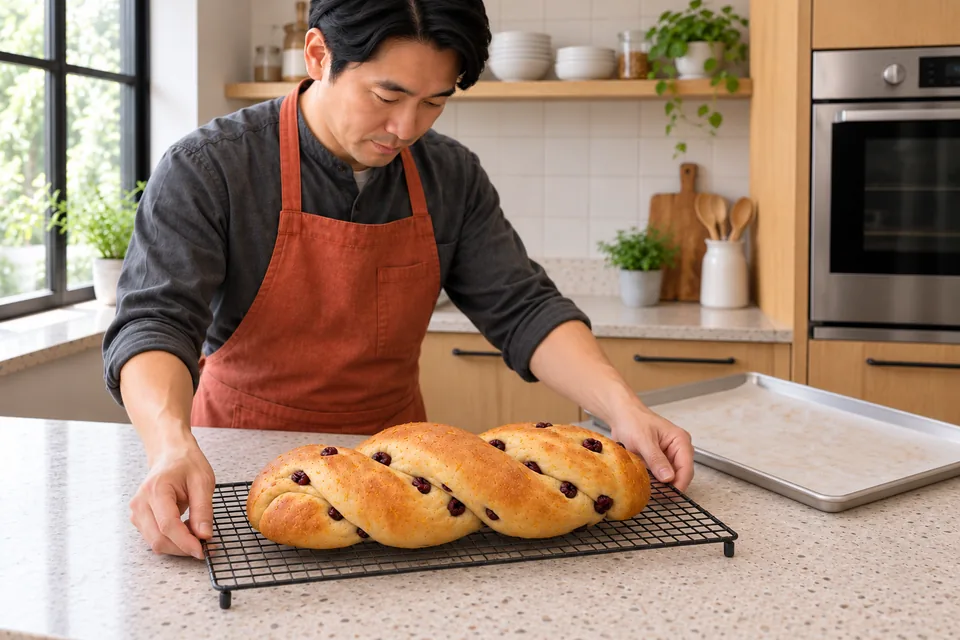
    A whole citrus-and-cherry twist cools on a rack.
    08 Orange, lemon and cherry breadCool fully before slicing.

What to look for

StageLook / feel forNeeds attention
Measure and prepare the separate additionsThe additions are measured and ready, with no stems, stones or unwanted surface liquid.
Mix and develop the doughThe dough is cohesive, soft and elastic; it stretches before tearing.
Let the dough riseThe dough is visibly aerated and approximately doubled in volume.
Fold in the reserved additionsThe additions are distributed without large clumps.
Shape the two-strand braidThe dough holds its shape and the additions are mostly enclosed.
Proof and heat the ovenThe dough is puffy and a light fingertip dent recovers slowly.
Bake until the bread centre is setThe base is firm and browned, and the bread centre reaches about 95°C.
Cool fully before slicingThe crumb is set.

Troubleshooting

If you see thisLikely causeWhat to do nowNext time
The additions break down during mixing.The dough was kneaded strongly after adding the fruit or flakes.Stop mixing once evenly distributed and use a scraper for handling.Develop the dough first and fold the additions in gently.
The crust colours before the centre is cooked.Exposed fruit, chocolate or nuts brown quickly.Cover loosely with foil and continue to the bread-centre and firm-base cues.Check from the lower stated bake time and keep most additions inside the dough.

Storage: Wrap once fully cool and keep in a cool dry place for up to 3 days. Freeze slices for up to 2 months. Toast slices that have firmed.; Contains: wheat, milk, sulphites if present in the fruit.; This Nepedia version has not been kitchen-tested.

Ingredient choices & substitutions

No brand is specified.

Match the ingredient’s function and weight. See the flour, gluten, yeast and salt guide.

Other approaches to this recipe
Cook / recipeUseWhat differs

The working ingredients and method form one recipe. Different formulas are compared without averaging their quantities or rise schedules.
Nepedia
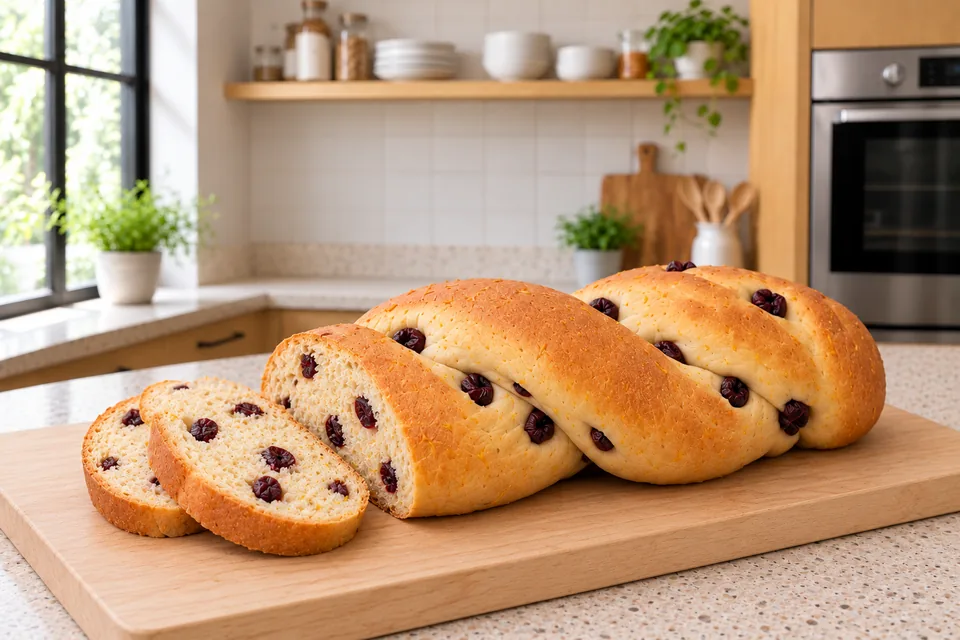
Two slices beside the shortened twist show its cherry-studded crumb.
Orange, lemon and cherry bread.

Recipe

Orange, lemon and cherry bread

A two-strand bread scented with orange and lemon zest, with soft dried sour cherries through the crumb. It is lightly enriched with butter.

How do I make it?

  1. Measure and prepare the separate additions

    5–10 min

    Wash and dry the citrus fruit, then weigh the finely grated coloured zest. Check the soft dried cherries for stones and halve any large pieces.

    Fine citrus zest and pitted dried cherries are kept in separate bowls.
    Prepare the citrus zest and cherries.

    Ready when: The additions are measured and ready, with no stems, stones or unwanted surface liquid.

  2. Mix and develop the dough

    11–14 min

    Mix the dough flour, water, salt, yeast, softened butter, sugar and both zests. Knead by hand or with a dough hook at the machine’s recommended speed for 8–10 minutes after the flour is moistened.

    Hands stretch citrus-scented dough before adding the cherries.
    Knead until the dough is elastic.

    Ready when: The dough is cohesive, soft and elastic; it stretches before tearing.

  3. Let the dough rise

    60–90 min

    Cover the bowl and leave at 22–24°C for 60–90 minutes.

    The citrus dough has risen before the cherries are added.
    Let the dough rise until airy.

    Ready when: The dough is visibly aerated and approximately doubled in volume.

  4. Fold in the reserved additions

    3–5 min

    Gently spread the dough into a thick rectangle. Scatter the dried cherries over it, fold the edges inward and knead lightly just until the fruit is evenly distributed.

    Hands distribute pitted dried cherries through the risen dough.
    Fold in the dried cherries.

    Ready when: The additions are distributed without large clumps.

  5. Shape the two-strand braid

    7–12 min

    Line a 30×40 cm tray with baking paper. Use the shaping flour sparingly. Divide the dough into two equal pieces, about 502 g each, and roll into 35 cm ropes. Cross them over one another to make a loose two-strand twist. Pinch the ends and tuck them underneath, then place on the tray.

    Two ropes form a citrus-and-cherry twist with tucked ends.
    Make one loose two-strand twist.

    Ready when: The dough holds its shape and the additions are mostly enclosed.

  6. Proof and heat the oven

    45–75 min

    Cover loosely and leave at 22–24°C for 45–75 minutes. Heat the oven to 200°C conventional during the final 20 minutes.

    The raw two-strand twist has increased in volume.
    Proof until the twist is puffy.

    Ready when: The dough is puffy and a light fingertip dent recovers slowly.

  7. Bake until the bread centre is set

    35–45 min

    Bake for 35–45 minutes. Cover loosely with foil if the top colours before the centre is cooked. Probe the bread in a thick section, avoiding fruit.

    The cook holds a tray with one browned citrus-and-cherry twist.
    Bake until the bread centre is set.

    Ready when: The base is firm and browned, and the bread centre reaches about 95°C.

  8. Cool fully before slicing

    90 min

    Move to a rack and cool for at least 90 minutes. Slice only when the centre is cool.

    A whole citrus-and-cherry twist cools on a rack.
    Cool fully before slicing.

    Ready when: The crumb is set.

What can go wrong, and how can I fix it?

What you noticeLikely causeWhat to do
The additions break down during mixing.The dough was kneaded strongly after adding the fruit or flakes.Stop mixing once evenly distributed and use a scraper for handling. Develop the dough first and fold the additions in gently.
The crust colours before the centre is cooked.Exposed fruit, chocolate or nuts brown quickly.Cover loosely with foil and continue to the bread-centre and firm-base cues. Check from the lower stated bake time and keep most additions inside the dough.
Useful recipe notes

Storage: Wrap once fully cool and keep in a cool dry place for up to 3 days. Freeze slices for up to 2 months. Toast slices that have firmed.

Contains: wheat, milk, sulphites if present in the fruit.

This Nepedia version has not been kitchen-tested.

See the detailed method and ratios in , or follow ingredients through the .

Ingredient proportions & recipe details

Orange, lemon and cherry bread at a glance

Makes
1 loaf, about 16 slices
Heat
200°C conventional
Baking time
35–45 min
Cuisine / style
International
Leavening
Yeast
Bulk fermentation (including folding)
60–90 min · The dough is visibly aerated and approximately doubled in volume.
How do the ingredient proportions compare?

Percentages compare each listed weight with the combined flour weight (100%). These are ingredient ratios, not dough hydration; milk, eggs and fillings contain other ingredients as well as water.

Formula componentGramsFlour = 100%
Strong white bread flour500 g100%
Water325 g65%
Fine salt10 g2%
Instant dried yeast7 g1.4%
Unsalted butter40 g8%
Caster sugar30 g6%
Finely grated orange zest12 g2.4%
Finely grated lemon zest4 g0.8%
Soft dried sour cherries75 g15%

Almond yeast bread

Makes
1 loaf, about 16 slices
Heat
180°C conventional
Baking time
45–55 min
Cuisine / style
International
International · Enriched fruit bread

Almond yeast bread

A soft oval yeast loaf with ground almonds in the dough, flaked almonds inside and a lightly toasted almond crust. There is no almond extract or icing.

Method

  1. 01 · Measure and prepare the separate additions

    5–10 min

    Use: Ground blanched almonds; Flaked almonds for the dough; Flaked almonds for topping

    Measure the ground almonds and keep the two flaked-almond portions separate: 60 g for the dough and 40 g for the top. Leave the topping untoasted.

    Ready when: The ground almonds are measured and the flaked almonds are separated into dough and topping portions.

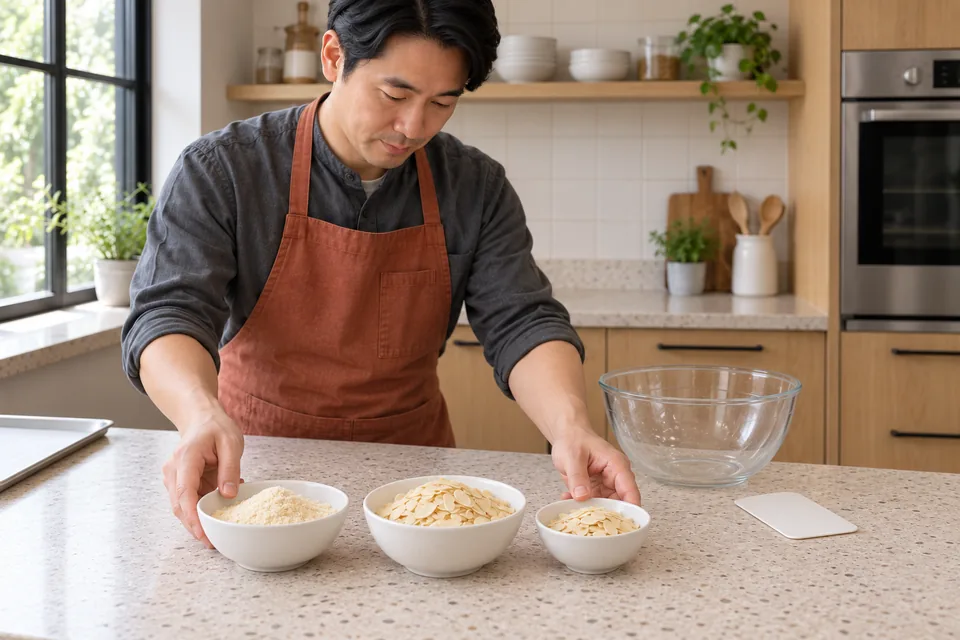
    The cook prepares ground almonds and two separate bowls of flaked almonds.
    01 Almond yeast breadKeep the almond portions separate.
  2. 02 · Mix and develop the dough

    11–14 min

    Use: Strong white bread flour; Water; Fine salt; Instant dried yeast; Unsalted butter; Caster sugar; Whole milk; Ground blanched almonds

    Mix the dough flour, water, salt, yeast, softened butter, sugar, milk and ground almonds. Knead by hand or with a dough hook at the machine’s recommended speed for 8–10 minutes after the flour is moistened.

    Ready when: The dough is cohesive, soft and elastic; it stretches before tearing.

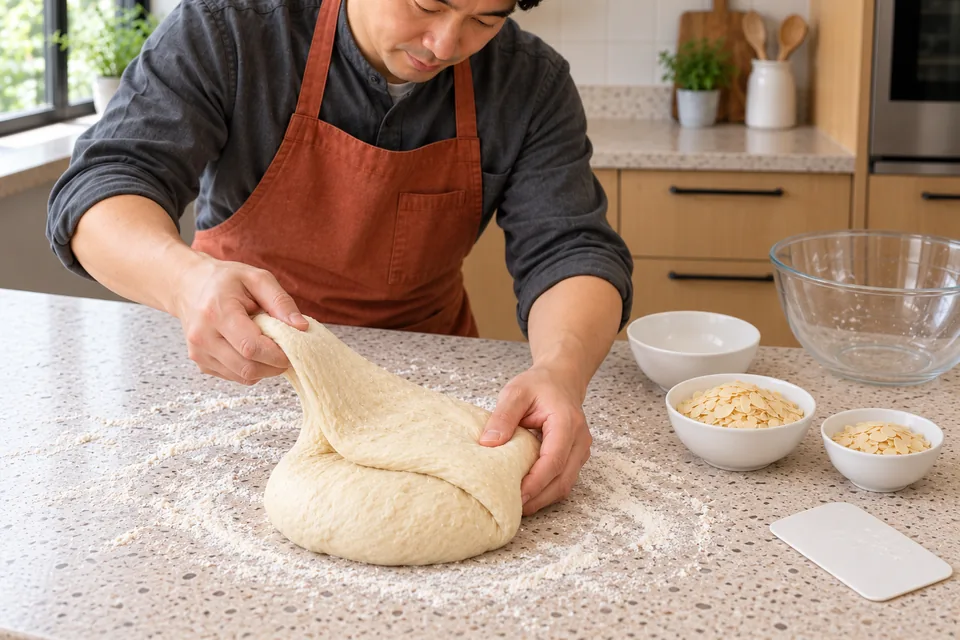
    Hands stretch soft almond-enriched yeast dough before adding flaked almonds.
    02 Almond yeast breadKnead until the dough is elastic.
  3. 03 · Let the dough rise

    60–120 min

    Use:

    Cover the bowl and leave at 22–24°C for 60–120 minutes.

    Ready when: The dough is visibly aerated and approximately doubled in volume.

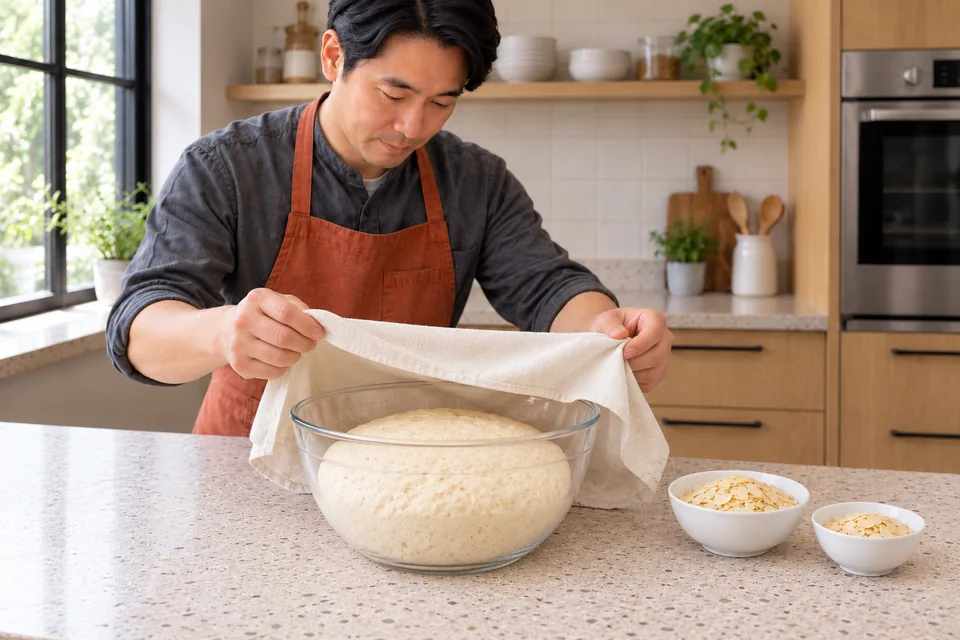
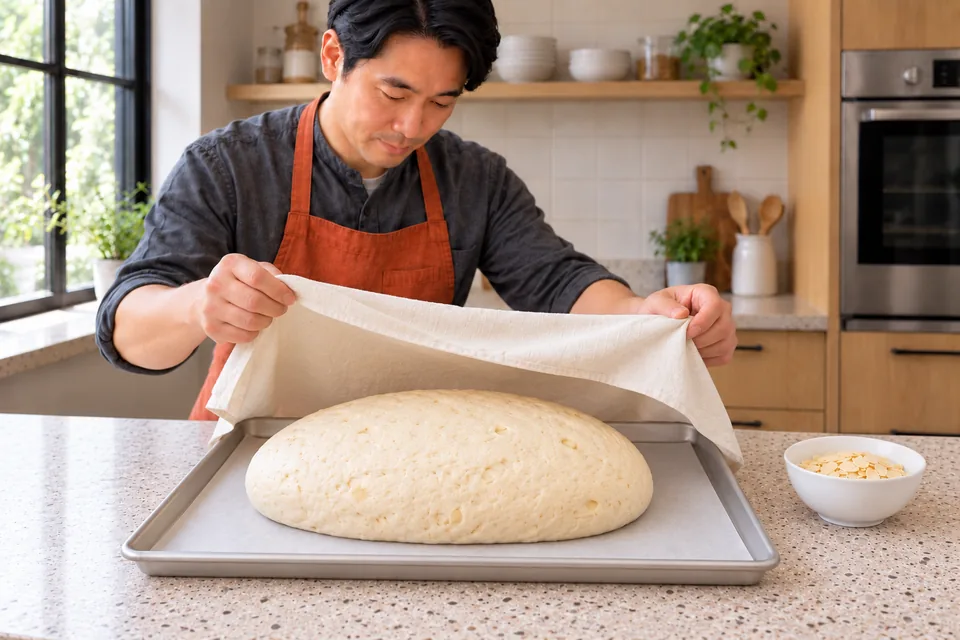
    A bowl holds risen almond-enriched dough.
    03 Almond yeast breadLet the dough rise until airy.
  4. 04 · Fold in the reserved additions

    3–5 min

    Use: Flaked almonds for the dough

    Gently spread the dough into a thick rectangle. Sprinkle over the 60 g flaked almonds for the dough, fold the sides inward and knead lightly to distribute them. Keep the 40 g topping portion separate.

    Ready when: The additions are distributed without large clumps.

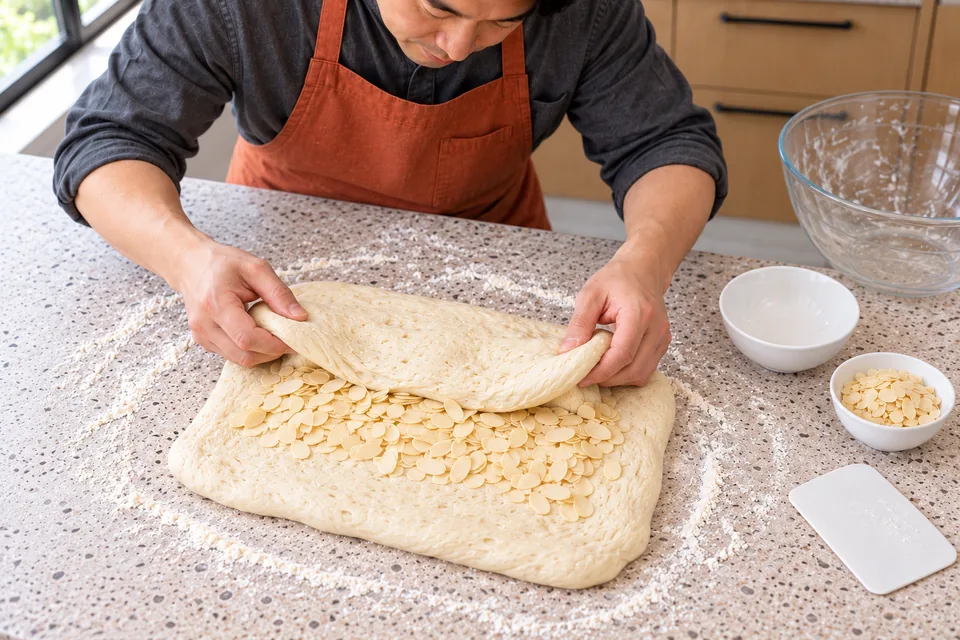
    Hands fold flaked almonds through the dough while the topping portion stays separate.
    04 Almond yeast breadFold in the dough portion of flaked almonds.
  5. 05 · Shape the almond round

    7–12 min

    Use: Flour for shaping

    Line a 30×40 cm tray with baking paper. Use the shaping flour sparingly. Form one oval about 25×15 cm, with an even middle and gently rounded ends. Place seam-side down on the tray.

    Ready when: The dough holds its shape and the additions are mostly enclosed.

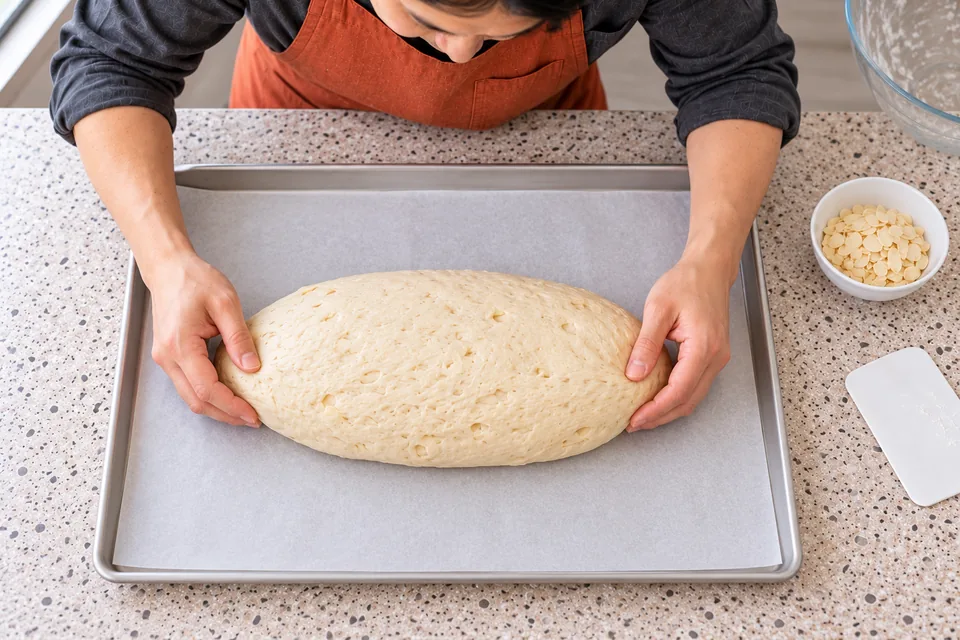
    A single untopped almond oval rests on a lined tray.
    05 Almond yeast breadShape one even oval.
  6. 06 · Proof and heat the oven

    45–90 min

    Use:

    Cover loosely and leave at 22–24°C for 45–90 minutes. Heat the oven to 180°C conventional during the final 20 minutes.

    Ready when: The dough is puffy and a light fingertip dent recovers slowly.

    The untopped almond loaf has risen before baking.
    06 Almond yeast breadProof until the oval is puffy.
  7. 07 · Bake until the bread centre is set

    45–55 min

    Use: Milk for brushing; Flaked almonds for topping

    Brush the top lightly with the separate 15 g milk. Press the reserved 40 g flaked almonds gently onto the damp surface. Bake for 45–55 minutes. Cover loosely with foil if the top colours before the centre is cooked. Probe the bread in a thick section.

    Ready when: The base is firm and browned, and the bread centre reaches about 93°C.

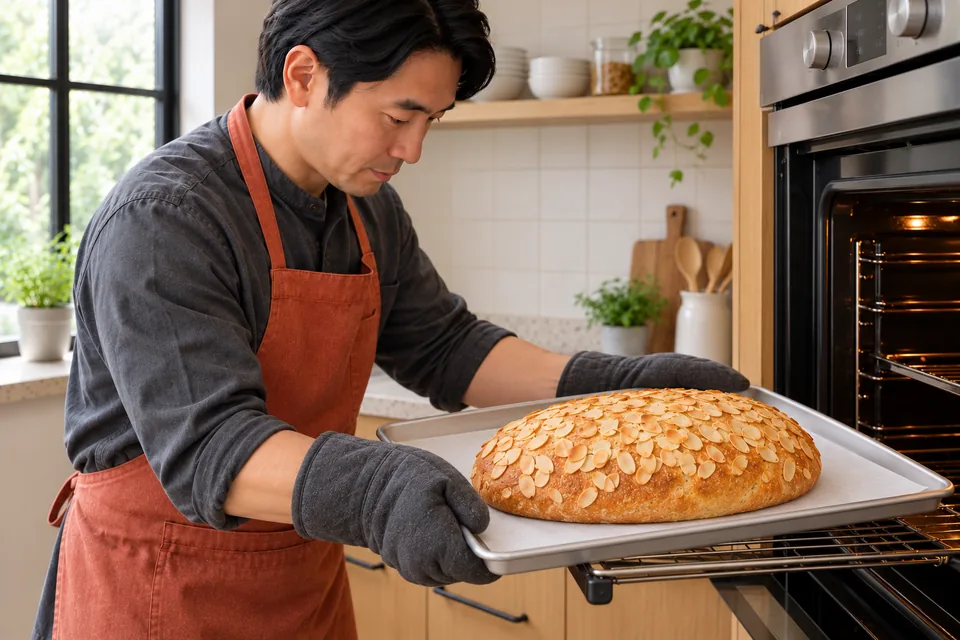
    The cook supports a golden almond-topped loaf on its tray.
    07 Almond yeast breadBake until the centre is set.
  8. 08 · Cool fully before slicing

    90 min

    Use:

    Move to a rack and cool for at least 90 minutes. Slice only when the centre is cool.

    Ready when: The crumb is set.

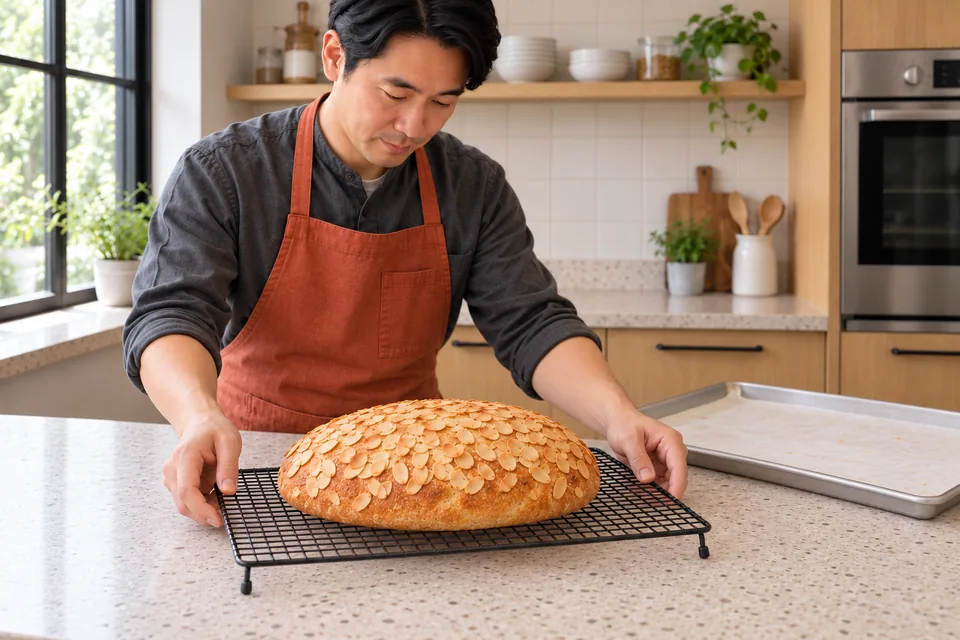
    The whole almond loaf rests on a cooling rack.
    08 Almond yeast breadCool fully before slicing.

What to look for

StageLook / feel forNeeds attention
Measure and prepare the separate additionsThe ground almonds are measured and the flaked almonds are separated into dough and topping portions.
Mix and develop the doughThe dough is cohesive, soft and elastic; it stretches before tearing.
Let the dough riseThe dough is visibly aerated and approximately doubled in volume.
Fold in the reserved additionsThe additions are distributed without large clumps.
Shape the almond roundThe dough holds its shape and the additions are mostly enclosed.
Proof and heat the ovenThe dough is puffy and a light fingertip dent recovers slowly.
Bake until the bread centre is setThe base is firm and browned, and the bread centre reaches about 93°C.
Cool fully before slicingThe crumb is set.

Troubleshooting

If you see thisLikely causeWhat to do nowNext time
The additions break down during mixing.The dough was kneaded strongly after adding the fruit or flakes.Stop mixing once evenly distributed and use a scraper for handling.Develop the dough first and fold the additions in gently.
The crust colours before the centre is cooked.Exposed fruit, chocolate or nuts brown quickly.Cover loosely with foil and continue to the bread-centre and firm-base cues.Check from the lower stated bake time and keep most additions inside the dough.

Storage: Wrap once fully cool and keep in a cool dry place for up to 3 days. Freeze slices for up to 2 months. Toast slices that have firmed.; Contains: wheat, milk, almonds.; This Nepedia version has not been kitchen-tested.

Ingredient choices & substitutions

No brand is specified.

Match the ingredient’s function and weight. See the flour, gluten, yeast and salt guide.

Other approaches to this recipe
Cook / recipeUseWhat differs

The working ingredients and method form one recipe. Different formulas are compared without averaging their quantities or rise schedules.
Nepedia
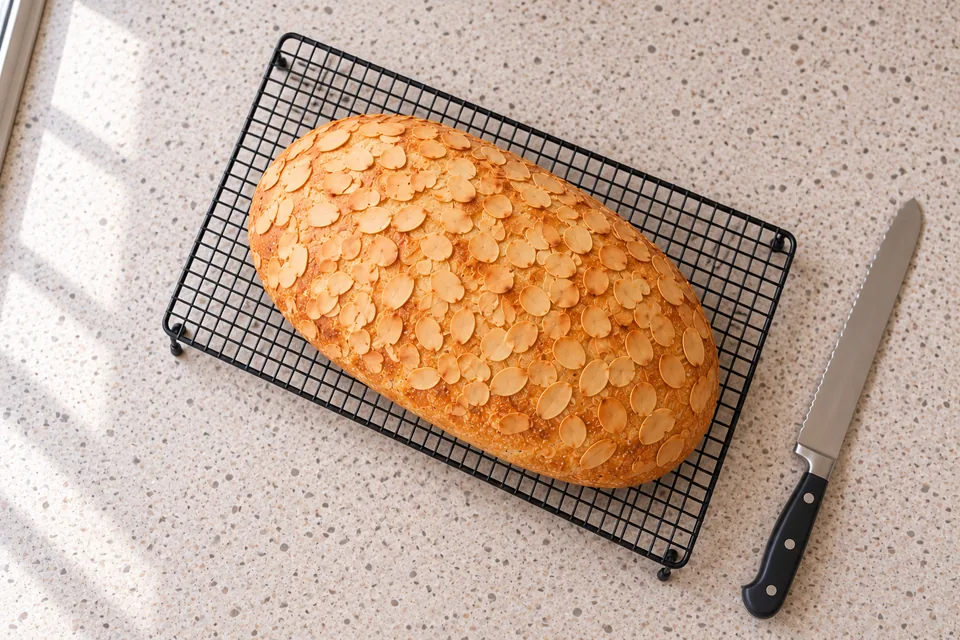
One oval loaf covered with golden almond flakes rests diagonally on a black cooling rack, viewed from above.
The whole almond-topped yeast loaf.

Recipe

Almond yeast bread

A soft oval yeast loaf with ground almonds in the dough, flaked almonds inside and a lightly toasted almond crust. There is no almond extract or icing.

How do I make it?

  1. Measure and prepare the separate additions

    5–10 min

    Measure the ground almonds and keep the two flaked-almond portions separate: 60 g for the dough and 40 g for the top. Leave the topping untoasted.

    The cook prepares ground almonds and two separate bowls of flaked almonds.
    Keep the almond portions separate.

    Ready when: The ground almonds are measured and the flaked almonds are separated into dough and topping portions.

  2. Mix and develop the dough

    11–14 min

    Mix the dough flour, water, salt, yeast, softened butter, sugar, milk and ground almonds. Knead by hand or with a dough hook at the machine’s recommended speed for 8–10 minutes after the flour is moistened.

    Hands stretch soft almond-enriched yeast dough before adding flaked almonds.
    Knead until the dough is elastic.

    Ready when: The dough is cohesive, soft and elastic; it stretches before tearing.

  3. Let the dough rise

    60–120 min

    Cover the bowl and leave at 22–24°C for 60–120 minutes.

    A bowl holds risen almond-enriched dough.
    Let the dough rise until airy.

    Ready when: The dough is visibly aerated and approximately doubled in volume.

  4. Fold in the reserved additions

    3–5 min

    Gently spread the dough into a thick rectangle. Sprinkle over the 60 g flaked almonds for the dough, fold the sides inward and knead lightly to distribute them. Keep the 40 g topping portion separate.

    Hands fold flaked almonds through the dough while the topping portion stays separate.
    Fold in the dough portion of flaked almonds.

    Ready when: The additions are distributed without large clumps.

  5. Shape the almond round

    7–12 min

    Line a 30×40 cm tray with baking paper. Use the shaping flour sparingly. Form one oval about 25×15 cm, with an even middle and gently rounded ends. Place seam-side down on the tray.

    A single untopped almond oval rests on a lined tray.
    Shape one even oval.

    Ready when: The dough holds its shape and the additions are mostly enclosed.

  6. Proof and heat the oven

    45–90 min

    Cover loosely and leave at 22–24°C for 45–90 minutes. Heat the oven to 180°C conventional during the final 20 minutes.

    The untopped almond loaf has risen before baking.
    Proof until the oval is puffy.

    Ready when: The dough is puffy and a light fingertip dent recovers slowly.

  7. Bake until the bread centre is set

    45–55 min

    Brush the top lightly with the separate 15 g milk. Press the reserved 40 g flaked almonds gently onto the damp surface. Bake for 45–55 minutes. Cover loosely with foil if the top colours before the centre is cooked. Probe the bread in a thick section.

    The cook supports a golden almond-topped loaf on its tray.
    Bake until the centre is set.

    Ready when: The base is firm and browned, and the bread centre reaches about 93°C.

  8. Cool fully before slicing

    90 min

    Move to a rack and cool for at least 90 minutes. Slice only when the centre is cool.

    The whole almond loaf rests on a cooling rack.
    Cool fully before slicing.

    Ready when: The crumb is set.

What can go wrong, and how can I fix it?

What you noticeLikely causeWhat to do
The additions break down during mixing.The dough was kneaded strongly after adding the fruit or flakes.Stop mixing once evenly distributed and use a scraper for handling. Develop the dough first and fold the additions in gently.
The crust colours before the centre is cooked.Exposed fruit, chocolate or nuts brown quickly.Cover loosely with foil and continue to the bread-centre and firm-base cues. Check from the lower stated bake time and keep most additions inside the dough.
Useful recipe notes

Storage: Wrap once fully cool and keep in a cool dry place for up to 3 days. Freeze slices for up to 2 months. Toast slices that have firmed.

Contains: wheat, milk, almonds.

This Nepedia version has not been kitchen-tested.

See the detailed method and ratios in , or follow ingredients through the .

Ingredient proportions & recipe details

Almond yeast bread at a glance

Makes
1 loaf, about 16 slices
Heat
180°C conventional
Baking time
45–55 min
Cuisine / style
International
Leavening
Yeast
Bulk fermentation (including folding)
60–120 min · The dough is visibly aerated and approximately doubled in volume.
How do the ingredient proportions compare?

Percentages compare each listed weight with the combined flour weight (100%). These are ingredient ratios, not dough hydration; milk, eggs and fillings contain other ingredients as well as water.

Formula componentGramsFlour = 100%
Strong white bread flour500 g100%
Water150 g30%
Fine salt10 g2%
Instant dried yeast7 g1.4%
Unsalted butter40 g8%
Caster sugar60 g12%
Whole milk175 g35%
Ground blanched almonds75 g15%
Flaked almonds for the dough60 g12%

Lemon and orange bread

Makes
2 small ring loaves, about 16 slices total
Heat
200°C conventional
Baking time
30–35 min
Cuisine / style
International

200°C conventional; swap racks and turn trays after 15 minutes.

International · Enriched fruit bread

Lemon and orange bread

Two small buttery yeast rings with 20% rye flour and measured lemon and orange zest. The zest flavours the dough without adding fruit juice.

Method

  1. 01 · Prepare and weigh coloured citrus zest

    8–10 min

    Use: Finely grated lemon zest; Finely grated orange zest

    Wash and dry the citrus fruit. Finely grate only the coloured outer skin and weigh 6 g lemon zest and 8 g orange zest; keep juice and unused fruit for another use.

    Ready when: The measured zest contains no large strip of bitter white pith.

    The cook finely grates citrus zest into a small dish, with the other measured zest separate.
    01 Lemon and orange breadFinely grate and weigh the lemon and orange zest.
  2. 02 · Develop the dough with butter and zest

    15–20 min

    Use: Strong white bread flour; Rye flour; Water; Caster sugar; Fine salt; Instant dried yeast; Unsalted butter; Finely grated lemon zest; Finely grated orange zest

    Mix both flours, water, sugar, salt and instant yeast. Knead until the dough begins to stretch, then work in the soft butter and both zests. Continue kneading by hand or with a dough hook at the machine’s recommended speed until cohesive, about 12–15 minutes after mixing.

    Ready when: The dough is soft and elastic with evenly distributed zest; the rye keeps it slightly tacky.

    One modest citrus dough batch is kneaded on the worktop.
    02 Lemon and orange breadKnead until cohesive and elastic, with the butter and zest evenly mixed.
  3. 03 · Let the dough rise

    90–120 min

    Use:

    Cover and leave at 22–24°C for 90–120 minutes.

    Ready when: The dough is aerated and roughly doubled.

    Risen citrus dough in the clear glass bowl beneath a lifted cover.
    03 Lemon and orange breadLet the covered dough rise until aerated and roughly doubled.
  4. 04 · Divide and rest two pieces

    15 min

    Use: Flour for shaping

    Line two 30×40 cm trays with baking paper. Use the shaping flour sparingly. Divide into two 488 g pieces, round gently, cover and rest 10 minutes.

    Ready when: Two relaxed rounds are ready to shape.

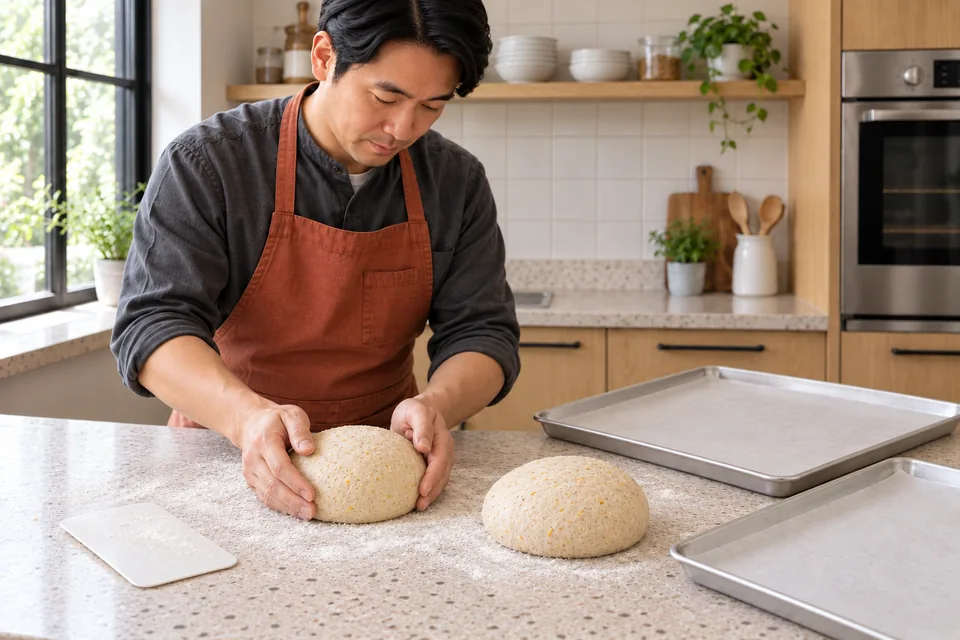
    Two equal citrus dough rounds rest beside the lined trays.
    04 Lemon and orange breadDivide into two equal pieces, round gently and rest.
  5. 05 · Open into two rings and proof

    65–95 min

    Use:

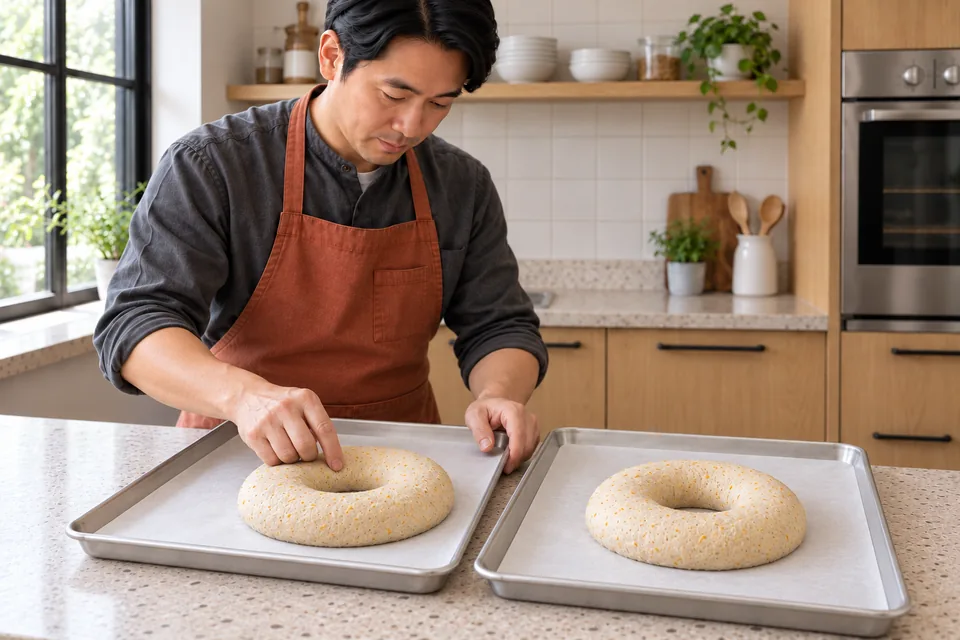
    Push a finger through each centre, then widen each opening gently to about 6 cm. Aim for rings about 16 cm across and 3 cm high, one per tray. Cover loosely and proof at 22–24°C for 60–90 minutes. During the final 20 minutes, heat the oven to 200°C conventional with two racks around the middle.

    Ready when: The rings are puffy and hold a light fingertip dent; the central openings remain visible.

    Two modest unscored dough rings on separate trays, each with an open centre.
    05 Lemon and orange breadShape two small rings and proof until puffy.
  6. 06 · Make shallow cuts on each ring

    3–5 min

    Use:

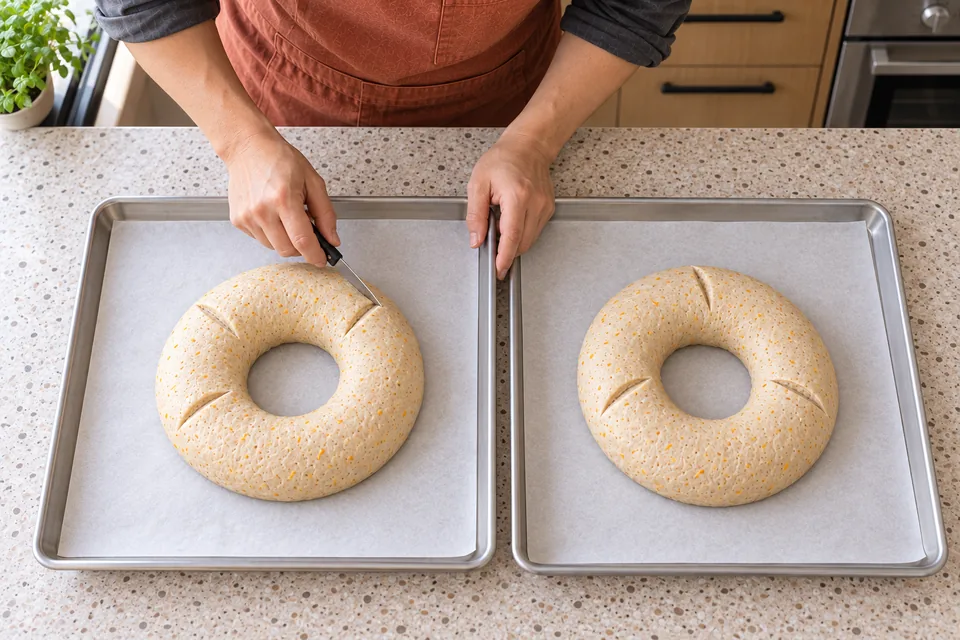
    Make three shallow cuts about 5 mm deep across the upper curve of each ring, without cutting through the ring.

    Ready when: The shallow cuts open the surface without collapsing the bread.

    Each of the two small rings has three shallow cuts across its upper curve.
    06 Lemon and orange breadMake three shallow cuts across the upper curve of each ring.
  7. 07 · Bake both trays, swapping halfway

    30–35 min

    Use:

    Bake both trays together for 15 minutes, then swap rack positions and turn the trays front to back. Continue for 15–20 minutes. Shield with foil if the crust colours too quickly; probe the thick bread away from a cut.

    Ready when: The bases are firm and browned and the bread centres reach about 93°C.

    The cook supports one tray of baked ring bread while the second remains on the other oven rack.
    07 Lemon and orange breadBake both trays, swapping their positions halfway through.
  8. 08 · Cool before slicing

    90 min

    Use:

    Transfer to racks and cool for at least 90 minutes before slicing.

    Ready when: The crumb is set and can be sliced without compression.

    Two small golden citrus rings cool on wire racks.
    08 Lemon and orange breadCool the rings fully before slicing.

What to look for

StageLook / feel forNeeds attention
Prepare and weigh coloured citrus zestThe measured zest contains no large strip of bitter white pith.
Develop the dough with butter and zestThe dough is soft and elastic with evenly distributed zest; the rye keeps it slightly tacky.
Let the dough riseThe dough is aerated and roughly doubled.
Divide and rest two piecesTwo relaxed rounds are ready to shape.
Open into two rings and proofThe rings are puffy and hold a light fingertip dent; the central openings remain visible.
Make shallow cuts on each ringThe shallow cuts open the surface without collapsing the bread.
Bake both trays, swapping halfwayThe bases are firm and browned and the bread centres reach about 93°C.
Cool before slicingThe crumb is set and can be sliced without compression.

Troubleshooting

If you see thisLikely causeWhat to do nowNext time
The dough is sticky during shaping.The rye blend and soft butter keep the dough tacky when warm.Use a scraper and the measured handling allowance; cover and rest briefly if the dough tears.Keep the stated ingredient weights and develop the dough rather than adding unmeasured cereal or flour.
The outside colours before the centre is cooked.The sweetened crust or exposed additions brown faster than thick bread.Shield loosely with foil and continue until the bread centre and base meet the stated cues.Use the specified portions, shape and temperature; probe away from inclusions.

Storage: Cool promptly, then refrigerate wrapped leftovers within 2 hours of baking and use within 2 days. Freeze slices for up to 1 month. Toast or warm before serving.; Contains: wheat, rye, milk.; This Nepedia version has not been kitchen-tested.

Ingredient choices & substitutions

No brand is specified.

Match the ingredient’s function and weight. See the flour, gluten, yeast and salt guide.

Other approaches to this recipe
Cook / recipeUseWhat differs

The working ingredients and method form one recipe. Different formulas are compared without averaging their quantities or rise schedules.
Nepedia
Two small citrus ring breads, one with a small serving wedge cut into two slices, showing a fine zest-flecked crumb.
Lemon and orange ring breads, cooled and sliced.

Recipe

Lemon and orange bread

Two small buttery yeast rings with 20% rye flour and measured lemon and orange zest. The zest flavours the dough without adding fruit juice.

How do I make it?

  1. Prepare and weigh coloured citrus zest

    8–10 min

    Wash and dry the citrus fruit. Finely grate only the coloured outer skin and weigh 6 g lemon zest and 8 g orange zest; keep juice and unused fruit for another use.

    The cook finely grates citrus zest into a small dish, with the other measured zest separate.
    Finely grate and weigh the lemon and orange zest.

    Ready when: The measured zest contains no large strip of bitter white pith.

  2. Develop the dough with butter and zest

    15–20 min

    Mix both flours, water, sugar, salt and instant yeast. Knead until the dough begins to stretch, then work in the soft butter and both zests. Continue kneading by hand or with a dough hook at the machine’s recommended speed until cohesive, about 12–15 minutes after mixing.

    One modest citrus dough batch is kneaded on the worktop.
    Knead until cohesive and elastic, with the butter and zest evenly mixed.

    Ready when: The dough is soft and elastic with evenly distributed zest; the rye keeps it slightly tacky.

  3. Let the dough rise

    90–120 min

    Cover and leave at 22–24°C for 90–120 minutes.

    Risen citrus dough in the clear glass bowl beneath a lifted cover.
    Let the covered dough rise until aerated and roughly doubled.

    Ready when: The dough is aerated and roughly doubled.

  4. Divide and rest two pieces

    15 min

    Line two 30×40 cm trays with baking paper. Use the shaping flour sparingly. Divide into two 488 g pieces, round gently, cover and rest 10 minutes.

    Two equal citrus dough rounds rest beside the lined trays.
    Divide into two equal pieces, round gently and rest.

    Ready when: Two relaxed rounds are ready to shape.

  5. Open into two rings and proof

    65–95 min

    Push a finger through each centre, then widen each opening gently to about 6 cm. Aim for rings about 16 cm across and 3 cm high, one per tray. Cover loosely and proof at 22–24°C for 60–90 minutes. During the final 20 minutes, heat the oven to 200°C conventional with two racks around the middle.

    Two modest unscored dough rings on separate trays, each with an open centre.
    Shape two small rings and proof until puffy.

    Ready when: The rings are puffy and hold a light fingertip dent; the central openings remain visible.

  6. Make shallow cuts on each ring

    3–5 min

    Make three shallow cuts about 5 mm deep across the upper curve of each ring, without cutting through the ring.

    Each of the two small rings has three shallow cuts across its upper curve.
    Make three shallow cuts across the upper curve of each ring.

    Ready when: The shallow cuts open the surface without collapsing the bread.

  7. Bake both trays, swapping halfway

    30–35 min

    Bake both trays together for 15 minutes, then swap rack positions and turn the trays front to back. Continue for 15–20 minutes. Shield with foil if the crust colours too quickly; probe the thick bread away from a cut.

    The cook supports one tray of baked ring bread while the second remains on the other oven rack.
    Bake both trays, swapping their positions halfway through.

    Ready when: The bases are firm and browned and the bread centres reach about 93°C.

  8. Cool before slicing

    90 min

    Transfer to racks and cool for at least 90 minutes before slicing.

    Two small golden citrus rings cool on wire racks.
    Cool the rings fully before slicing.

    Ready when: The crumb is set and can be sliced without compression.

What can go wrong, and how can I fix it?

What you noticeLikely causeWhat to do
The dough is sticky during shaping.The rye blend and soft butter keep the dough tacky when warm.Use a scraper and the measured handling allowance; cover and rest briefly if the dough tears. Keep the stated ingredient weights and develop the dough rather than adding unmeasured cereal or flour.
The outside colours before the centre is cooked.The sweetened crust or exposed additions brown faster than thick bread.Shield loosely with foil and continue until the bread centre and base meet the stated cues. Use the specified portions, shape and temperature; probe away from inclusions.
Useful recipe notes

Storage: Cool promptly, then refrigerate wrapped leftovers within 2 hours of baking and use within 2 days. Freeze slices for up to 1 month. Toast or warm before serving.

Contains: wheat, rye, milk.

This Nepedia version has not been kitchen-tested.

See the detailed method and ratios in , or follow ingredients through the .

Ingredient proportions & recipe details

Lemon and orange bread at a glance

Makes
2 small ring loaves, about 16 slices total
Heat
200°C conventional
Baking time
30–35 min
Cuisine / style
International
Leavening
Yeast
Bulk fermentation (including folding)
90–120 min · The dough is aerated and roughly doubled.
How do the ingredient proportions compare?

Percentages compare each listed weight with the combined flour weight (100%). These are ingredient ratios, not dough hydration; milk, eggs and fillings contain other ingredients as well as water.

Formula componentGramsFlour = 100%
Strong white bread flour400 g80%
Rye flour100 g20%
Water325 g65%
Unsalted butter60 g12%
Caster sugar60 g12%
Fine salt10 g2%
Instant dried yeast7 g1.4%
Finely grated lemon zest6 g1.2%
Finely grated orange zest8 g1.6%

Peanut yeast bread

Makes
2 coiled loaves, about 16 slices total
Heat
180°C conventional
Baking time
40–45 min
Cuisine / style
International

180°C conventional; swap racks and turn trays after 20 minutes.

International · Enriched fruit bread

Peanut yeast bread

Two soft yeast-raised coils with crunchy peanut butter and small pieces of peanut brittle. The nut butter is kneaded into developed dough before the brittle is folded through.

Method

  1. 01 · Stir peanut butter and prepare the separate brittle

    8–10 min

    Use: Unsalted crunchy peanut butter; Prepared peanut brittle

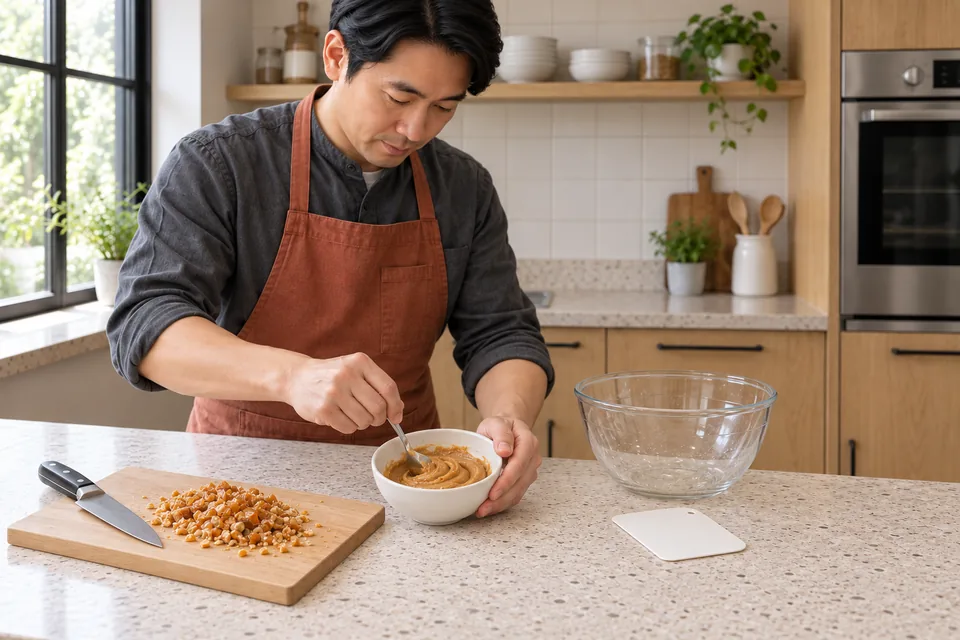
    Stir the peanut butter until any separated oil is evenly mixed, then weigh 150 g. Chop the brittle into 3–5 mm pieces, remove long sharp shards, then weigh 100 g of usable pieces.

    Ready when: The peanut butter is uniform and the brittle is in small usable pieces.

    The cook stirs peanut butter beside a small pile of chopped peanut brittle.
    01 Peanut yeast breadStir the peanut butter and prepare small pieces of brittle.
  2. 02 · Develop the dough, adding peanut butter in portions

    15–20 min

    Use: Strong white bread flour; Water; Fine salt; Instant dried yeast; Unsalted crunchy peanut butter

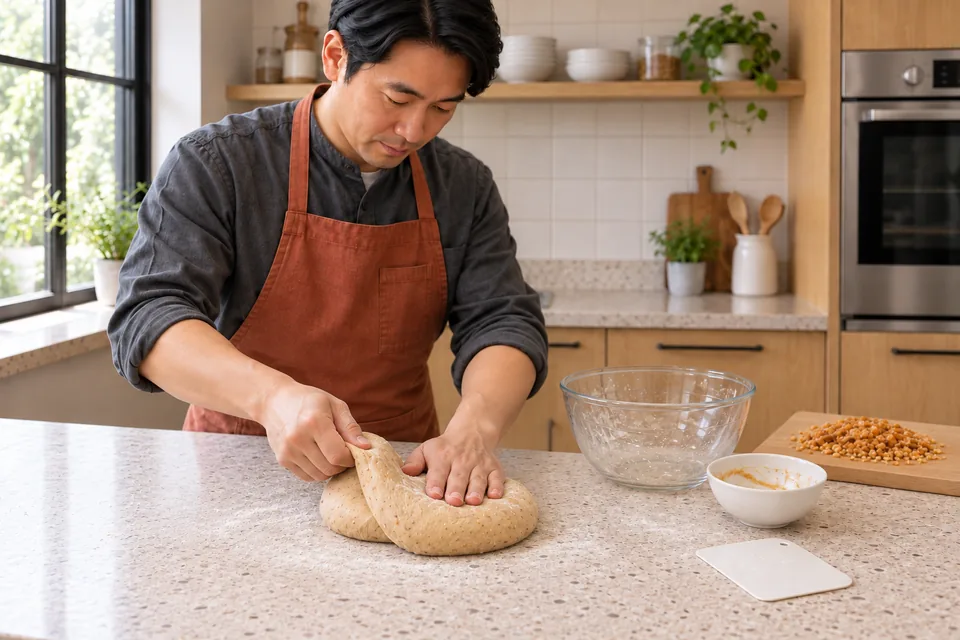
    Mix the flour, water, salt and instant yeast. Knead until the dough starts to stretch, then add the peanut butter in three portions, kneading each in before the next. Continue by hand or with a dough hook at the machine’s recommended speed until cohesive, about 12–15 minutes after mixing.

    Ready when: The dough becomes elastic and evenly coloured; there is no loose oil or unmixed nut-butter pocket.

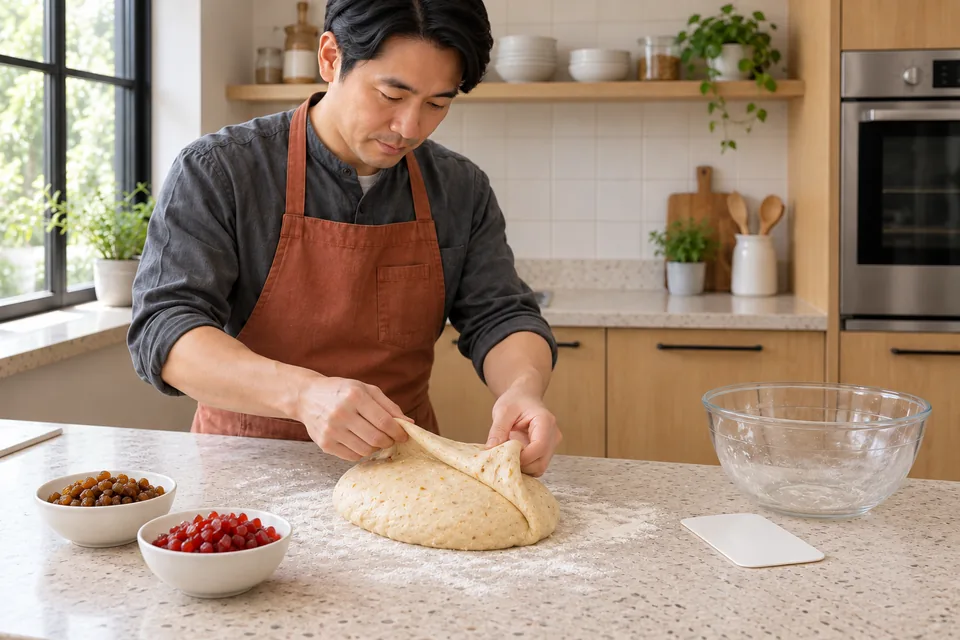
    The cook folds and kneads one modest batch of peanut dough, with brittle kept separate.
    02 Peanut yeast breadDevelop an elastic dough with the peanut butter fully incorporated.
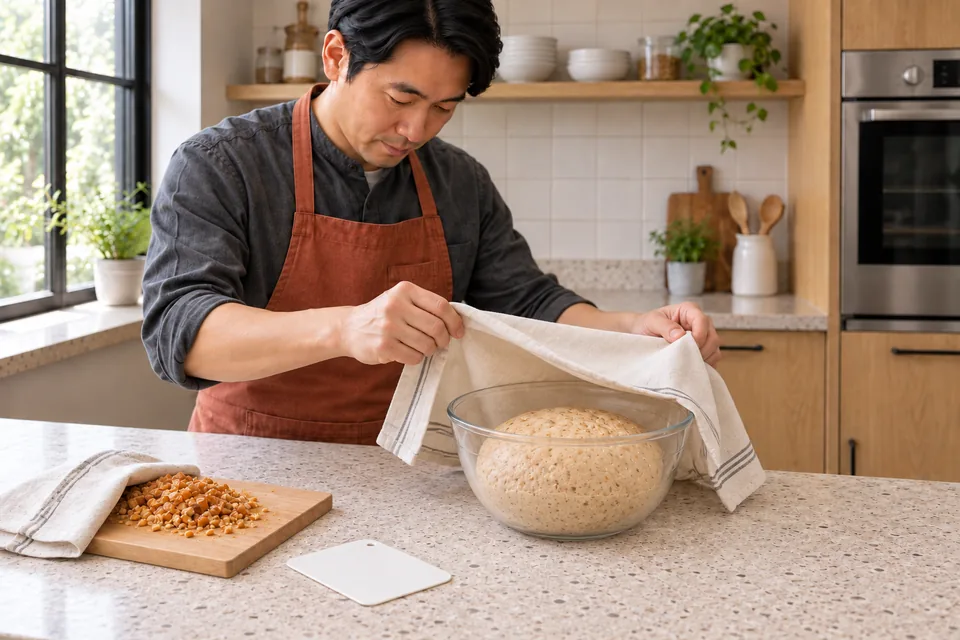
  3. 03 · Let the dough rise

    90–120 min

    Use:

    Cover and leave at 22–24°C for 90–120 minutes.

    Ready when: The dough is aerated and roughly doubled.

    The cook lifts a cloth from risen peanut dough while chopped brittle remains separate.
    03 Peanut yeast breadLet the dough rise until aerated and roughly doubled.
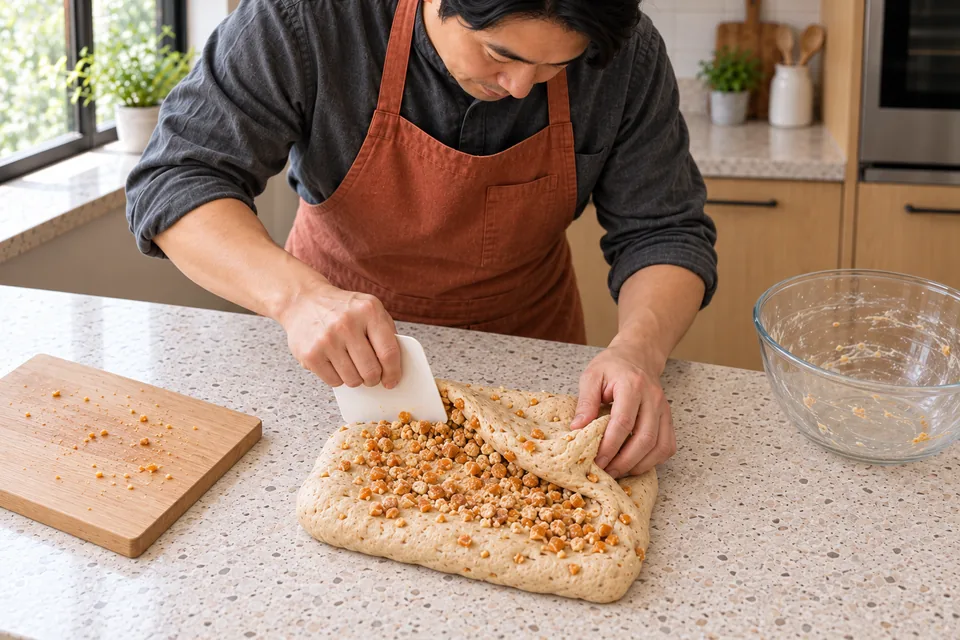
  4. 04 · Fold in the held chopped brittle

    5–10 min

    Use: Prepared peanut brittle

    Spread the dough into a thick rectangle. Add all the chopped brittle and fold gently until dispersed. Use a scraper rather than more unmeasured chips or flour.

    Ready when: Small brittle pieces are distributed without long tears.

    The cook folds small chopped peanut-brittle pieces into the peanut dough with a scraper.
    04 Peanut yeast breadFold the chopped brittle through the dough.
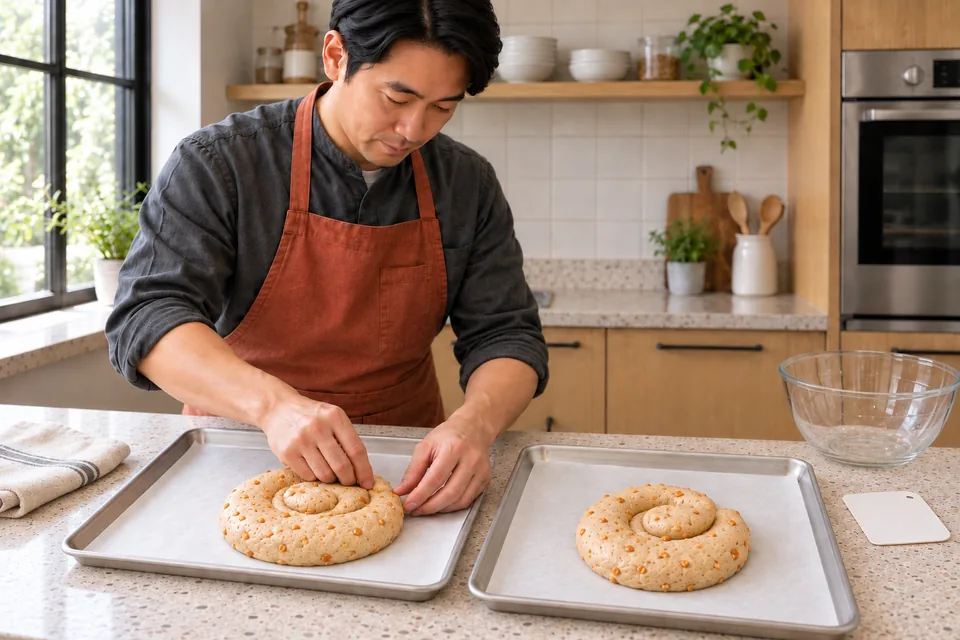
  5. 05 · Divide and shape two loose coils

    20–25 min

    Use: Flour for shaping

    Line two 30×40 cm trays with baking paper. Use the shaping flour sparingly. Divide into two 545 g pieces, cover and rest 10 minutes. Roll each into a rope about 35 cm long, curl into a loose coil about 14–16 cm across, and tuck the outer tip underneath. Place one coil on each tray.

    Ready when: Both coils are evenly shaped without a tight high centre or loose end.

    Shaping two small peanut bread coils, each on its own lined tray.
    05 Peanut yeast breadCoil each rested rope loosely, tuck the end underneath and leave space for the dough to rise.
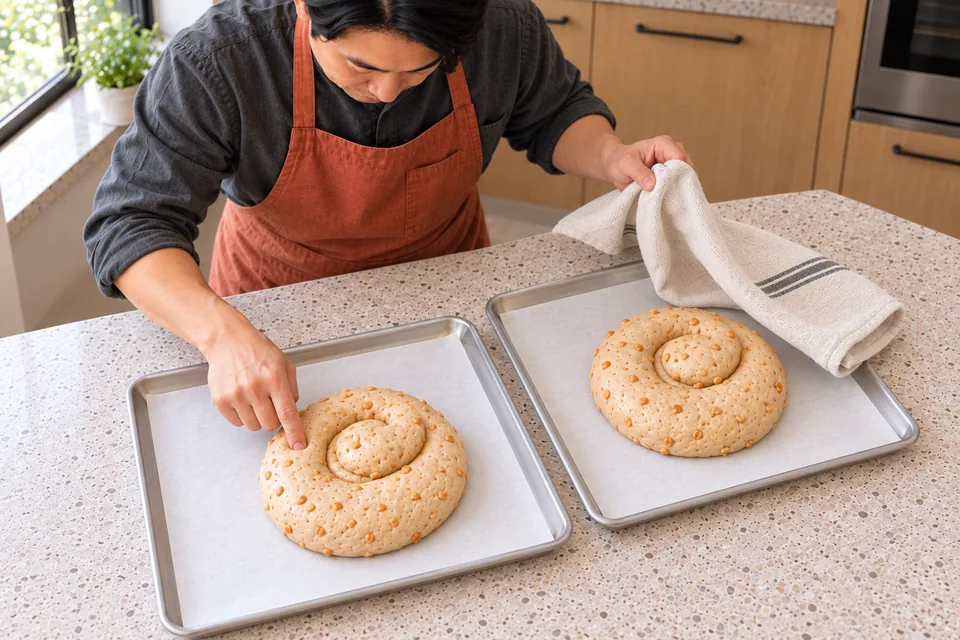
  6. 06 · Proof and heat the oven

    60–90 min

    Use:

    Cover loosely and leave at 22–24°C for 60–90 minutes. During the final 20 minutes, heat the oven to 180°C conventional with two racks around the middle.

    Ready when: The coils are puffy and a light fingertip dent returns slowly.

    Checking the rise of two peanut bread coils on separate trays.
    06 Peanut yeast breadThe coils should look puffy, and a light fingertip dent should return slowly.
  7. 07 · Score and bake both trays

    40–45 min

    Use:

    Make one shallow curved score about 5 mm deep along the top of each coil. Bake both trays together for 20 minutes, then swap rack positions and turn the trays front to back. Bake for 20–25 minutes more. Shield dark brittle pieces with foil as needed. Probe the thickest bread away from a nut or caramel pocket.

    Ready when: The bases are firm and browned and the bread centres reach about 93°C.

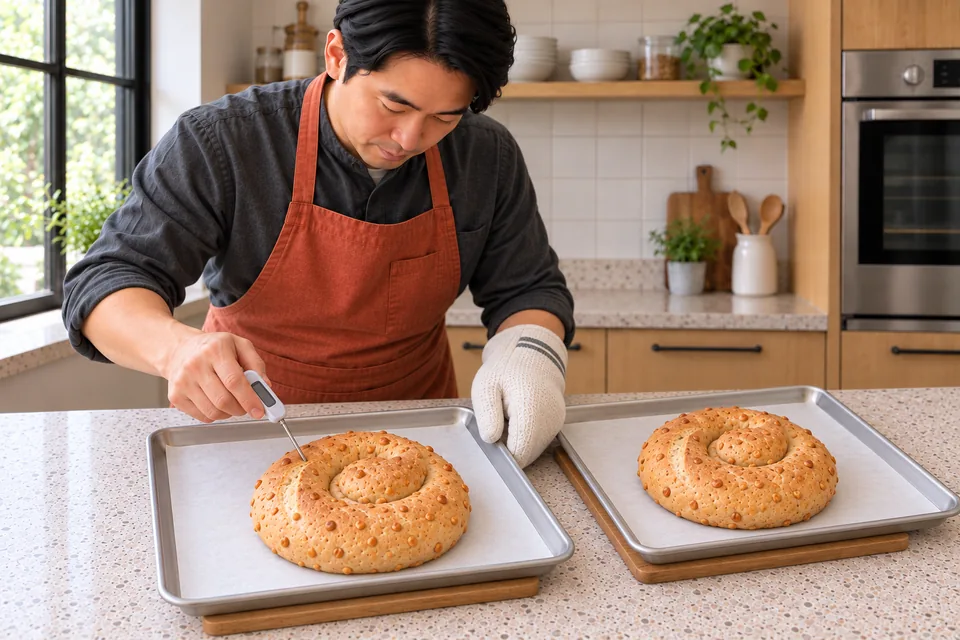
    Checking the centre of a baked peanut loaf with a thermometer while the second loaf rests on its tray.
    07 Peanut yeast breadCheck the thickest bread away from a nut or caramel pocket; the centre should reach about 93°C.
  8. 08 · Cool fully before slicing

    90 min

    Use:

    Transfer carefully to racks and cool for at least 90 minutes. Let caramel pieces cool fully before slicing.

    Ready when: The crumb is set and caramel is no longer molten.

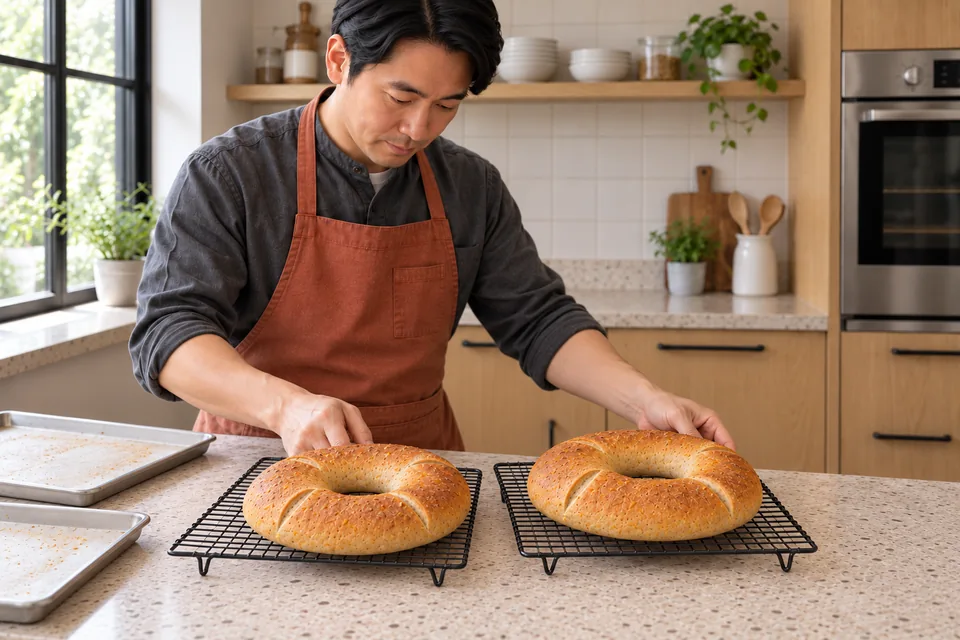
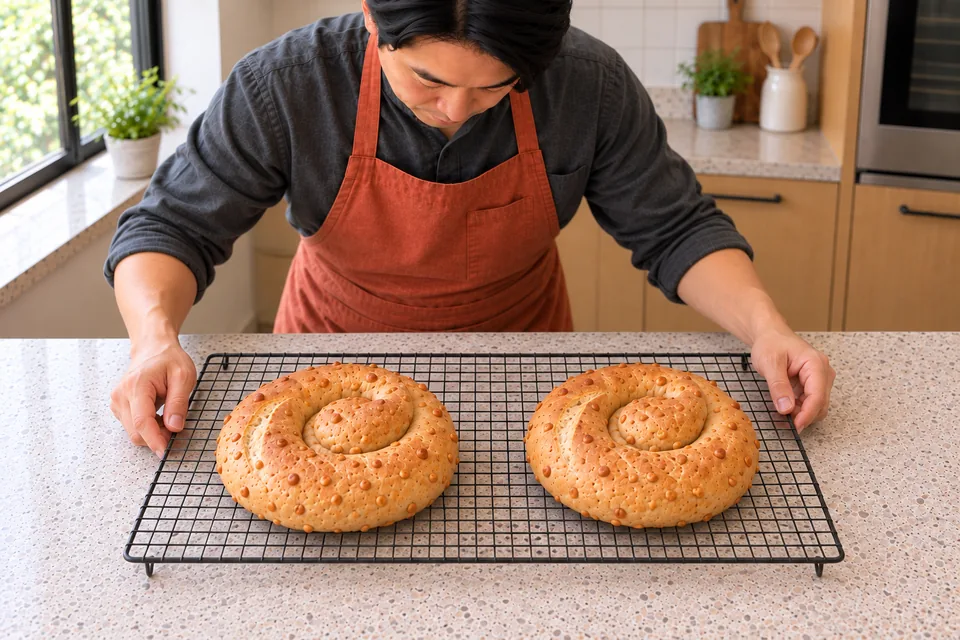
    Two baked peanut bread coils cooling side by side on a wire rack.
    08 Peanut yeast breadCool both loaves fully on a rack before slicing so the crumb sets and the caramel pieces are no longer hot.

What to look for

StageLook / feel forNeeds attention
Stir peanut butter and prepare the separate brittleThe peanut butter is uniform and the brittle is in small usable pieces.
Develop the dough, adding peanut butter in portionsThe dough becomes elastic and evenly coloured; there is no loose oil or unmixed nut-butter pocket.
Let the dough riseThe dough is aerated and roughly doubled.
Fold in the held chopped brittleSmall brittle pieces are distributed without long tears.
Divide and shape two loose coilsBoth coils are evenly shaped without a tight high centre or loose end.
Proof and heat the ovenThe coils are puffy and a light fingertip dent returns slowly.
Score and bake both traysThe bases are firm and browned and the bread centres reach about 93°C.
Cool fully before slicingThe crumb is set and caramel is no longer molten.

Troubleshooting

If you see thisLikely causeWhat to do nowNext time
The dough is sticky during shaping.Peanut butter is greasy before it is fully worked into the dough.Use a scraper and the measured handling allowance; cover and rest briefly if the dough tears.Keep the stated ingredient weights and develop the dough rather than adding unmeasured cereal or flour.
The outside colours before the centre is cooked.The sweetened crust or exposed additions brown faster than thick bread.Shield loosely with foil and continue until the bread centre and base meet the stated cues.Use the specified portions, shape and temperature; probe away from inclusions.

Storage: Cool promptly, then refrigerate wrapped leftovers within 2 hours of baking and use within 2 days. Freeze slices for up to 1 month. Toast or warm before serving.; Contains: wheat, peanut.; This Nepedia version has not been kitchen-tested.

Ingredient choices & substitutions

No brand is specified.

Match the ingredient’s function and weight. See the flour, gluten, yeast and salt guide.

Other approaches to this recipe
Cook / recipeUseWhat differs

The working ingredients and method form one recipe. Different formulas are compared without averaging their quantities or rise schedules.
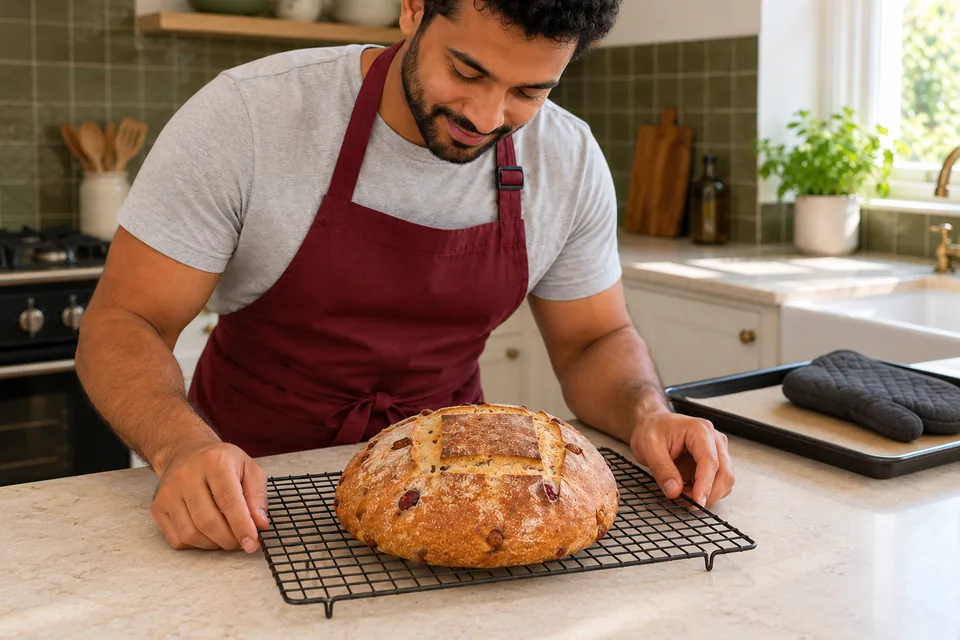
Nepedia
One whole peanut bread coil beside a second loaf cut into two slices, revealing the tan crumb.
Peanut yeast bread with a soft tan crumb and small peanut-brittle pieces.

Recipe

Peanut yeast bread

Two soft yeast-raised coils with crunchy peanut butter and small pieces of peanut brittle. The nut butter is kneaded into developed dough before the brittle is folded through.

How do I make it?

  1. Stir peanut butter and prepare the separate brittle

    8–10 min

    Stir the peanut butter until any separated oil is evenly mixed, then weigh 150 g. Chop the brittle into 3–5 mm pieces, remove long sharp shards, then weigh 100 g of usable pieces.

    The cook stirs peanut butter beside a small pile of chopped peanut brittle.
    Stir the peanut butter and prepare small pieces of brittle.

    Ready when: The peanut butter is uniform and the brittle is in small usable pieces.

  2. Develop the dough, adding peanut butter in portions

    15–20 min

    Mix the flour, water, salt and instant yeast. Knead until the dough starts to stretch, then add the peanut butter in three portions, kneading each in before the next. Continue by hand or with a dough hook at the machine’s recommended speed until cohesive, about 12–15 minutes after mixing.

    The cook folds and kneads one modest batch of peanut dough, with brittle kept separate.
    Develop an elastic dough with the peanut butter fully incorporated.

    Ready when: The dough becomes elastic and evenly coloured; there is no loose oil or unmixed nut-butter pocket.

  3. Let the dough rise

    90–120 min

    Cover and leave at 22–24°C for 90–120 minutes.

    The cook lifts a cloth from risen peanut dough while chopped brittle remains separate.
    Let the dough rise until aerated and roughly doubled.

    Ready when: The dough is aerated and roughly doubled.

  4. Fold in the held chopped brittle

    5–10 min

    Spread the dough into a thick rectangle. Add all the chopped brittle and fold gently until dispersed. Use a scraper rather than more unmeasured chips or flour.

    The cook folds small chopped peanut-brittle pieces into the peanut dough with a scraper.
    Fold the chopped brittle through the dough.

    Ready when: Small brittle pieces are distributed without long tears.

  5. Divide and shape two loose coils

    20–25 min

    Line two 30×40 cm trays with baking paper. Use the shaping flour sparingly. Divide into two 545 g pieces, cover and rest 10 minutes. Roll each into a rope about 35 cm long, curl into a loose coil about 14–16 cm across, and tuck the outer tip underneath. Place one coil on each tray.

    Shaping two small peanut bread coils, each on its own lined tray.
    Coil each rested rope loosely, tuck the end underneath and leave space for the dough to rise.

    Ready when: Both coils are evenly shaped without a tight high centre or loose end.

  6. Proof and heat the oven

    60–90 min

    Cover loosely and leave at 22–24°C for 60–90 minutes. During the final 20 minutes, heat the oven to 180°C conventional with two racks around the middle.

    Checking the rise of two peanut bread coils on separate trays.
    The coils should look puffy, and a light fingertip dent should return slowly.

    Ready when: The coils are puffy and a light fingertip dent returns slowly.

  7. Score and bake both trays

    40–45 min

    Make one shallow curved score about 5 mm deep along the top of each coil. Bake both trays together for 20 minutes, then swap rack positions and turn the trays front to back. Bake for 20–25 minutes more. Shield dark brittle pieces with foil as needed. Probe the thickest bread away from a nut or caramel pocket.

    Checking the centre of a baked peanut loaf with a thermometer while the second loaf rests on its tray.
    Check the thickest bread away from a nut or caramel pocket; the centre should reach about 93°C.

    Ready when: The bases are firm and browned and the bread centres reach about 93°C.

  8. Cool fully before slicing

    90 min

    Transfer carefully to racks and cool for at least 90 minutes. Let caramel pieces cool fully before slicing.

    Two baked peanut bread coils cooling side by side on a wire rack.
    Cool both loaves fully on a rack before slicing so the crumb sets and the caramel pieces are no longer hot.

    Ready when: The crumb is set and caramel is no longer molten.

What can go wrong, and how can I fix it?

What you noticeLikely causeWhat to do
The dough is sticky during shaping.Peanut butter is greasy before it is fully worked into the dough.Use a scraper and the measured handling allowance; cover and rest briefly if the dough tears. Keep the stated ingredient weights and develop the dough rather than adding unmeasured cereal or flour.
The outside colours before the centre is cooked.The sweetened crust or exposed additions brown faster than thick bread.Shield loosely with foil and continue until the bread centre and base meet the stated cues. Use the specified portions, shape and temperature; probe away from inclusions.
Useful recipe notes

Storage: Cool promptly, then refrigerate wrapped leftovers within 2 hours of baking and use within 2 days. Freeze slices for up to 1 month. Toast or warm before serving.

Contains: wheat, peanut.

This Nepedia version has not been kitchen-tested.

See the detailed method and ratios in , or follow ingredients through the .

Ingredient proportions & recipe details

Peanut yeast bread at a glance

Makes
2 coiled loaves, about 16 slices total
Heat
180°C conventional
Baking time
40–45 min
Cuisine / style
International
Leavening
Yeast
Bulk fermentation (including folding)
90–120 min · The dough is aerated and roughly doubled.
How do the ingredient proportions compare?

Percentages compare each listed weight with the combined flour weight (100%). These are ingredient ratios, not dough hydration; milk, eggs and fillings contain other ingredients as well as water.

Formula componentGramsFlour = 100%
Strong white bread flour500 g100%
Water325 g65%
Fine salt10 g2%
Instant dried yeast5 g1%
Unsalted crunchy peanut butter150 g30%
Prepared peanut brittle100 g20%

Iced cherry and sultana loaf

Makes
1 loaf, about 12 slices
Heat
180°C conventional
Baking time
35–45 min
Cuisine / style
International

180°C conventional.

International · Enriched fruit bread

Iced cherry and sultana loaf

A soft tin loaf with sultanas, glacé cherries, orange zest and a simple water icing. The fruit is folded into the risen dough and the loaf cools fully before icing.

Method

  1. 01 · Mix and develop the spiced milk dough

    12–15 min

    Use: Strong white bread flour; Whole milk; Water; Caster sugar; Fine salt; Instant dried yeast; Ground cinnamon; Finely grated orange zest; Unsalted butter

    Mix the flour, milk, water, sugar, salt, yeast, cinnamon and zest. Knead until the dough starts to stretch, then add the soft butter in small pieces. Continue kneading for 8–10 minutes until elastic.

    Ready when: The dough is soft and slightly tacky without loose butter.

    One dough batch is kneaded while sultanas and quartered glacé cherries remain separate.
    01 Iced cherry and sultana loafKnead the spiced enriched dough until elastic.
  2. 02 · Let the dough rise

    60–120 min

    Use:

    Cover and leave at 22–24°C for 60–120 minutes.

    Ready when: The dough is aerated and roughly doubled.

    The cook uncovers risen spiced dough before adding the fruit.
    02 Iced cherry and sultana loafCover and let the dough rise until aerated.
  3. 03 · Fold in sultanas and quartered cherries

    5–10 min

    Use: Soft sultanas; Glacé cherries

    Spread the dough into a thick rectangle. Scatter over the sultanas and quartered cherries, then fold and turn gently until the fruit is dispersed.

    Ready when: Fruit is spread through the dough without being crushed into a paste.

    The cook folds small sultanas and glacé-cherry pieces into one dough rectangle.
    03 Iced cherry and sultana loafFold in the sultanas and quartered cherries after the first rise.
  4. 04 · Shape into the separately buttered tin

    8–10 min

    Use: Flour for shaping; Butter for the tin

    Butter a 23×13×8 cm loaf tin. Use the shaping flour sparingly. Pat the dough into a rectangle, roll it into a short log and tuck the ends to fit the tin. Place seam-side down.

    Ready when: One even log fills the length of the tin.

    A single modest fruit-dough log is placed in one loaf tin.
    04 Iced cherry and sultana loafShape one log and place it seam-side down in the buttered tin.
  5. 05 · Proof and heat the oven

    45–90 min

    Use:

    Cover loosely and leave at 22–24°C for 45–90 minutes. During the last 20 minutes, heat the oven to 180°C conventional.

    Ready when: The top is puffy and a light fingertip dent slowly returns.

    The fruit loaf has risen in its tin, with no wash or icing yet.
    05 Iced cherry and sultana loafProof until puffy and a light dent returns slowly.
  6. 06 · Bake until the bread centre is cooked

    35–45 min

    Use:

    Bake for 35–45 minutes. Shield loosely with foil if the top colours early. Probe the thick bread centre away from fruit.

    Ready when: The base is firm and the bread centre reaches about 93°C.

    The cook probes the centre of a baked loaf in its hot tin.
    06 Iced cherry and sultana loafBake until the base is firm and check the bread centre.
  7. 07 · Cool completely before icing

    90 min

    Use:

    Leave in the tin for 10 minutes, then turn out onto a rack for at least 80 minutes more.

    Ready when: The loaf is cool through the centre before icing.

    One uniced fruit loaf cools on a rack beside its empty tin.
    07 Iced cherry and sultana loafCool in the tin briefly, then turn out and cool fully.
  8. 08 · Mix and drizzle the separate icing

    12–15 min

    Use: Icing sugar; Water for icing

    Mix the icing sugar with 15 g water until smooth. Drizzle it in broad lines across the cooled top. Leave for 10 minutes for an initial set, then cut into 12 slices.

    Ready when: The icing stays on the crust and the fruit crumb slices cleanly.

    The cook drizzles white water icing over one cooled cherry and sultana loaf.
    08 Iced cherry and sultana loafDrizzle broad icing lines over the cooled loaf and let them set.

What to look for

StageLook / feel forNeeds attention
Mix and develop the spiced milk doughThe dough is soft and slightly tacky without loose butter.
Let the dough riseThe dough is aerated and roughly doubled.
Fold in sultanas and quartered cherriesFruit is spread through the dough without being crushed into a paste.
Shape into the separately buttered tinOne even log fills the length of the tin.
Proof and heat the ovenThe top is puffy and a light fingertip dent slowly returns.
Bake until the bread centre is cookedThe base is firm and the bread centre reaches about 93°C.
Cool completely before icingThe loaf is cool through the centre before icing.
Mix and drizzle the separate icingThe icing stays on the crust and the fruit crumb slices cleanly.

Troubleshooting

If you see thisLikely causeWhat to do nowNext time
Fruit tears the dough.Large sticky cherry pieces or forceful kneading after fermentation.Fold gently with a scraper and keep any exposed fruit tucked inside.Quarter and pat the cherries before weighing.
Icing disappears into the crust.The bread is still warm.Allow the loaf to cool fully before adding more icing.Check the centre as well as the crust before icing.

Storage: Once cool, wrap and refrigerate within 2 hours of baking; use within 2 days. Freeze uniced slices for up to 1 month. Let icing set before wrapping.; Contains: wheat, milk, sulphites if present in dried or glacé fruit.; This Nepedia version has not been kitchen-tested.

Ingredient choices & substitutions

No brand is specified.

Match the ingredient’s function and weight. See the flour, gluten, yeast and salt guide.

Other approaches to this recipe
Cook / recipeUseWhat differs

The working ingredients and method form one recipe. Different formulas are compared without averaging their quantities or rise schedules.
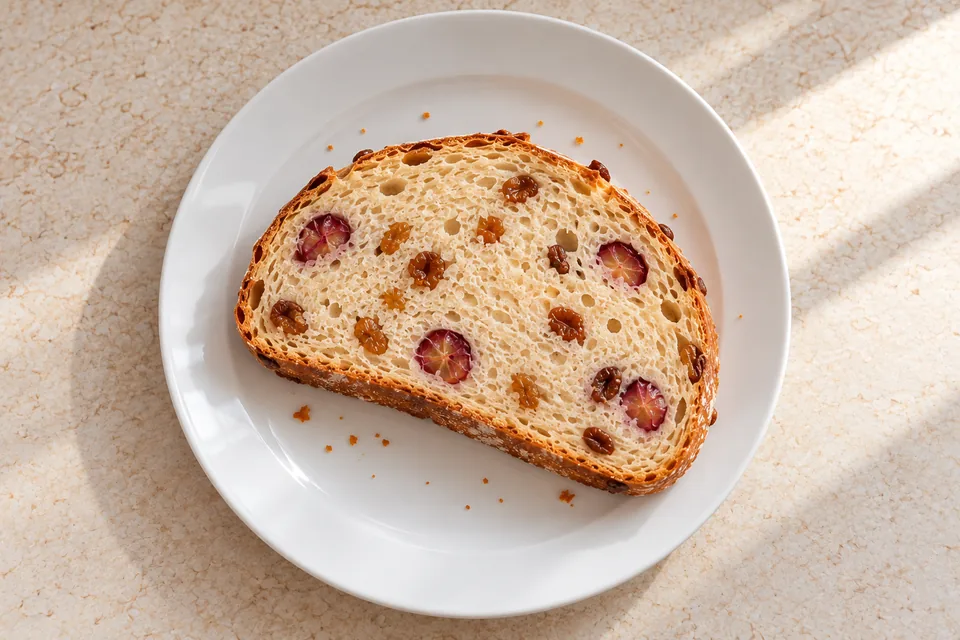
Nepedia
Three slices show golden sultanas, red glacé-cherry pieces and white icing on the crust.
Iced cherry and sultana loaf, sliced after the icing sets.

Recipe

Iced cherry and sultana loaf

A soft tin loaf with sultanas, glacé cherries, orange zest and a simple water icing. The fruit is folded into the risen dough and the loaf cools fully before icing.

How do I make it?

  1. Mix and develop the spiced milk dough

    12–15 min

    Mix the flour, milk, water, sugar, salt, yeast, cinnamon and zest. Knead until the dough starts to stretch, then add the soft butter in small pieces. Continue kneading for 8–10 minutes until elastic.

    One dough batch is kneaded while sultanas and quartered glacé cherries remain separate.
    Knead the spiced enriched dough until elastic.

    Ready when: The dough is soft and slightly tacky without loose butter.

  2. Let the dough rise

    60–120 min

    Cover and leave at 22–24°C for 60–120 minutes.
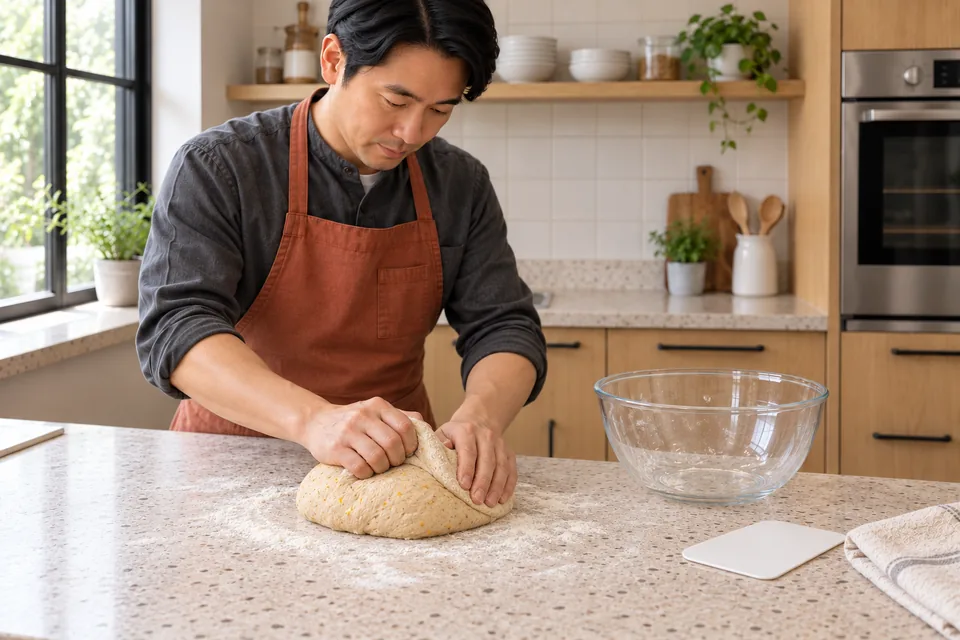
    The cook uncovers risen spiced dough before adding the fruit.
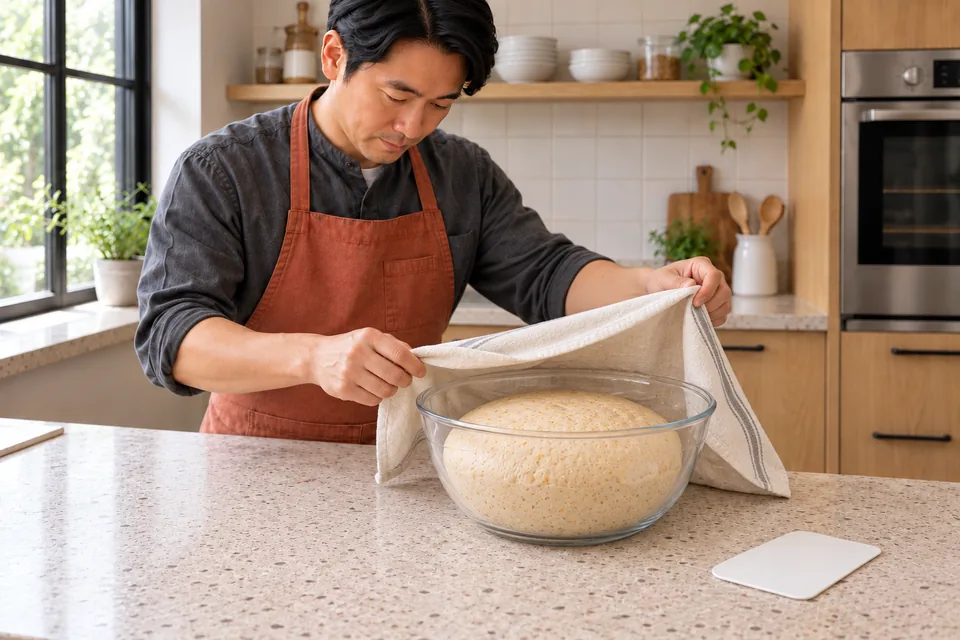
    Cover and let the dough rise until aerated.

    Ready when: The dough is aerated and roughly doubled.

  3. Fold in sultanas and quartered cherries

    5–10 min

    Spread the dough into a thick rectangle. Scatter over the sultanas and quartered cherries, then fold and turn gently until the fruit is dispersed.

    The cook folds small sultanas and glacé-cherry pieces into one dough rectangle.
    Fold in the sultanas and quartered cherries after the first rise.

    Ready when: Fruit is spread through the dough without being crushed into a paste.

  4. Shape into the separately buttered tin

    8–10 min

    Butter a 23×13×8 cm loaf tin. Use the shaping flour sparingly. Pat the dough into a rectangle, roll it into a short log and tuck the ends to fit the tin. Place seam-side down.

    A single modest fruit-dough log is placed in one loaf tin.
    Shape one log and place it seam-side down in the buttered tin.

    Ready when: One even log fills the length of the tin.

  5. Proof and heat the oven

    45–90 min

    Cover loosely and leave at 22–24°C for 45–90 minutes. During the last 20 minutes, heat the oven to 180°C conventional.

    The fruit loaf has risen in its tin, with no wash or icing yet.
    Proof until puffy and a light dent returns slowly.

    Ready when: The top is puffy and a light fingertip dent slowly returns.

  6. Bake until the bread centre is cooked

    35–45 min

    Bake for 35–45 minutes. Shield loosely with foil if the top colours early. Probe the thick bread centre away from fruit.

    The cook probes the centre of a baked loaf in its hot tin.
    Bake until the base is firm and check the bread centre.

    Ready when: The base is firm and the bread centre reaches about 93°C.

  7. Cool completely before icing

    90 min

    Leave in the tin for 10 minutes, then turn out onto a rack for at least 80 minutes more.

    One uniced fruit loaf cools on a rack beside its empty tin.
    Cool in the tin briefly, then turn out and cool fully.

    Ready when: The loaf is cool through the centre before icing.

  8. Mix and drizzle the separate icing

    12–15 min

    Mix the icing sugar with 15 g water until smooth. Drizzle it in broad lines across the cooled top. Leave for 10 minutes for an initial set, then cut into 12 slices.

    The cook drizzles white water icing over one cooled cherry and sultana loaf.
    Drizzle broad icing lines over the cooled loaf and let them set.

    Ready when: The icing stays on the crust and the fruit crumb slices cleanly.

What can go wrong, and how can I fix it?

What you noticeLikely causeWhat to do
Fruit tears the dough.Large sticky cherry pieces or forceful kneading after fermentation.Fold gently with a scraper and keep any exposed fruit tucked inside. Quarter and pat the cherries before weighing.
Icing disappears into the crust.The bread is still warm.Allow the loaf to cool fully before adding more icing. Check the centre as well as the crust before icing.
Useful recipe notes

Storage: Once cool, wrap and refrigerate within 2 hours of baking; use within 2 days. Freeze uniced slices for up to 1 month. Let icing set before wrapping.

Contains: wheat, milk, sulphites if present in dried or glacé fruit.

This Nepedia version has not been kitchen-tested.

See the detailed method and ratios in , or follow ingredients through the .

Ingredient proportions & recipe details

Iced cherry and sultana loaf at a glance

Makes
1 loaf, about 12 slices
Heat
180°C conventional
Baking time
35–45 min
Cuisine / style
International
Leavening
Yeast
Bulk fermentation (including folding)
60–120 min · The dough is aerated and roughly doubled.
How do the ingredient proportions compare?

Percentages compare each listed weight with the combined flour weight (100%). These are ingredient ratios, not dough hydration; milk, eggs and fillings contain other ingredients as well as water.

Formula componentGramsFlour = 100%
Strong white bread flour400 g100%
Whole milk140 g35%
Water120 g30%
Unsalted butter40 g10%
Caster sugar40 g10%
Fine salt8 g2%
Instant dried yeast7 g1.8%
Ground cinnamon2 g0.5%
Finely grated orange zest6 g1.5%
Soft sultanas50 g12.5%
Glacé cherries60 g15%