Nepedia

Brioche

Twelve buttery breakfast rolls with a fine, tender crumb. Make the dough the evening before so it is firm enough to shape the next morning.

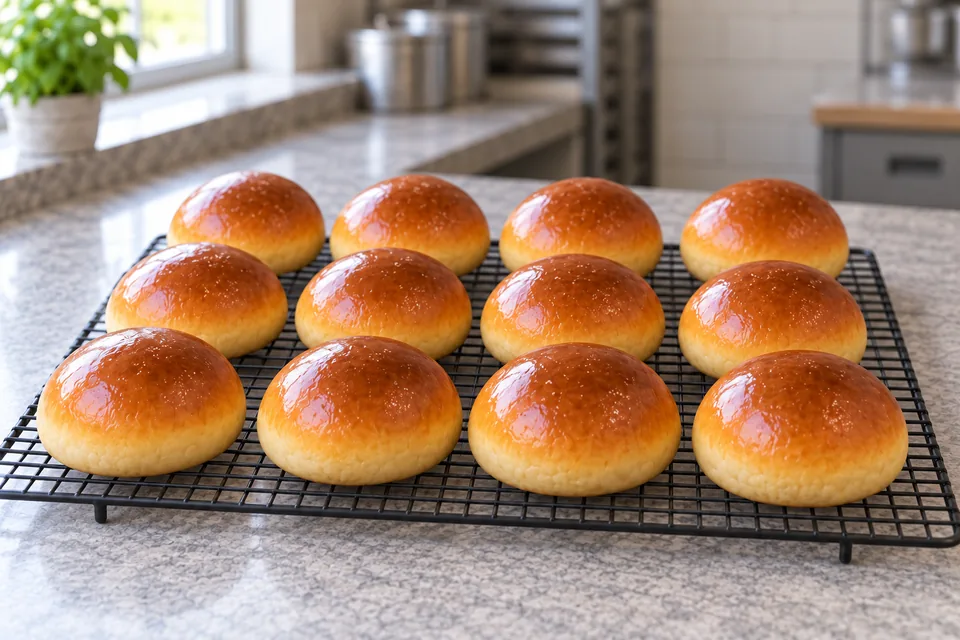
Twelve glossy golden round brioches arranged in three rows on a black cooling rack.
Makes
12 individual brioches
Heat
190°C conventional
Baking time
18–22 min
Cuisine / style
France
View

Brioche

Makes
12 individual brioches
Heat
190°C conventional
Baking time
18–22 min
Cuisine / style
France
France · Brioche

Brioche

Twelve buttery breakfast rolls with a fine, tender crumb. Make the dough the evening before so it is firm enough to shape the next morning.

Method

  1. 01 · Mix and develop the dough

    10–13 min

    Use: Strong white bread flour; Caster sugar; Instant dried yeast; Fine salt; Whole milk; Eggs

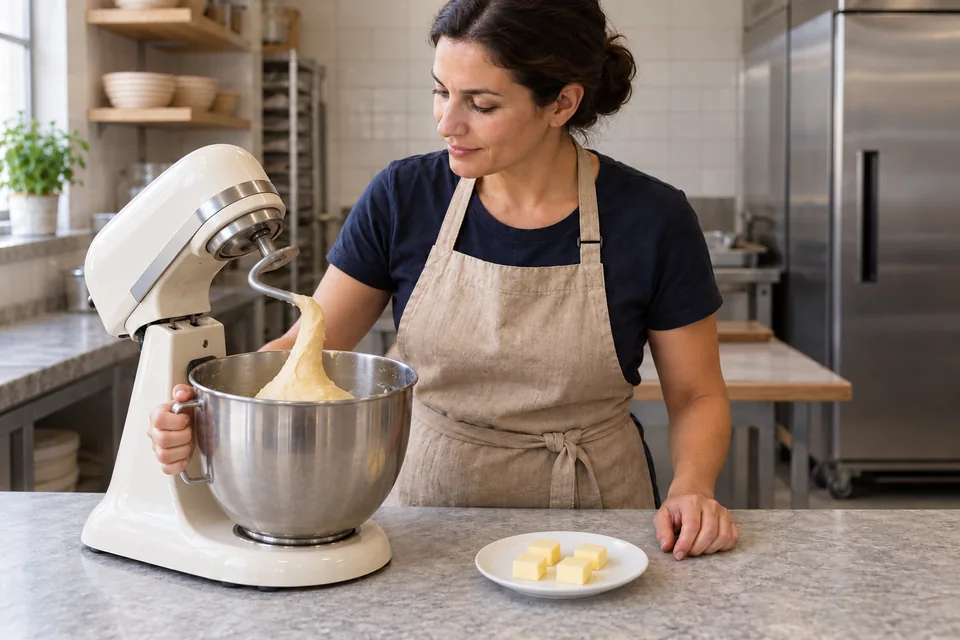
    Put the flour, sugar, yeast, salt, milk and three dough eggs in a stand-mixer bowl. Fit the dough hook, mix on low until combined, then knead at the manufacturer’s recommended dough speed for 8–10 minutes. Scrape down the bowl as needed.

    Ready when: The dough is cohesive and stretches before tearing; it may still cling to the bottom of the bowl.
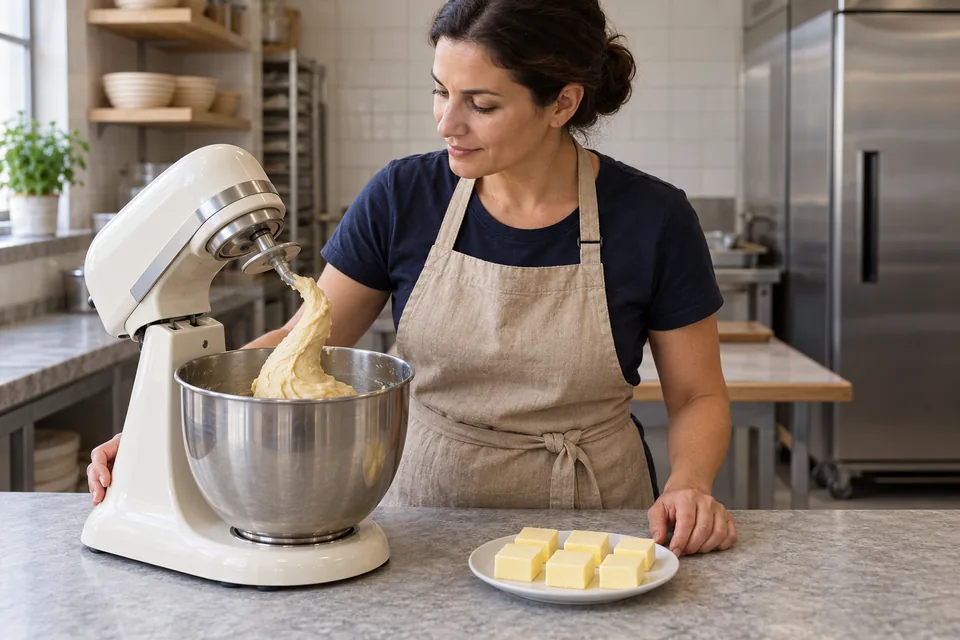
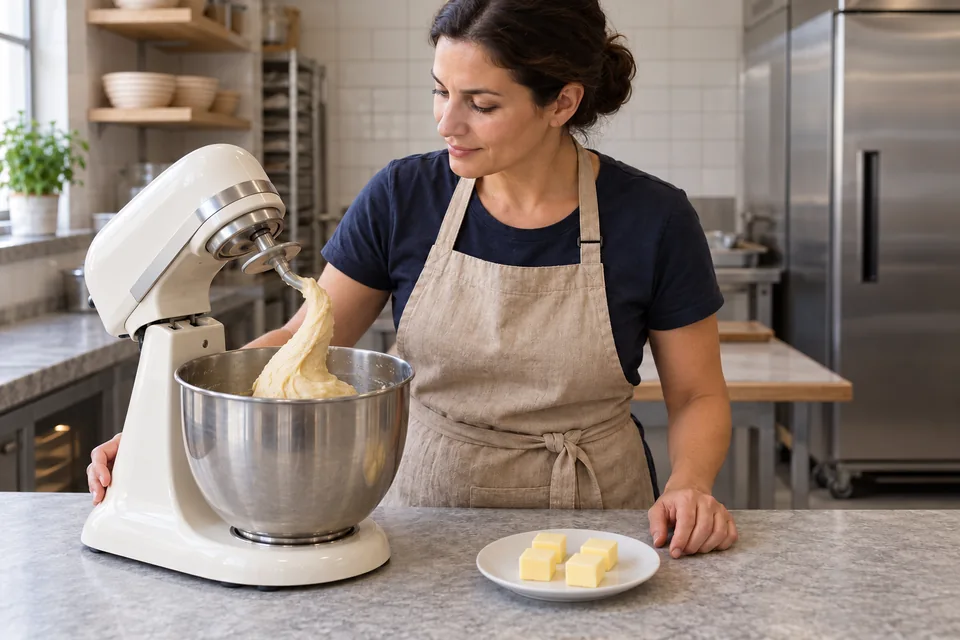
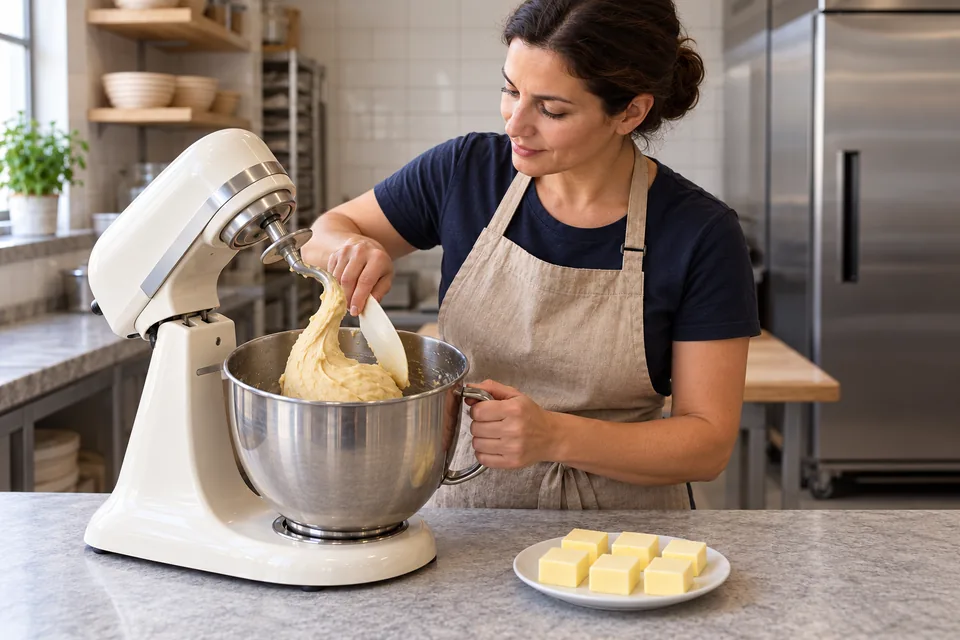
    Baker beside a stopped stand mixer holding elastic dough on its hook, with six butter pieces on a plate.
    01 Brioche — step 1Develop the dough before adding the butter.
  2. 02 · Work in the butter

    12–18 min

    Use: Unsalted butter

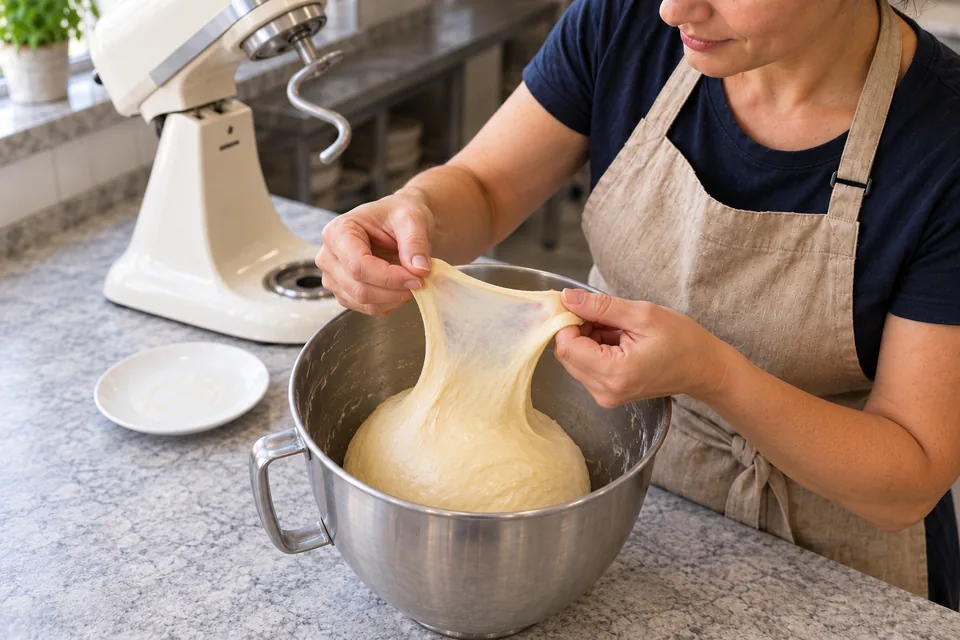
    With the mixer running slowly, add the butter a piece at a time, waiting until each piece disappears before adding the next. Keep mixing, allowing 12–18 minutes in total for adding the butter and finishing the dough. Scrape the bowl once or twice. If the dough becomes greasy or the bowl feels warm, stop and chill the covered bowl for 15 minutes before continuing.

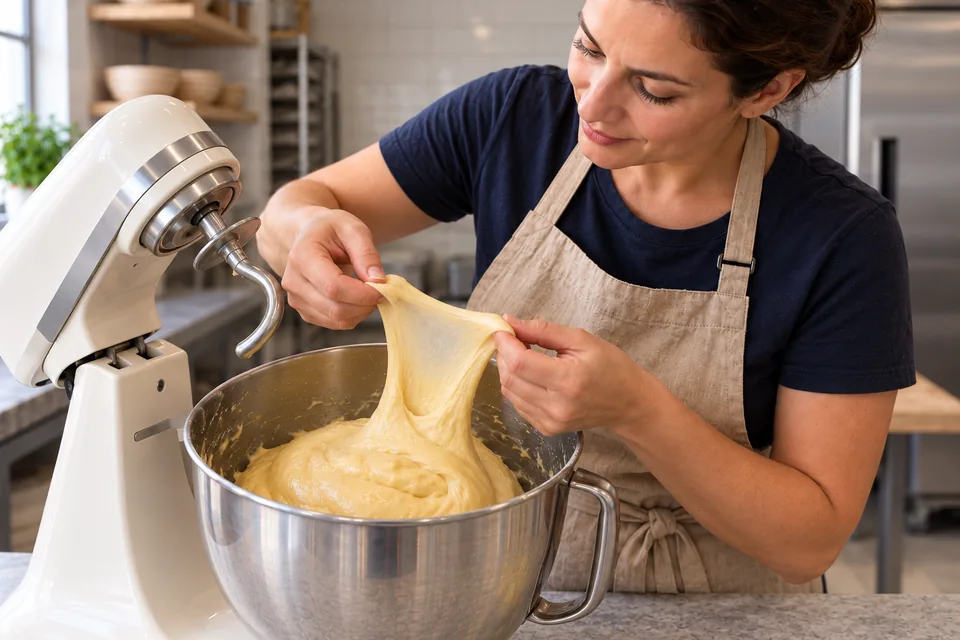
    Ready when: The butter is fully absorbed. The dough looks smooth and glossy and can stretch into a thin patch without immediately breaking.
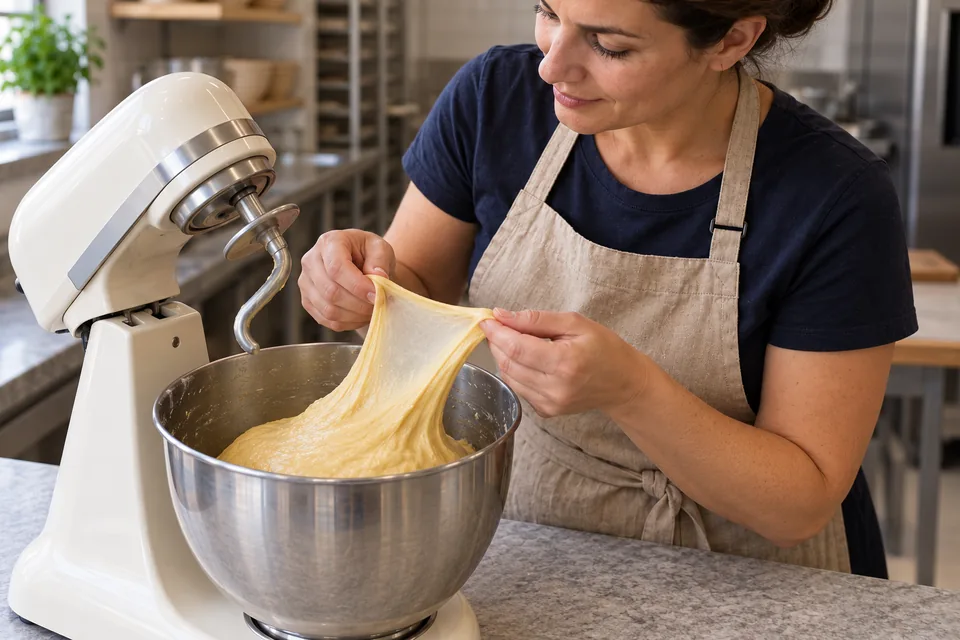
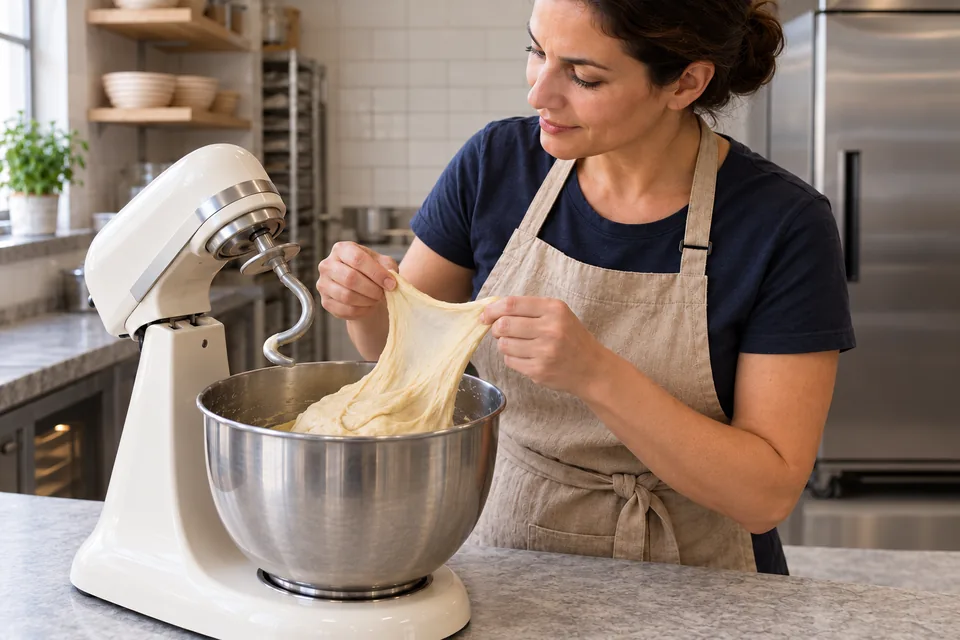
    Baker gently stretches a glossy thin sheet of brioche dough above the mixer bowl.
    02 Brioche — step 2Mix until the butter is absorbed and the dough stretches thinly.
  3. 03 · Let the dough begin to rise

    60 min

    Use:

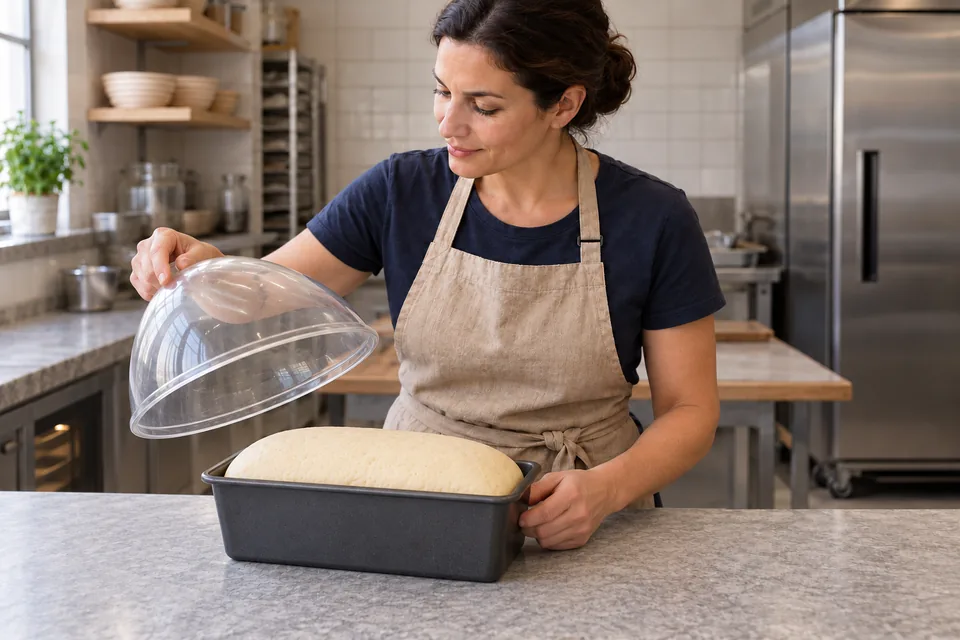
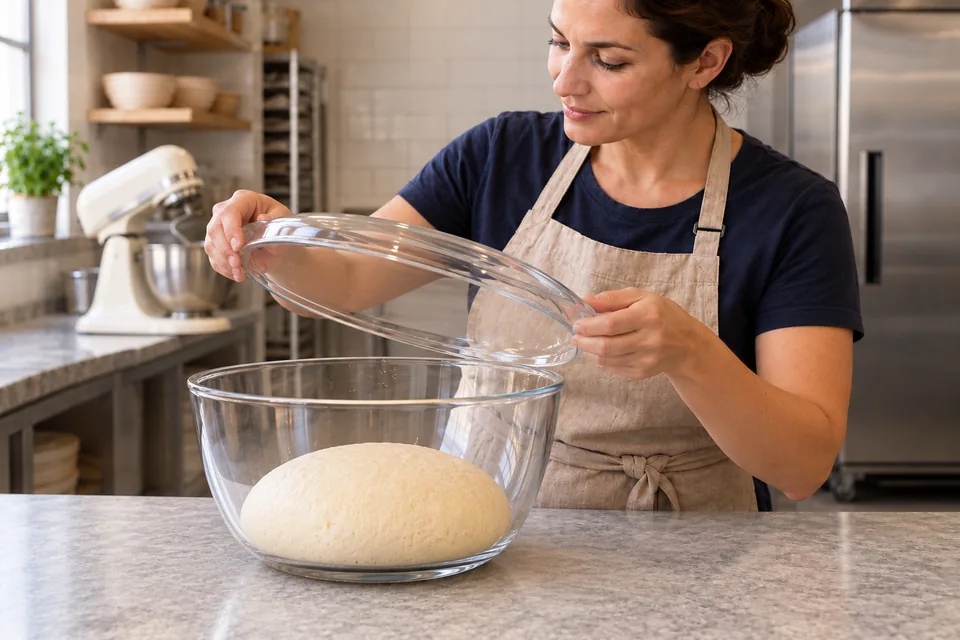
    Scrape the dough into a covered bowl with room for expansion. Leave at about 22–24°C for 1 hour.

    Ready when: The dough begins to swell and feels lighter; it does not need to double before chilling.
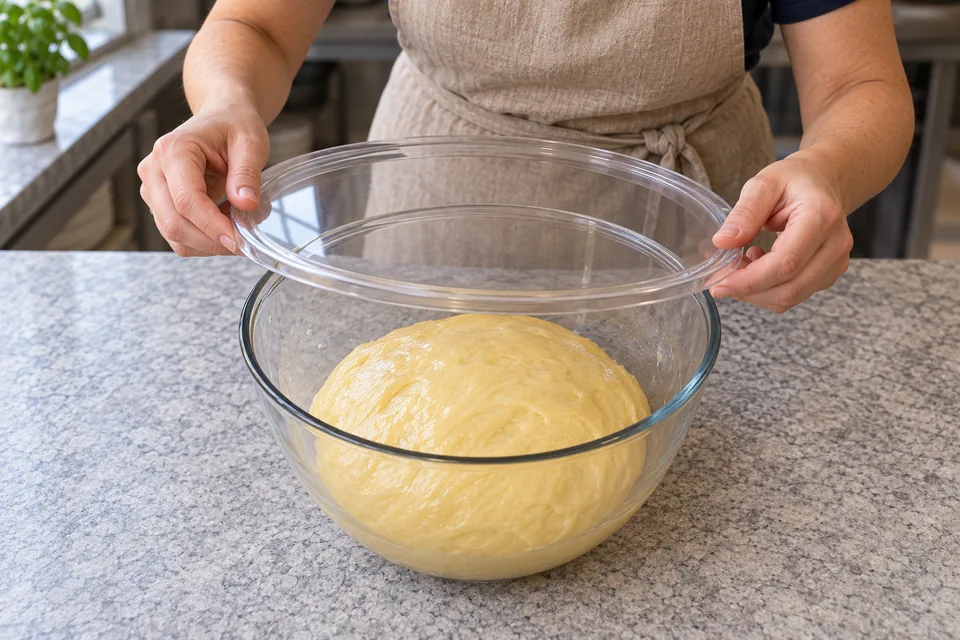
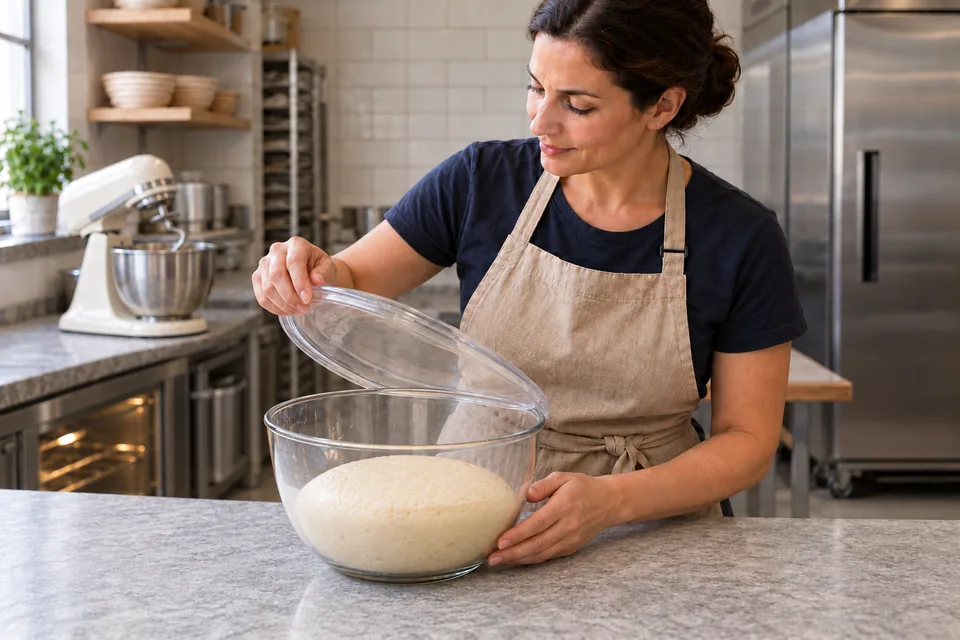
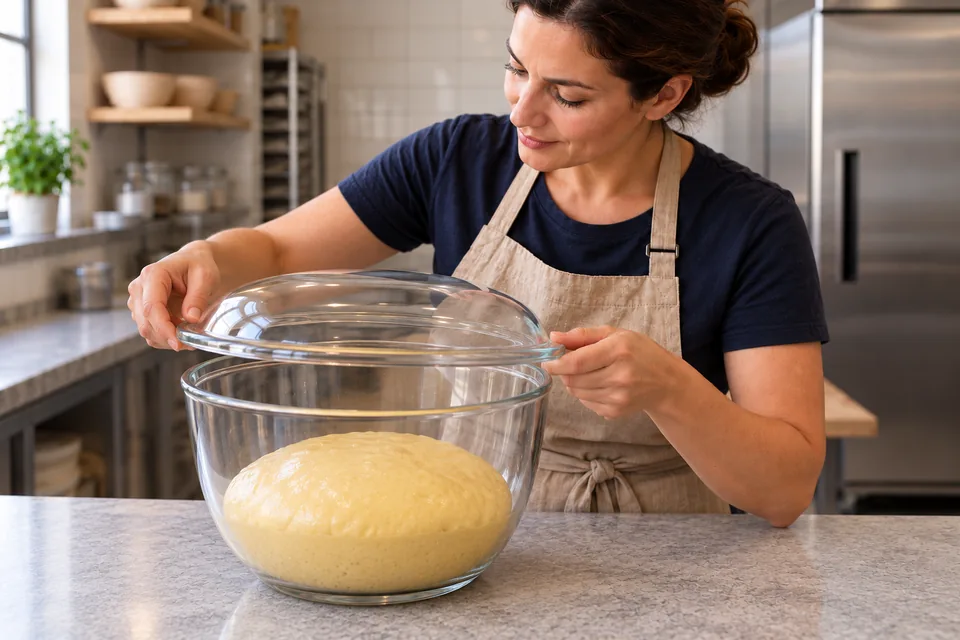
    Hands lower a clear cover over a glass bowl containing a glossy dome of brioche dough.
    03 Brioche — step 3Cover the dough for its first rise.
  4. 04 · Chill overnight

    480–720 min

    Use:

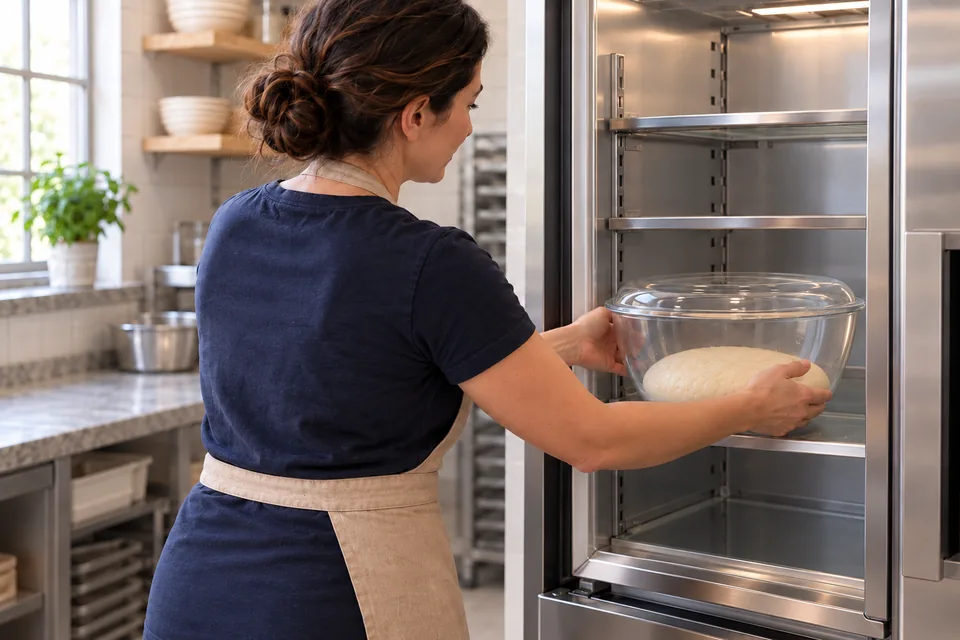
    Press the dough down gently, cover the bowl well and refrigerate for 8–12 hours. Allow space under the cover for the dough to expand.

    Ready when: The dough is cold and firm enough to lift and divide without smearing.
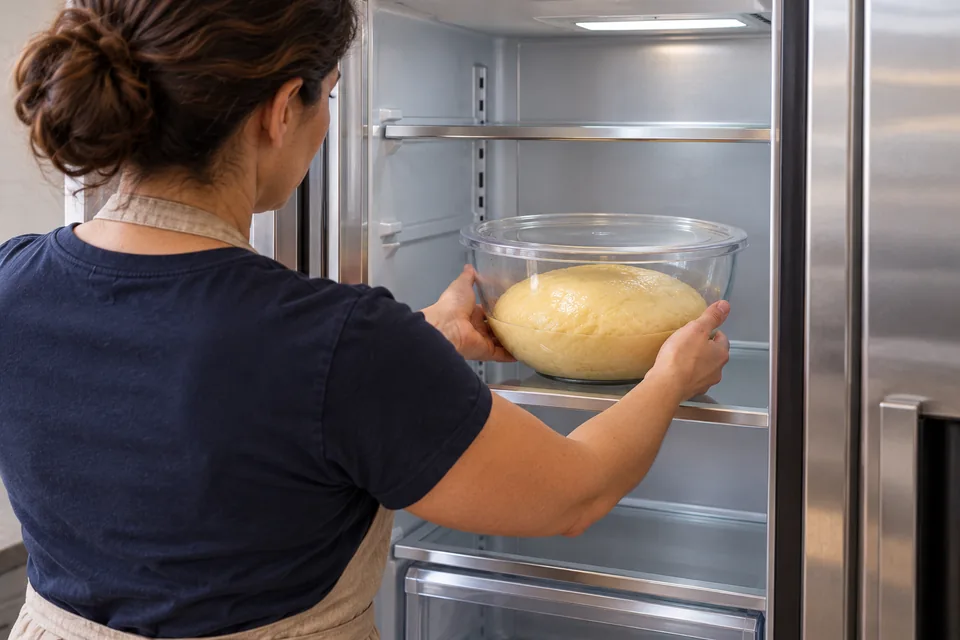
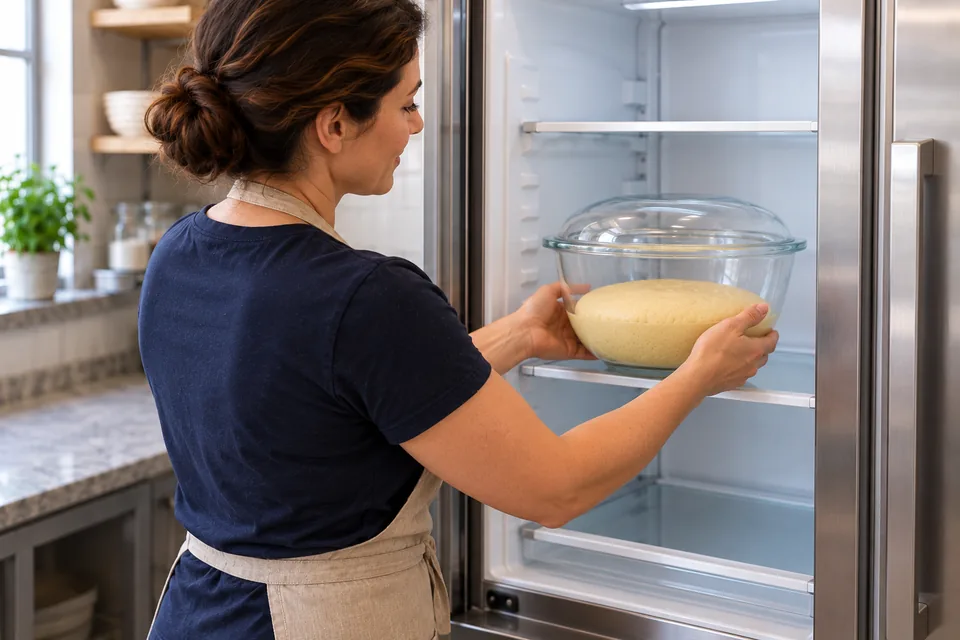
    Baker places the covered glass bowl of brioche dough on a refrigerator shelf.
    04 Brioche — step 4Refrigerate the covered dough with room to expand.
  5. 05 · Shape the rolls

    12–15 min

    Use: Unsalted butter

    Grease all twelve wells of a standard muffin tin with the tin butter. Divide the cold dough into twelve equal pieces, about 70 g each. Fold each piece’s edges into its centre, turn it over and cup it against the clean work surface to make a smooth ball. Put each ball seam-side down in a well.

    Ready when: The balls are evenly sized with closed seams. Work while the dough is cold; chill it briefly if it softens.
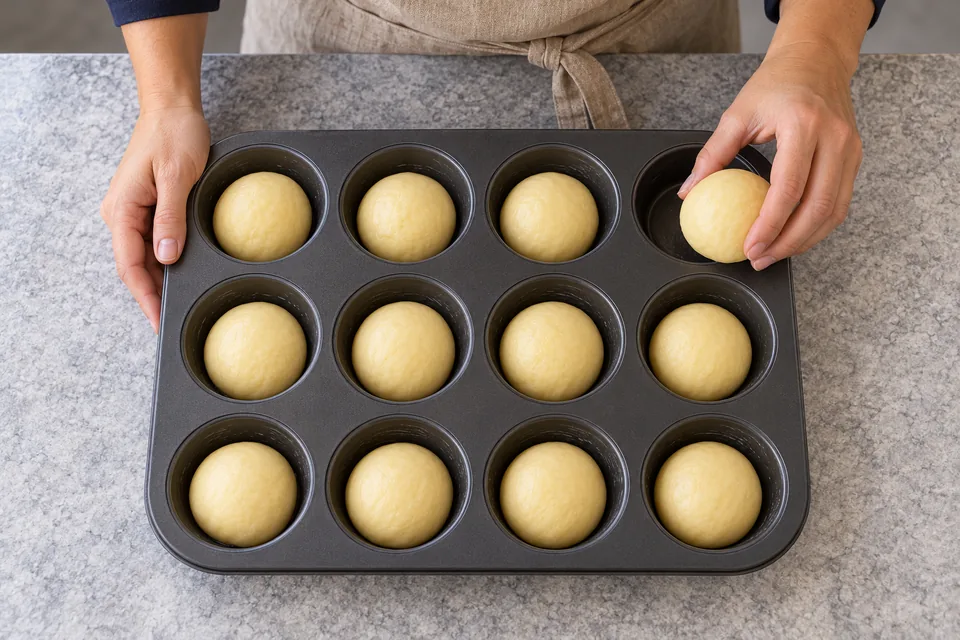
    Eleven round dough balls fill a three-by-four muffin tin as the baker places the twelfth in the empty corner well.
    05 Brioche — step 5Shape twelve equal balls and place them in the greased muffin tin.
  6. 06 · Proof the rolls and heat the oven

    150–240 min

    Use:

    Cover the tin loosely and let the buns rise at about 24–26°C for 2½–4 hours. Keep them away from direct heat. During the final 20 minutes, heat a conventional oven to 190°C with a rack in the middle.

    Ready when: The buns are noticeably larger, soft and gently wobbly. A light fingertip dent returns slowly; tight, firm dough needs more time.
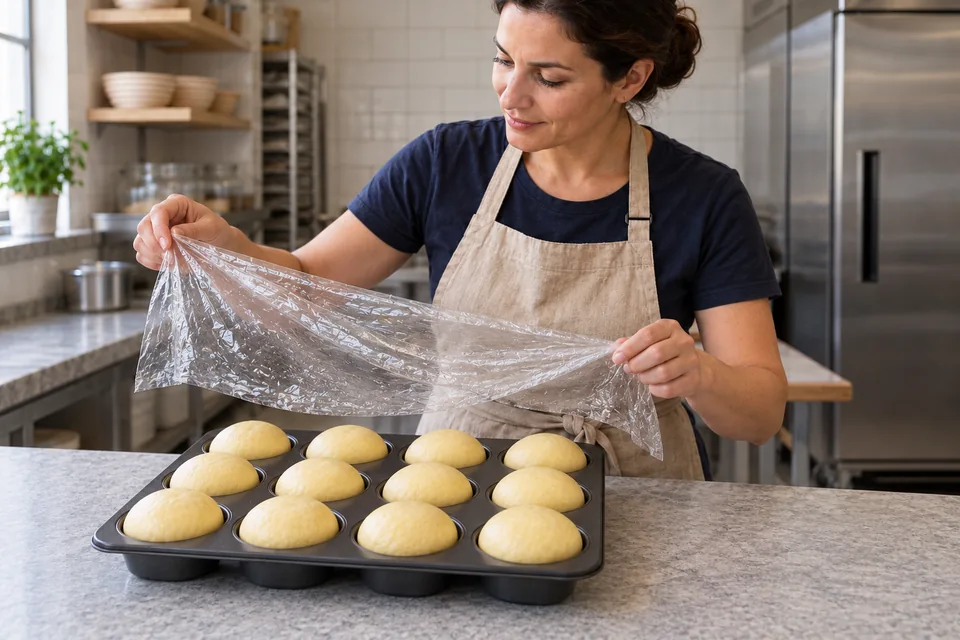
    Baker lifts a loose transparent cover above twelve risen pale brioche domes in the muffin tin.
    06 Brioche — step 6Let the buns rise until noticeably larger and soft.
  7. 07 · Glaze and bake

    18–22 min

    Use: Egg

    Brush the tops lightly with the beaten glaze egg without letting it pool around the edges; discard unused wash. Bake at 190°C conventional for 18–22 minutes, checking from 18 minutes. If the tops darken before the centres are baked, cover loosely with foil.

    Ready when: The tops are deep golden and the sides feel set. A probe inserted into the centre of a middle bun should read at least 88°C.
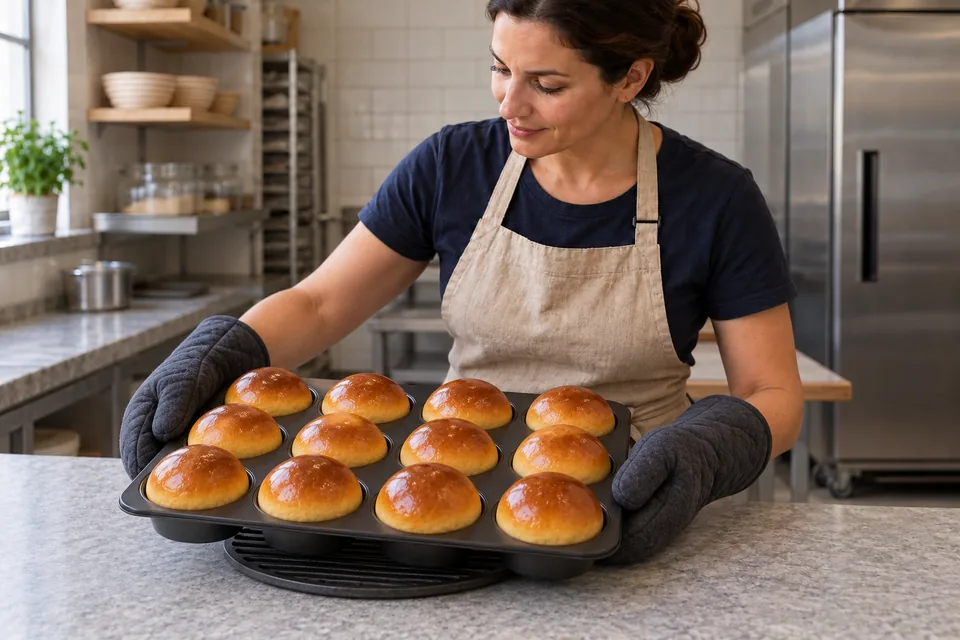
    Baker wearing oven mitts lowers a tin of twelve golden round brioches onto a trivet.
    07 Brioche — step 7Bake the lightly glazed buns until deep golden and set.
  8. 08 · Cool the brioches

    60 min

    Use:

    Leave the buns in the tin for 5 minutes, then lift them onto a wire rack. Let them cool for about 1 hour before storing.

    Ready when: The sides hold their shape and the centres no longer release visible steam when opened.
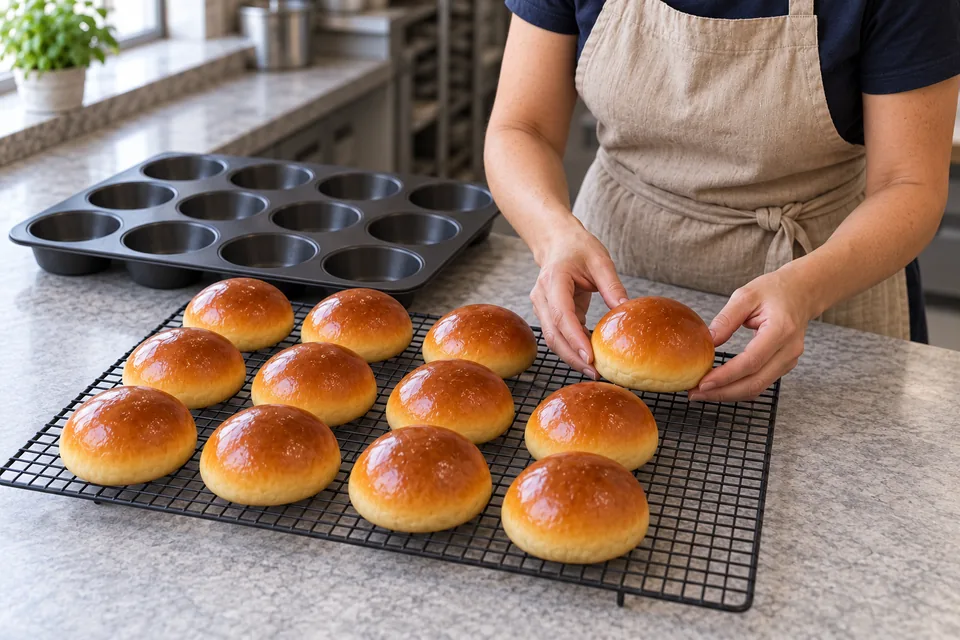
    Baker sets the last of twelve golden brioches on a wire rack beside the empty muffin tin.
    08 Brioche — step 8Lift the buns onto a wire rack to cool.

What to look for

StageLook / feel forNeeds attention
Mix and develop the doughThe dough is cohesive and stretches before tearing; it may still cling to the bottom of the bowl.
Work in the butterThe butter is fully absorbed. The dough looks smooth and glossy and can stretch into a thin patch without immediately breaking.
Let the dough begin to riseThe dough begins to swell and feels lighter; it does not need to double before chilling.
Chill overnightThe dough is cold and firm enough to lift and divide without smearing.
Shape the rollsThe balls are evenly sized with closed seams. Work while the dough is cold; chill it briefly if it softens.
Proof the rolls and heat the ovenThe buns are noticeably larger, soft and gently wobbly. A light fingertip dent returns slowly; tight, firm dough needs more time.
Glaze and bakeThe tops are deep golden and the sides feel set. A probe inserted into the centre of a middle bun should read at least 88°C.
Cool the briochesThe sides hold their shape and the centres no longer release visible steam when opened.

Troubleshooting

If you see thisLikely causeWhat to do nowNext time
Butter smears around the bowl instead of mixing in.The butter was too soft, added too quickly, or the dough became warm.Stop mixing and chill the covered bowl for 15 minutes, then resume slowly.Use cool, pliable butter and add it in small portions after developing dough strength.
The shaped buns stay small and firm.The chilled dough is still cold, the room is cool, or the yeast is weak.Allow more time in a mild 24–26°C place and watch for swelling and softness.Use yeast within date and allow several hours for final proof; do not use a hot oven to hurry the buns.
The outside is dark but the centre is doughy.The buns browned before enough heat reached the centres.Cover loosely with foil and continue baking until the centres set and reach at least 88°C.Use equal portions, preheat accurately and check a middle bun rather than relying on colour alone.

Storage: Once completely cool, keep airtight at room temperature for up to 2 days. Freeze the cooled buns in a sealed bag for up to 2 months. Thaw while wrapped, then warm at 150°C conventional for 5–8 minutes if desired.; Contains: wheat, gluten, egg, milk.; This Nepedia version has not been kitchen-tested.

Ingredient choices & substitutions

No brand is specified.

Match the ingredient’s function and weight. See the flour, gluten, yeast and salt guide.

Other approaches to this recipe
Cook / recipeUseWhat differs

The working ingredients and method form one recipe. Different formulas are compared without averaging their quantities or rise schedules.
Nepedia

Recipe

Brioche

Twelve buttery breakfast rolls with a fine, tender crumb. Make the dough the evening before so it is firm enough to shape the next morning.

How do I make it?

  1. Mix and develop the dough

    10–13 min

    Put the flour, sugar, yeast, salt, milk and three dough eggs in a stand-mixer bowl. Fit the dough hook, mix on low until combined, then knead at the manufacturer’s recommended dough speed for 8–10 minutes. Scrape down the bowl as needed.

    Baker beside a stopped stand mixer holding elastic dough on its hook, with six butter pieces on a plate.
    Develop the dough before adding the butter.

    Ready when: The dough is cohesive and stretches before tearing; it may still cling to the bottom of the bowl.

  2. Work in the butter

    12–18 min

    With the mixer running slowly, add the butter a piece at a time, waiting until each piece disappears before adding the next. Keep mixing, allowing 12–18 minutes in total for adding the butter and finishing the dough. Scrape the bowl once or twice. If the dough becomes greasy or the bowl feels warm, stop and chill the covered bowl for 15 minutes before continuing.

    Baker gently stretches a glossy thin sheet of brioche dough above the mixer bowl.
    Mix until the butter is absorbed and the dough stretches thinly.

    Ready when: The butter is fully absorbed. The dough looks smooth and glossy and can stretch into a thin patch without immediately breaking.

  3. Let the dough begin to rise

    60 min

    Scrape the dough into a covered bowl with room for expansion. Leave at about 22–24°C for 1 hour.

    Hands lower a clear cover over a glass bowl containing a glossy dome of brioche dough.
    Cover the dough for its first rise.

    Ready when: The dough begins to swell and feels lighter; it does not need to double before chilling.

  4. Chill overnight

    480–720 min

    Press the dough down gently, cover the bowl well and refrigerate for 8–12 hours. Allow space under the cover for the dough to expand.

    Baker places the covered glass bowl of brioche dough on a refrigerator shelf.
    Refrigerate the covered dough with room to expand.

    Ready when: The dough is cold and firm enough to lift and divide without smearing.

  5. Shape the rolls

    12–15 min

    Grease all twelve wells of a standard muffin tin with the tin butter. Divide the cold dough into twelve equal pieces, about 70 g each. Fold each piece’s edges into its centre, turn it over and cup it against the clean work surface to make a smooth ball. Put each ball seam-side down in a well.

    Eleven round dough balls fill a three-by-four muffin tin as the baker places the twelfth in the empty corner well.
    Shape twelve equal balls and place them in the greased muffin tin.

    Ready when: The balls are evenly sized with closed seams. Work while the dough is cold; chill it briefly if it softens.

  6. Proof the rolls and heat the oven

    150–240 min

    Cover the tin loosely and let the buns rise at about 24–26°C for 2½–4 hours. Keep them away from direct heat. During the final 20 minutes, heat a conventional oven to 190°C with a rack in the middle.

    Baker lifts a loose transparent cover above twelve risen pale brioche domes in the muffin tin.
    Let the buns rise until noticeably larger and soft.

    Ready when: The buns are noticeably larger, soft and gently wobbly. A light fingertip dent returns slowly; tight, firm dough needs more time.

  7. Glaze and bake

    18–22 min

    Brush the tops lightly with the beaten glaze egg without letting it pool around the edges; discard unused wash. Bake at 190°C conventional for 18–22 minutes, checking from 18 minutes. If the tops darken before the centres are baked, cover loosely with foil.

    Baker wearing oven mitts lowers a tin of twelve golden round brioches onto a trivet.
    Bake the lightly glazed buns until deep golden and set.

    Ready when: The tops are deep golden and the sides feel set. A probe inserted into the centre of a middle bun should read at least 88°C.

  8. Cool the brioches

    60 min

    Leave the buns in the tin for 5 minutes, then lift them onto a wire rack. Let them cool for about 1 hour before storing.

    Baker sets the last of twelve golden brioches on a wire rack beside the empty muffin tin.
    Lift the buns onto a wire rack to cool.

    Ready when: The sides hold their shape and the centres no longer release visible steam when opened.

What can go wrong, and how can I fix it?

What you noticeLikely causeWhat to do
Butter smears around the bowl instead of mixing in.The butter was too soft, added too quickly, or the dough became warm.Stop mixing and chill the covered bowl for 15 minutes, then resume slowly. Use cool, pliable butter and add it in small portions after developing dough strength.
The shaped buns stay small and firm.The chilled dough is still cold, the room is cool, or the yeast is weak.Allow more time in a mild 24–26°C place and watch for swelling and softness. Use yeast within date and allow several hours for final proof; do not use a hot oven to hurry the buns.
The outside is dark but the centre is doughy.The buns browned before enough heat reached the centres.Cover loosely with foil and continue baking until the centres set and reach at least 88°C. Use equal portions, preheat accurately and check a middle bun rather than relying on colour alone.
Useful recipe notes

Storage: Once completely cool, keep airtight at room temperature for up to 2 days. Freeze the cooled buns in a sealed bag for up to 2 months. Thaw while wrapped, then warm at 150°C conventional for 5–8 minutes if desired.

Contains: wheat, gluten, egg, milk.

This Nepedia version has not been kitchen-tested.

See the detailed method and ratios in , or follow ingredients through the .

Ingredient proportions & recipe details

Brioche at a glance

Makes
12 individual brioches
Heat
190°C conventional
Baking time
18–22 min
Cuisine / style
France
Leavening
Yeast
How do the ingredient proportions compare?

Percentages compare each listed weight with the combined flour weight (100%). These are ingredient ratios, not dough hydration; milk, eggs and fillings contain other ingredients as well as water.

Formula componentGramsFlour = 100%
Strong white bread flour375 g100%
Caster sugar40 g10.7%
Instant dried yeast5 g1.3%
Fine salt7 g1.9%
Unsalted butter185 g49.3%

Apricot brioche loaves

Makes
2 small loaves, 16 filled portions total
Heat
180°C conventional
Baking time
30–40 min
Cuisine / style
France
France · Brioche

Apricot brioche loaves

Two small butter-rich loaves built from soft brioche balls with dried apricots inside. Start the dough the day before and shape it while cold.

Method

  1. 01 · Mix and develop the enriched dough

    10–13 min

    Use: Strong white bread flour; Caster sugar; Instant dried yeast; Fine salt; Whole milk; Beaten whole egg

    Mix the dough flour, sugar, yeast, salt, milk and dough egg in a stand-mixer bowl with the dough hook. Once combined, knead at the manufacturer’s recommended dough speed for 8–10 minutes, scraping the bowl as needed.

    Ready when: The dough pulls into an elastic mass and stretches before tearing.

    The cook checks elastic pale dough in a stopped mixer beside six separate butter pieces.
    01 DevelopDevelop the dough before adding the butter.
  2. 02 · Work in the butter gradually

    12–18 min

    Use: Unsalted butter

    Add the 185 g butter gradually with the mixer running slowly, letting each piece disappear before adding the next. Allow 12–18 minutes for the addition and final mixing. If the bowl warms or the dough looks greasy, cover and chill for 15 minutes before continuing.

    Ready when: All butter is incorporated; the dough is glossy and can stretch into a thin patch.

    The cook stretches a small translucent patch of glossy yellow brioche dough above its bowl.
    02 Add ButterWork in the butter until the dough stretches thinly.
  3. 03 · Let the dough rise

    60 min

    Use:

    Move the dough to a covered bowl with room for expansion. Leave at 22–24°C for about 1 hour.

    Ready when: The dough begins to swell and feels lighter, without needing to double yet.

    The cook lowers a clear cover above a softly domed yellow dough with ample bowl space above it.
    03 First RiseCover and let the dough begin to swell.
  4. 04 · Chill the rich dough overnight

    480–720 min

    Use:

    Press the dough down gently, cover well and refrigerate for 8–12 hours.

    Ready when: The dough is cold and firm enough to divide without smearing.

    The cook slides the covered dough bowl onto a refrigerator shelf, leaving space above the dough.
    04 ChillCover well and refrigerate until cold and firm.
  5. 05 · Fill sixteen balls and arrange in two tins

    20–25 min

    Use: Butter for the tins; Flour for shaping; Soft dried apricots

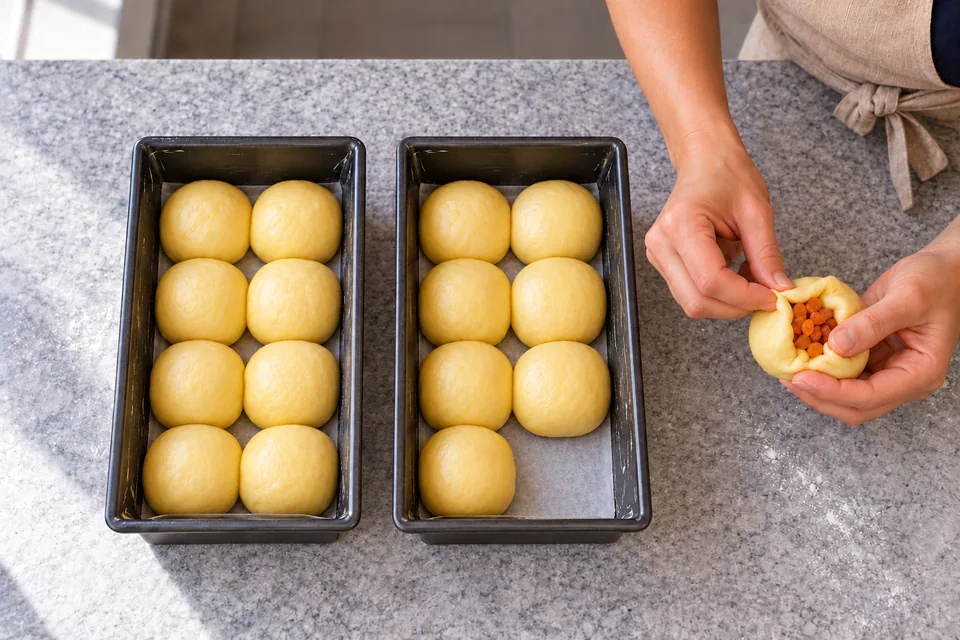
    Grease two 20×10×7 cm loaf tins and line their bases with baking paper. On a lightly floured worktop, divide the cold dough into 16 equal pieces, about 52 g each. Divide all the diced apricots between them, about 9 g per piece. Flatten each dough piece, place its fruit in the centre, bring the edges together and pinch closed. Set eight balls seam-side down in each tin, in four rows of two.

    Ready when: Every ball encloses its apricots, with a closed seam. There are sixteen balls total and no remaining filling.

    Two small tins hold fifteen filled dough balls while the cook seals the last apricot-filled piece.
    05 Fill ShapeEnclose the apricots and place eight balls in each tin.
  6. 06 · Proof slowly and heat the oven

    150–240 min

    Use:

    Cover loosely and leave at 24–26°C for 2½–4 hours. Keep away from direct heat. Heat the oven to 180°C conventional during the final 20 minutes.

    Ready when: The balls are puffy, touching and close to the tin rims. A light fingertip dent recovers slowly.

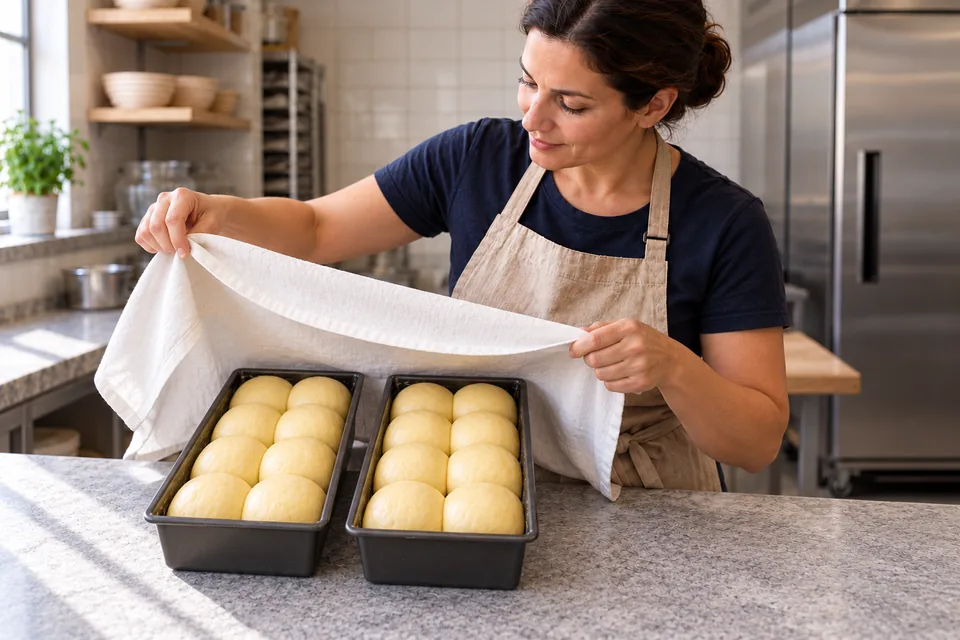
    The cook lifts a white cloth above two tins, each holding eight puffy joined brioche balls.
    06 ProofLet both loaves rise until the balls are puffy and touching.
  7. 07 · Brush and bake both loaves

    32–42 min

    Use: Beaten egg for brushing

    Brush the tops lightly with the separate beaten wash egg. Bake both tins on the middle rack for 30–40 minutes. Cover loosely with foil if the tops brown before the centres cook. Check the bread in the middle of each loaf with a probe, avoiding a pocket of fruit.

    Ready when: The bread centre reads at least 88°C. The tops are deep golden and the sides feel set.

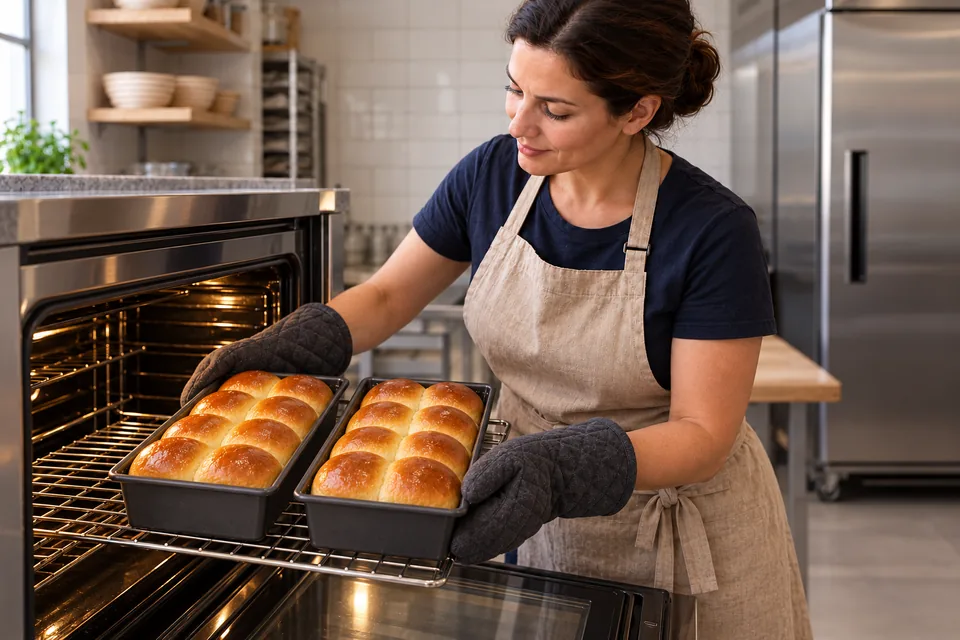
    Two tins on the oven rack each hold a golden brioche loaf with eight glossy joined domes.
    07 Wash BakeBrush lightly with egg and bake both loaves until deep golden.
  8. 08 · Cool before slicing

    90 min

    Use:

    Leave in the tins for 10 minutes, then turn out onto a rack. Cool for at least another 80 minutes before slicing or storing.

    Ready when: The loaves hold their shape and the crumb around the fruit is set.

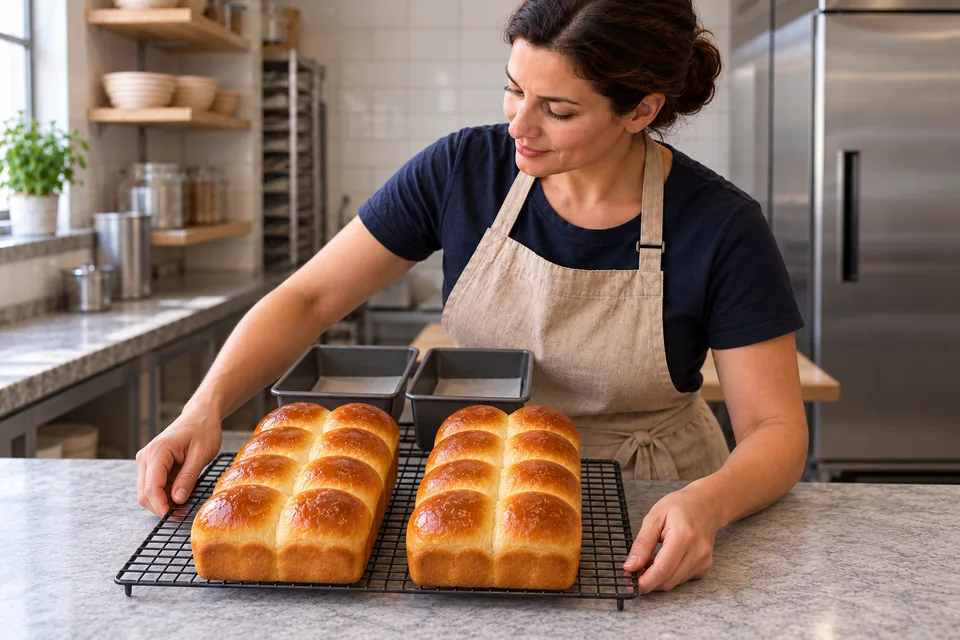
    Two whole golden brioche loaves, each with eight joined domes, cool on a rack beside two empty tins.
    08 CoolTurn out and cool fully before cutting.

What to look for

StageLook / feel forNeeds attention
Mix and develop the enriched doughThe dough pulls into an elastic mass and stretches before tearing.
Work in the butter graduallyAll butter is incorporated; the dough is glossy and can stretch into a thin patch.
Let the dough riseThe dough begins to swell and feels lighter, without needing to double yet.
Chill the rich dough overnightThe dough is cold and firm enough to divide without smearing.
Fill sixteen balls and arrange in two tinsEvery ball encloses its apricots, with a closed seam. There are sixteen balls total and no remaining filling.
Proof slowly and heat the ovenThe balls are puffy, touching and close to the tin rims. A light fingertip dent recovers slowly.
Brush and bake both loavesThe bread centre reads at least 88°C. The tops are deep golden and the sides feel set.
Cool before slicingThe loaves hold their shape and the crumb around the fruit is set.

Troubleshooting

If you see thisLikely causeWhat to do nowNext time
Butter leaks while mixing.The dough became too warm before the butter was fully absorbed.Cover and chill briefly, then resume gently.Use cool pliable butter and pause if the bowl warms.
Fruit escapes through a seam.The apricot pieces reached the edge or the seam was not sealed.Before proofing, pinch the dough closed around the fruit and place the seam underneath.Divide the filling evenly and keep a clean border around each portion.
The top is dark but the middle is damp.The rich dough browned before the loaf cooked through.Tent loosely with foil and continue baking until the bread centre reaches the stated cue.Use the loaf temperature and time rather than a small-bun schedule.

Storage: Once completely cool, wrap and keep at room temperature for up to 2 days. Slice and toast older brioche. Freeze the wrapped loaves or slices for up to 2 months; thaw while wrapped before warming.; Contains: wheat, milk, egg, sulphites if present in the dried apricots.; This Nepedia version has not been kitchen-tested.

Ingredient choices & substitutions

No brand is specified.

Match the ingredient’s function and weight. See the flour, gluten, yeast and salt guide.

Other approaches to this recipe
Cook / recipeUseWhat differs

The working ingredients and method form one recipe. Different formulas are compared without averaging their quantities or rise schedules.
Nepedia
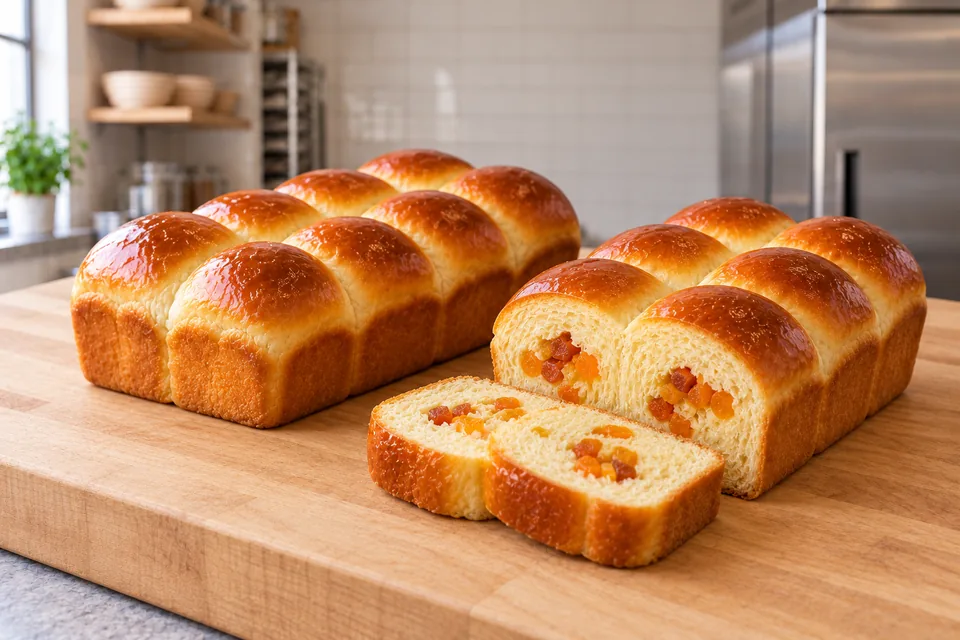
Two golden brioche loaves, one shortened by a thick two-lobed slice, show cream-yellow crumb and two pockets of diced apricot filling.
Apricot brioche loaves with a soft, butter-rich crumb.

Recipe

Apricot brioche loaves

Two small butter-rich loaves built from soft brioche balls with dried apricots inside. Start the dough the day before and shape it while cold.

How do I make it?

  1. Mix and develop the enriched dough

    10–13 min

    Mix the dough flour, sugar, yeast, salt, milk and dough egg in a stand-mixer bowl with the dough hook. Once combined, knead at the manufacturer’s recommended dough speed for 8–10 minutes, scraping the bowl as needed.

    The cook checks elastic pale dough in a stopped mixer beside six separate butter pieces.
    Develop the dough before adding the butter.

    Ready when: The dough pulls into an elastic mass and stretches before tearing.

  2. Work in the butter gradually

    12–18 min

    Add the 185 g butter gradually with the mixer running slowly, letting each piece disappear before adding the next. Allow 12–18 minutes for the addition and final mixing. If the bowl warms or the dough looks greasy, cover and chill for 15 minutes before continuing.

    The cook stretches a small translucent patch of glossy yellow brioche dough above its bowl.
    Work in the butter until the dough stretches thinly.

    Ready when: All butter is incorporated; the dough is glossy and can stretch into a thin patch.

  3. Let the dough rise

    60 min

    Move the dough to a covered bowl with room for expansion. Leave at 22–24°C for about 1 hour.

    The cook lowers a clear cover above a softly domed yellow dough with ample bowl space above it.
    Cover and let the dough begin to swell.

    Ready when: The dough begins to swell and feels lighter, without needing to double yet.

  4. Chill the rich dough overnight

    480–720 min

    Press the dough down gently, cover well and refrigerate for 8–12 hours.

    The cook slides the covered dough bowl onto a refrigerator shelf, leaving space above the dough.
    Cover well and refrigerate until cold and firm.

    Ready when: The dough is cold and firm enough to divide without smearing.

  5. Fill sixteen balls and arrange in two tins

    20–25 min

    Grease two 20×10×7 cm loaf tins and line their bases with baking paper. On a lightly floured worktop, divide the cold dough into 16 equal pieces, about 52 g each. Divide all the diced apricots between them, about 9 g per piece. Flatten each dough piece, place its fruit in the centre, bring the edges together and pinch closed. Set eight balls seam-side down in each tin, in four rows of two.

    Two small tins hold fifteen filled dough balls while the cook seals the last apricot-filled piece.
    Enclose the apricots and place eight balls in each tin.

    Ready when: Every ball encloses its apricots, with a closed seam. There are sixteen balls total and no remaining filling.

  6. Proof slowly and heat the oven

    150–240 min

    Cover loosely and leave at 24–26°C for 2½–4 hours. Keep away from direct heat. Heat the oven to 180°C conventional during the final 20 minutes.

    The cook lifts a white cloth above two tins, each holding eight puffy joined brioche balls.
    Let both loaves rise until the balls are puffy and touching.

    Ready when: The balls are puffy, touching and close to the tin rims. A light fingertip dent recovers slowly.

  7. Brush and bake both loaves

    32–42 min

    Brush the tops lightly with the separate beaten wash egg. Bake both tins on the middle rack for 30–40 minutes. Cover loosely with foil if the tops brown before the centres cook. Check the bread in the middle of each loaf with a probe, avoiding a pocket of fruit.

    Two tins on the oven rack each hold a golden brioche loaf with eight glossy joined domes.
    Brush lightly with egg and bake both loaves until deep golden.

    Ready when: The bread centre reads at least 88°C. The tops are deep golden and the sides feel set.

  8. Cool before slicing

    90 min

    Leave in the tins for 10 minutes, then turn out onto a rack. Cool for at least another 80 minutes before slicing or storing.

    Two whole golden brioche loaves, each with eight joined domes, cool on a rack beside two empty tins.
    Turn out and cool fully before cutting.

    Ready when: The loaves hold their shape and the crumb around the fruit is set.

What can go wrong, and how can I fix it?

What you noticeLikely causeWhat to do
Butter leaks while mixing.The dough became too warm before the butter was fully absorbed.Cover and chill briefly, then resume gently. Use cool pliable butter and pause if the bowl warms.
Fruit escapes through a seam.The apricot pieces reached the edge or the seam was not sealed.Before proofing, pinch the dough closed around the fruit and place the seam underneath. Divide the filling evenly and keep a clean border around each portion.
The top is dark but the middle is damp.The rich dough browned before the loaf cooked through.Tent loosely with foil and continue baking until the bread centre reaches the stated cue. Use the loaf temperature and time rather than a small-bun schedule.
Useful recipe notes

Storage: Once completely cool, wrap and keep at room temperature for up to 2 days. Slice and toast older brioche. Freeze the wrapped loaves or slices for up to 2 months; thaw while wrapped before warming.

Contains: wheat, milk, egg, sulphites if present in the dried apricots.

This Nepedia version has not been kitchen-tested.

See the detailed method and ratios in , or follow ingredients through the .

Ingredient proportions & recipe details

Apricot brioche loaves at a glance

Makes
2 small loaves, 16 filled portions total
Heat
180°C conventional
Baking time
30–40 min
Cuisine / style
France
Leavening
Yeast
Bulk fermentation (including folding)
60 min · The dough begins to swell and feels lighter, without needing to double yet.
How do the ingredient proportions compare?

Percentages compare each listed weight with the combined flour weight (100%). These are ingredient ratios, not dough hydration; milk, eggs and fillings contain other ingredients as well as water.

Formula componentGramsFlour = 100%
Strong white bread flour375 g100%
Caster sugar40 g10.7%
Instant dried yeast5 g1.3%
Fine salt7 g1.9%
Whole milk75 g20%
Beaten whole egg150 g40%
Unsalted butter185 g49.3%

Smoked salmon brioche loaf

Makes
1 loaf, 12 slices
Heat
200°C conventional
Baking time
30–40 min
Cuisine / style
France
France · Brioche

Smoked salmon brioche loaf

A soft milk-rich loaf rolled around smoked salmon, crème fraîche and dill. The lighter dough is made and baked on the same day.

Method

  1. 01 · Mix and develop the dough

    7–9 min

    Use: Strong white bread flour; Whole milk; Beaten whole egg; Caster sugar; Fine salt; Instant dried yeast

    Put the dough flour, milk, 50 g egg, sugar, salt and yeast in a stand-mixer bowl. Mix with the dough hook until the flour is moistened, then knead at the manufacturer’s recommended speed for 5 minutes.

    Ready when: The dough gathers into an elastic mass.

    Cook beside a stopped cream stand mixer with dough on its hook and four small butter pieces.
    01 Develop the milk-rich doughMix and develop the milk-rich dough.
  2. 02 · Work in the butter

    5–8 min

    Use: Unsalted butter

    Add the 40 g softened butter in small pieces. Continue kneading for 5–8 minutes, pausing to scrape the bowl if needed.

    Ready when: No butter pieces remain and the dough stretches smoothly. It is soft but holds together.

    Hands stretch a small flap of smooth pale enriched dough over the steel mixer bowl.
    02 Knead in the butterKnead in the softened butter until the dough is smooth.
  3. 03 · Let the dough rise

    60–90 min

    Use:

    Cover the bowl and leave at 22–24°C for 60–90 minutes. Keep the salmon and crème fraîche refrigerated while the dough rises.

    Ready when: The dough is airy and approximately doubled in volume.

    Cook lifts a cover from risen milk-rich dough in a clear bowl.
    03 Let the dough riseLet the covered dough rise until airy and about doubled.
  4. 04 · Add the chilled filling and roll into the tin

    12–18 min

    Use: Butter for the tin; Flour for shaping; Full-fat crème fraîche; Fresh dill leaves; Ground black pepper; Smoked salmon

    Butter a 23×13×8 cm loaf tin and line the base with baking paper. Lightly flour the worktop and roll the dough into a 25×35 cm rectangle. Spread the crème fraîche over it, leaving a 2 cm clear border. Add the dill, pepper and salmon in an even thin layer. Starting at a 25 cm edge, roll up without squeezing out the filling. Pinch the long seam closed, tuck the ends inward to fit the tin, and set the log seam-side down.

    Ready when: One filled log fits the tin with closed ends. All filling is inside rather than piled along the seam.

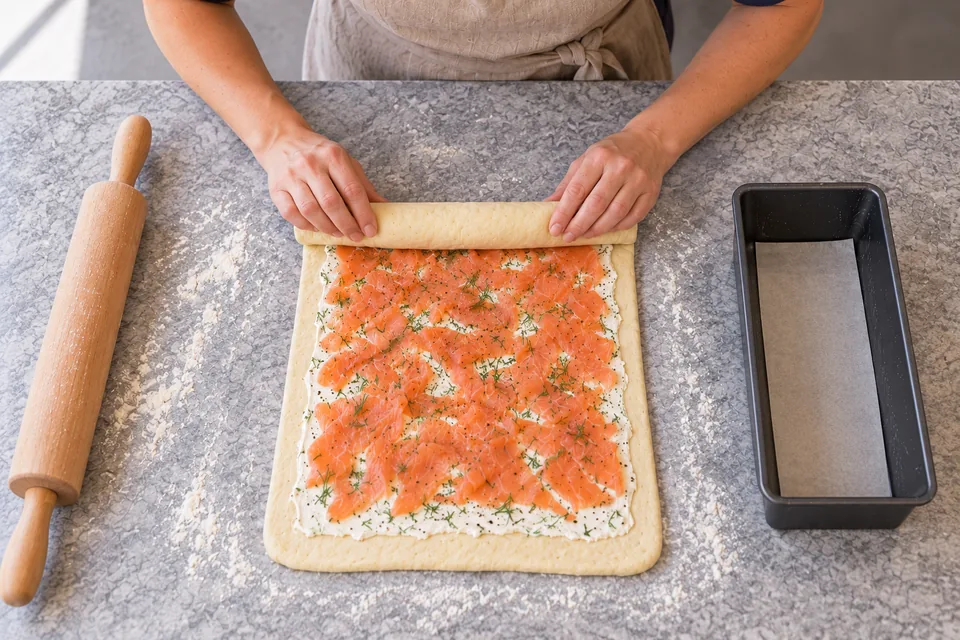
    Hands begin rolling a rectangle of dough spread thinly with salmon, crème fraîche and dill.
    04 Fill and roll from the short edgeAdd the thin cold filling and roll from a short edge.
  5. 05 · Proof and heat the oven

    45–60 min

    Use:

    Cover loosely and leave at 22–24°C for 45–60 minutes. Heat the oven to 200°C conventional during the final 20 minutes.

    Ready when: The loaf is puffy, has risen well up the tin and a light fingertip dent recovers slowly.

    Cook lifts the cover above one risen filled loaf in its tin.
    05 Proof the filled loafLet the filled loaf become puffy before glazing.
  6. 06 · Brush and bake the filled loaf

    32–42 min

    Use: Beaten egg for brushing

    Brush lightly with the separate beaten wash egg. Bake for 30–40 minutes. If the top becomes dark early, cover loosely with foil. Probe the bread near the middle, between salmon layers, and check that the filling is hot through.

    Ready when: The bread reaches about 93°C, the sides are firm and there is no wet raw dough around the filling.

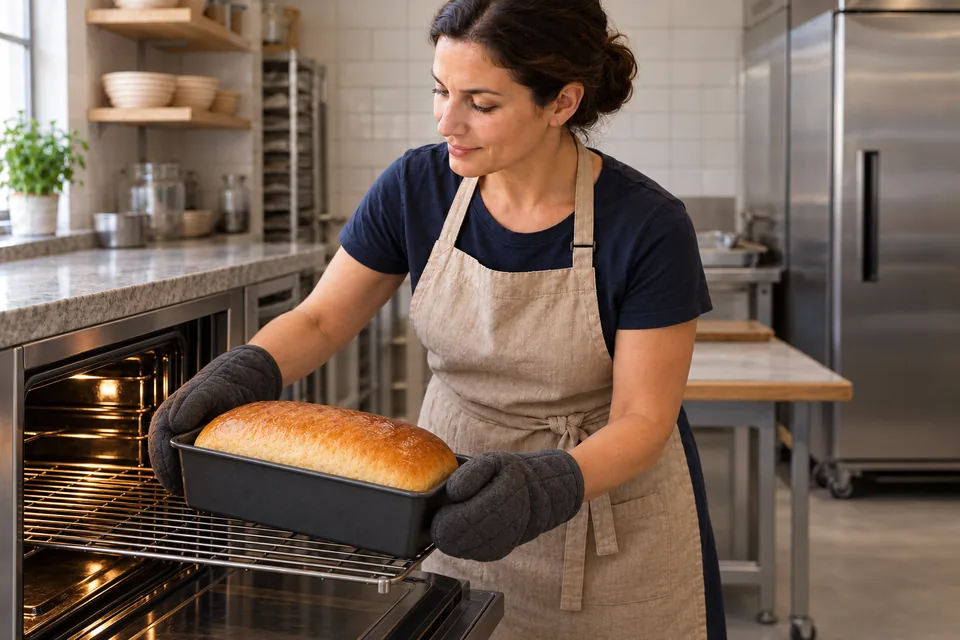
    Cook uses two oven mitts to support one golden baked loaf in its tin.
    06 Glaze lightly and bakeBrush lightly with egg and bake until the bread and filling are cooked.
  7. 07 · Rest before slicing

    45 min

    Use:

    Leave in the tin for 10 minutes, then turn out onto a rack. Rest for another 35 minutes before slicing with a serrated knife.

    Ready when: Slices hold together and the filling no longer releases clouds of steam.

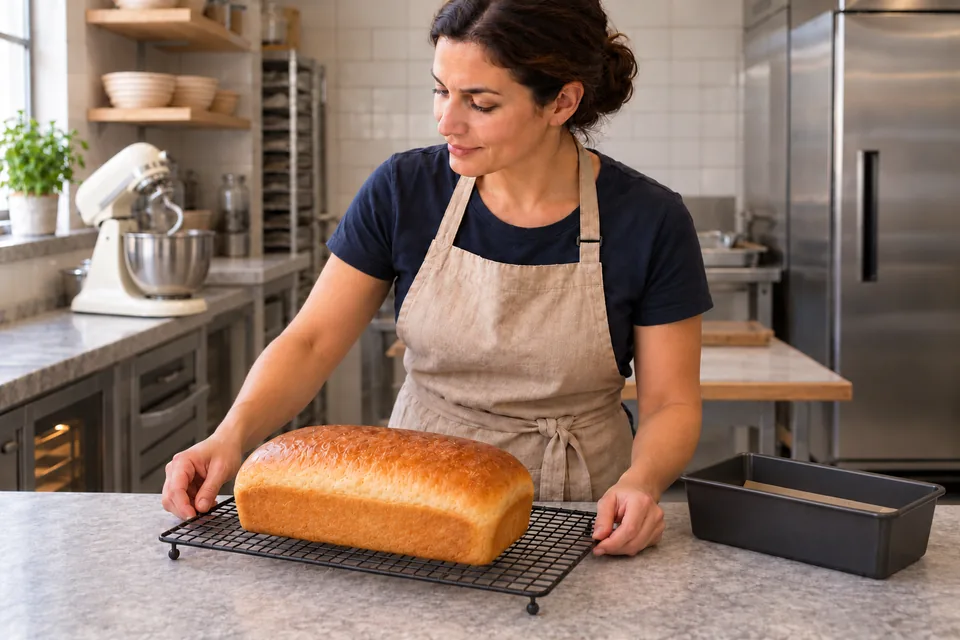
    Cook beside one cooled golden salmon brioche loaf on a black rack.
    07 Rest and cool before slicingRest in the tin, then cool on a rack before slicing.

What to look for

StageLook / feel forNeeds attention
Mix and develop the doughThe dough gathers into an elastic mass.
Work in the butterNo butter pieces remain and the dough stretches smoothly. It is soft but holds together.
Let the dough riseThe dough is airy and approximately doubled in volume.
Add the chilled filling and roll into the tinOne filled log fits the tin with closed ends. All filling is inside rather than piled along the seam.
Proof and heat the ovenThe loaf is puffy, has risen well up the tin and a light fingertip dent recovers slowly.
Brush and bake the filled loafThe bread reaches about 93°C, the sides are firm and there is no wet raw dough around the filling.
Rest before slicingSlices hold together and the filling no longer releases clouds of steam.

Troubleshooting

If you see thisLikely causeWhat to do nowNext time
The filling escapes while rolling.The filling reached the border or the log was squeezed too tightly.Clear the border and pinch the seam and ends closed before putting the loaf in the tin.Use the measured filling and leave the stated clear border.
The loaf is golden but dough remains wet near the filling.The outside coloured before the middle cooked.Cover loosely with foil and continue baking, checking bread rather than only the hot salmon.Use the stated tin and check the centre before taking the loaf out.

Storage: Refrigerate leftovers promptly once cooled, and within 2 hours of baking. Wrap and use within 2 days. Reheat slices until hot through. Freeze wrapped slices for up to 1 month; thaw in the refrigerator before reheating.; Contains: wheat, milk, egg, fish.; This Nepedia version has not been kitchen-tested.

Ingredient choices & substitutions

No brand is specified.

Match the ingredient’s function and weight. See the flour, gluten, yeast and salt guide.

Other approaches to this recipe
Cook / recipeUseWhat differs

The working ingredients and method form one recipe. Different formulas are compared without averaging their quantities or rise schedules.
Nepedia
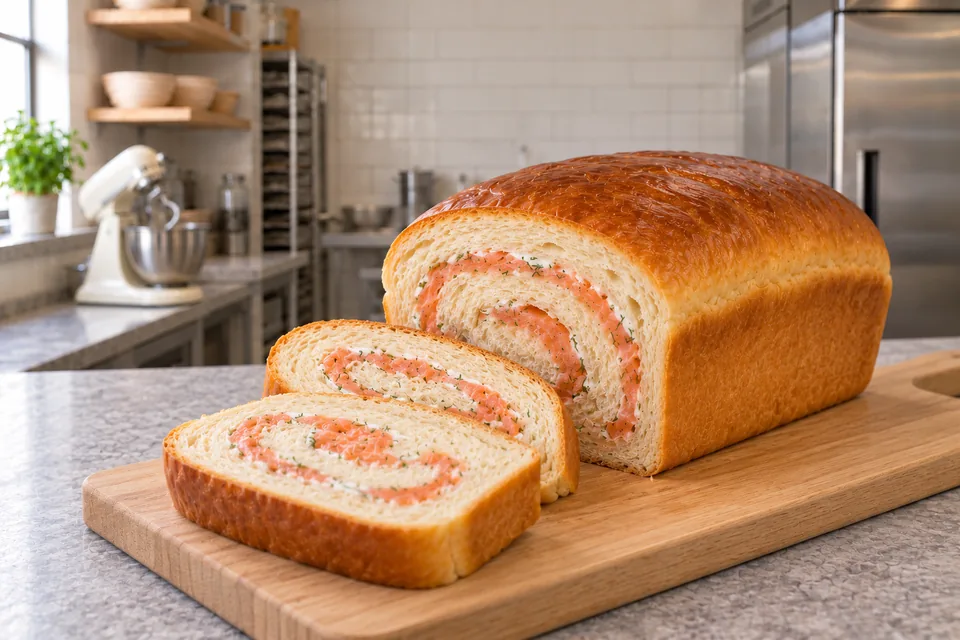
One golden brioche loaf with two slices revealing salmon and dill in a rolled spiral.
A soft milk-rich loaf with a thin smoked-salmon spiral.

Recipe

Smoked salmon brioche loaf

A soft milk-rich loaf rolled around smoked salmon, crème fraîche and dill. The lighter dough is made and baked on the same day.

How do I make it?

  1. Mix and develop the dough

    7–9 min

    Put the dough flour, milk, 50 g egg, sugar, salt and yeast in a stand-mixer bowl. Mix with the dough hook until the flour is moistened, then knead at the manufacturer’s recommended speed for 5 minutes.

    Cook beside a stopped cream stand mixer with dough on its hook and four small butter pieces.
    Mix and develop the milk-rich dough.

    Ready when: The dough gathers into an elastic mass.

  2. Work in the butter

    5–8 min

    Add the 40 g softened butter in small pieces. Continue kneading for 5–8 minutes, pausing to scrape the bowl if needed.

    Hands stretch a small flap of smooth pale enriched dough over the steel mixer bowl.
    Knead in the softened butter until the dough is smooth.

    Ready when: No butter pieces remain and the dough stretches smoothly. It is soft but holds together.

  3. Let the dough rise

    60–90 min

    Cover the bowl and leave at 22–24°C for 60–90 minutes. Keep the salmon and crème fraîche refrigerated while the dough rises.

    Cook lifts a cover from risen milk-rich dough in a clear bowl.
    Let the covered dough rise until airy and about doubled.

    Ready when: The dough is airy and approximately doubled in volume.

  4. Add the chilled filling and roll into the tin

    12–18 min

    Butter a 23×13×8 cm loaf tin and line the base with baking paper. Lightly flour the worktop and roll the dough into a 25×35 cm rectangle. Spread the crème fraîche over it, leaving a 2 cm clear border. Add the dill, pepper and salmon in an even thin layer. Starting at a 25 cm edge, roll up without squeezing out the filling. Pinch the long seam closed, tuck the ends inward to fit the tin, and set the log seam-side down.

    Hands begin rolling a rectangle of dough spread thinly with salmon, crème fraîche and dill.
    Add the thin cold filling and roll from a short edge.

    Ready when: One filled log fits the tin with closed ends. All filling is inside rather than piled along the seam.

  5. Proof and heat the oven

    45–60 min

    Cover loosely and leave at 22–24°C for 45–60 minutes. Heat the oven to 200°C conventional during the final 20 minutes.

    Cook lifts the cover above one risen filled loaf in its tin.
    Let the filled loaf become puffy before glazing.

    Ready when: The loaf is puffy, has risen well up the tin and a light fingertip dent recovers slowly.

  6. Brush and bake the filled loaf

    32–42 min

    Brush lightly with the separate beaten wash egg. Bake for 30–40 minutes. If the top becomes dark early, cover loosely with foil. Probe the bread near the middle, between salmon layers, and check that the filling is hot through.

    Cook uses two oven mitts to support one golden baked loaf in its tin.
    Brush lightly with egg and bake until the bread and filling are cooked.

    Ready when: The bread reaches about 93°C, the sides are firm and there is no wet raw dough around the filling.

  7. Rest before slicing

    45 min

    Leave in the tin for 10 minutes, then turn out onto a rack. Rest for another 35 minutes before slicing with a serrated knife.

    Cook beside one cooled golden salmon brioche loaf on a black rack.
    Rest in the tin, then cool on a rack before slicing.

    Ready when: Slices hold together and the filling no longer releases clouds of steam.

What can go wrong, and how can I fix it?

What you noticeLikely causeWhat to do
The filling escapes while rolling.The filling reached the border or the log was squeezed too tightly.Clear the border and pinch the seam and ends closed before putting the loaf in the tin. Use the measured filling and leave the stated clear border.
The loaf is golden but dough remains wet near the filling.The outside coloured before the middle cooked.Cover loosely with foil and continue baking, checking bread rather than only the hot salmon. Use the stated tin and check the centre before taking the loaf out.
Useful recipe notes

Storage: Refrigerate leftovers promptly once cooled, and within 2 hours of baking. Wrap and use within 2 days. Reheat slices until hot through. Freeze wrapped slices for up to 1 month; thaw in the refrigerator before reheating.

Contains: wheat, milk, egg, fish.

This Nepedia version has not been kitchen-tested.

See the detailed method and ratios in , or follow ingredients through the .

Ingredient proportions & recipe details

Smoked salmon brioche loaf at a glance

Makes
1 loaf, 12 slices
Heat
200°C conventional
Baking time
30–40 min
Cuisine / style
France
Leavening
Yeast
Bulk fermentation (including folding)
60–90 min · The dough is airy and approximately doubled in volume.
How do the ingredient proportions compare?

Percentages compare each listed weight with the combined flour weight (100%). These are ingredient ratios, not dough hydration; milk, eggs and fillings contain other ingredients as well as water.

Formula componentGramsFlour = 100%
Strong white bread flour325 g100%
Whole milk175 g53.8%
Beaten whole egg50 g15.4%
Caster sugar15 g4.6%
Fine salt5 g1.5%
Instant dried yeast4.5 g1.4%
Unsalted butter40 g12.3%

Brie brioche parcel

Makes
1 parcel, 8 wedges
Heat
200°C conventional
Baking time
25–35 min
Cuisine / style
France
France · Brioche

Brie brioche parcel

A whole Brie enclosed in soft savoury brioche. Let the baked parcel rest briefly, then cut into wedges while the cheese is warm.

Method

  1. 01 · Mix and develop the dough

    7–9 min

    Use: Strong white bread flour; Whole milk; Beaten whole egg; Instant dried yeast; Fine salt

    Mix the dough flour, milk, 50 g egg, yeast and salt in a stand-mixer bowl with the dough hook. Knead at the manufacturer’s recommended speed for 5 minutes after the flour is moistened.

    Ready when: The dough gathers together and begins to stretch.

    The cook checks a small batch of elastic dough beside four small butter pieces.
    01 Brie brioche parcelDevelop the dough before adding the butter.
  2. 02 · Work in the butter

    5–8 min

    Use: Unsalted butter

    Work the 50 g butter into the dough in small pieces. Continue kneading for 5–8 minutes, scraping the bowl if needed.

    Ready when: The dough is smooth and stretchy, with no separate butter pieces.

    Hands stretch a small patch of smooth enriched dough over a mixer bowl.
    02 Brie brioche parcelWork in the butter until the dough stretches smoothly.
  3. 03 · Let the dough rise

    60–90 min

    Use:

    Cover the bowl and leave at 22–24°C for 60–90 minutes.

    Ready when: The dough becomes airy and roughly doubles in volume.

    A covered bowl holds a visibly risen enriched dough.
    03 Brie brioche parcelLet the dough rise until airy and roughly doubled.
  4. 04 · Chill before wrapping

    45–60 min

    Use:

    Press down the dough gently, cover and refrigerate for 45–60 minutes.

    Ready when: The butter is firm enough that the dough rolls without smearing.

    The cook places a covered dough bowl in the refrigerator.
    04 Brie brioche parcelChill the dough until it rolls without smearing.
  5. 05 · Enclose the whole Brie and seal

    10–15 min

    Use: Flour for shaping; Whole Brie

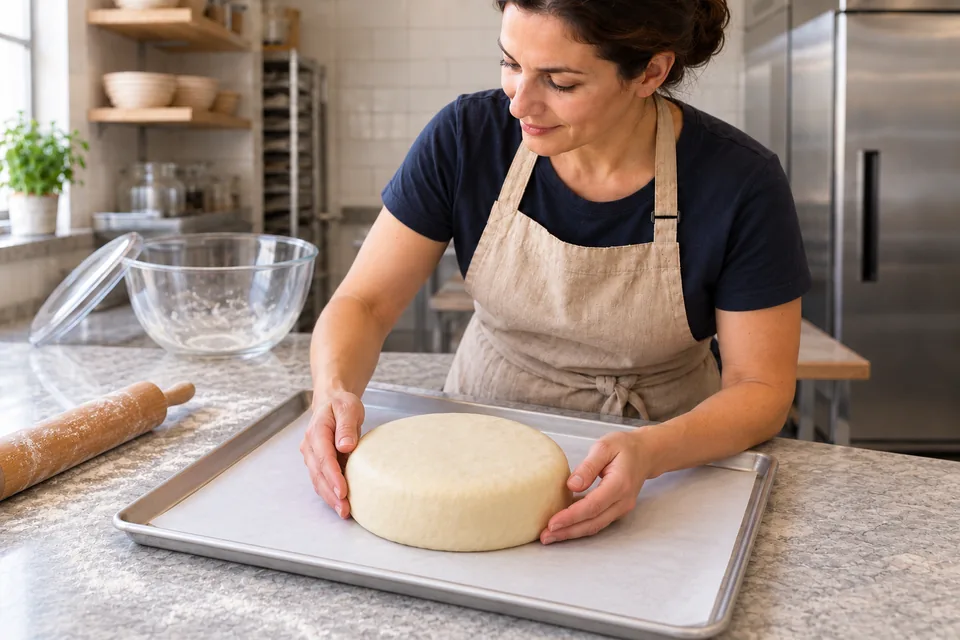
    Line a 30×40 cm baking tray with baking paper. Lightly flour the worktop and roll the dough into a circle about 30 cm across and 6 mm thick to start. Remove all packaging from the chilled Brie, leaving its rind intact. Check the dough against the wheel: it must cover the base, sides and top with small overlaps. Roll it larger and thinner if needed. Put the Brie in the centre, bring the dough over it and gently stretch without tearing until the cheese is fully covered. Spread the overlaps flat and pinch every join closed. Turn the parcel over onto the tray so the joins sit underneath.

    Ready when: The cheese is completely enclosed by unbroken dough. The underside has small, flat, sealed overlaps rather than a thick dough knot.

    One whole Brie wheel is enclosed in a smooth dough parcel on a lined tray.
    05 Brie brioche parcelEnclose the chilled Brie and seal the joins underneath.
  6. 06 · Proof and heat the oven

    45–60 min

    Use:

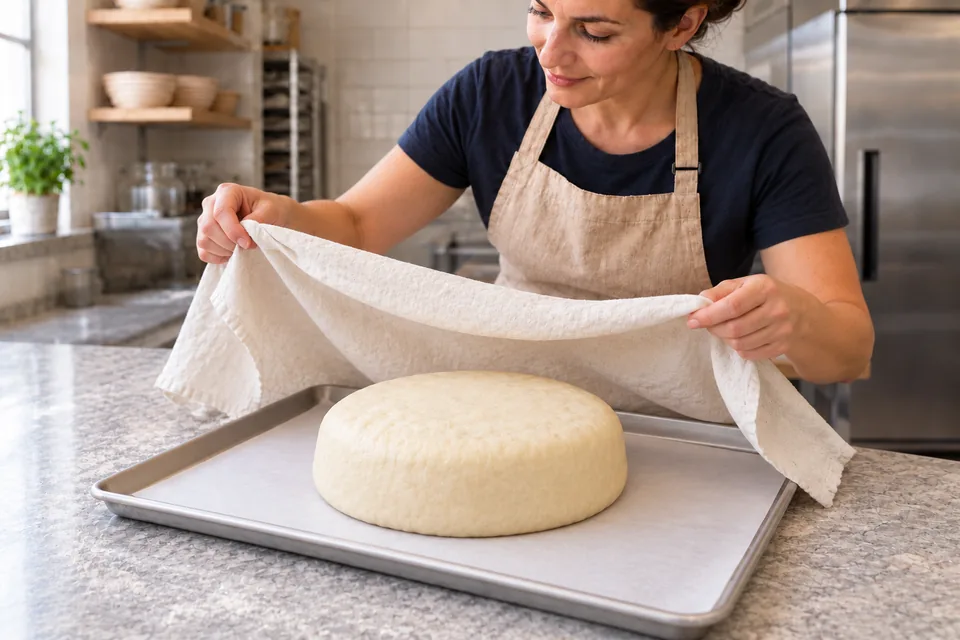
    Cover loosely and leave at 22–24°C for 45–60 minutes. Heat the oven to 200°C conventional during the final 20 minutes.

    Ready when: The dough covering has visibly puffed and a light fingertip dent recovers slowly.

    The dough around one Brie parcel has risen softly on its tray.
    06 Brie brioche parcelLet the covering puff before glazing.
  7. 07 · Brush and bake the parcel

    27–37 min

    Use: Beaten egg for brushing

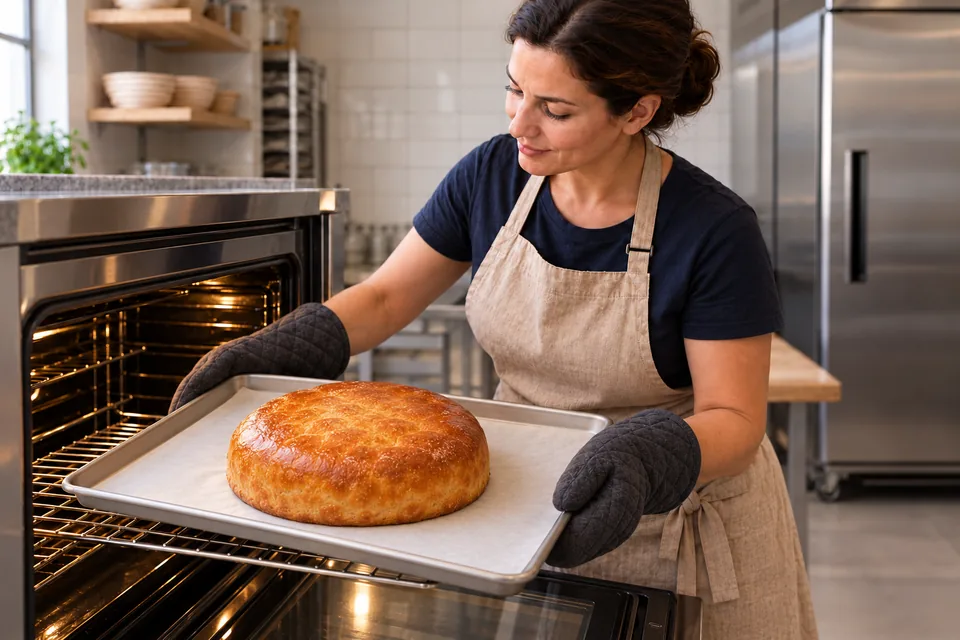
    Brush the parcel lightly with the separate beaten wash egg. Bake for 25–35 minutes, covering loosely with foil if it colours too quickly. Check the thick folded bread near the underside with a probe, avoiding the cheese.

    Ready when: The crust is deep golden, the underside is set and the bread at the folds reaches at least 90°C.

    The cook lifts a tray holding one golden enclosed Brie parcel.
    07 Brie brioche parcelBrush lightly with egg and bake until the bread is cooked.
  8. 08 · Rest and cut into wedges

    20–23 min

    Use:

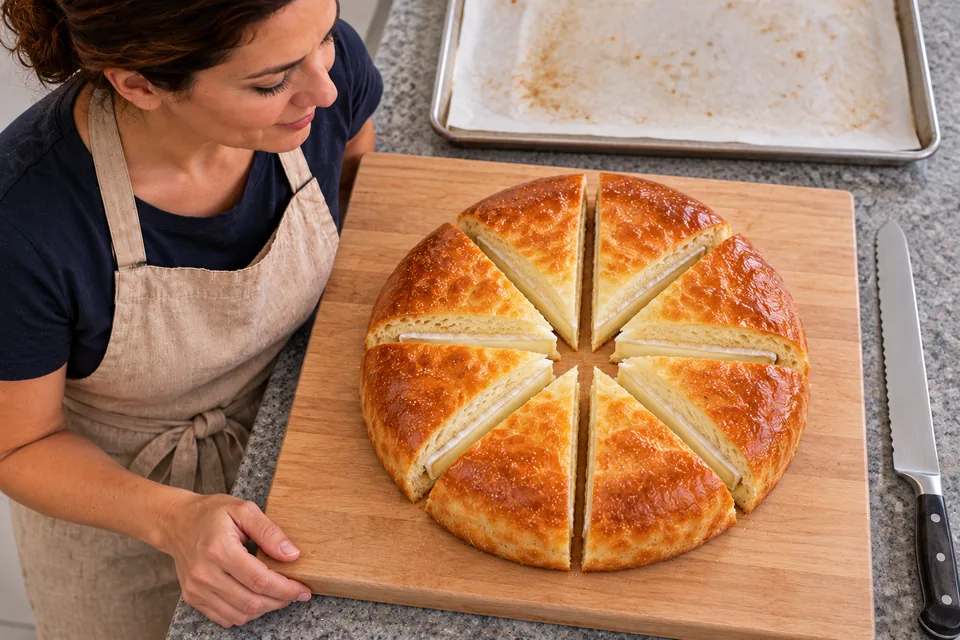
    Leave the parcel on the tray for 20 minutes. Move it to a board and cut into eight wedges with a serrated knife.

    Ready when: The bread cuts cleanly and the warm cheese is soft without being boiling hot.

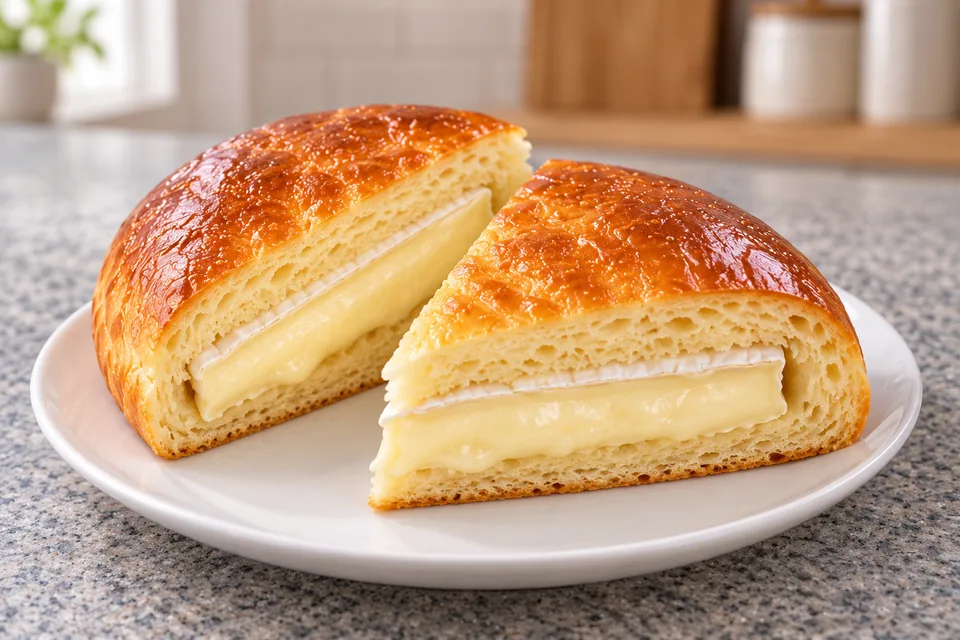
    Eight wedges of a warm Brie parcel show cooked bread around soft cheese.
    08 Brie brioche parcelRest,then divide the warm parcel into eight wedges.

What to look for

StageLook / feel forNeeds attention
Mix and develop the doughThe dough gathers together and begins to stretch.
Work in the butterThe dough is smooth and stretchy, with no separate butter pieces.
Let the dough riseThe dough becomes airy and roughly doubles in volume.
Chill before wrappingThe butter is firm enough that the dough rolls without smearing.
Enclose the whole Brie and sealThe cheese is completely enclosed by unbroken dough. The underside has small, flat, sealed overlaps rather than a thick dough knot.
Proof and heat the ovenThe dough covering has visibly puffed and a light fingertip dent recovers slowly.
Brush and bake the parcelThe crust is deep golden, the underside is set and the bread at the folds reaches at least 90°C.
Rest and cut into wedgesThe bread cuts cleanly and the warm cheese is soft without being boiling hot.

Troubleshooting

If you see thisLikely causeWhat to do nowNext time
Cheese escapes through the underside.A seam was open or the rind was cut before wrapping.Let the baked parcel rest on its lined tray before moving it.Keep the rind intact and seal every dough join before proofing.
The underside has a dense dough patch.Too many folds were piled in one place or the parcel was removed too early.If still baking, cover the top loosely and continue until the folded bread is set.Spread the overlaps and check the bread at the seam rather than probing only cheese.

Storage: Serve warm after the stated rest. Refrigerate cooled leftovers within 2 hours of baking and use within 2 days. Reheat individual wedges in an oven until hot through.; Contains: wheat, milk, egg.; This Nepedia version has not been kitchen-tested.

Ingredient choices & substitutions

No brand is specified.

Match the ingredient’s function and weight. See the flour, gluten, yeast and salt guide.

Other approaches to this recipe
Cook / recipeUseWhat differs

The working ingredients and method form one recipe. Different formulas are compared without averaging their quantities or rise schedules.
Nepedia
Two wedges show golden bread surrounding warm soft Brie.
Brie brioche parcel with a soft cheese centre.

Recipe

Brie brioche parcel

A whole Brie enclosed in soft savoury brioche. Let the baked parcel rest briefly, then cut into wedges while the cheese is warm.

How do I make it?

  1. Mix and develop the dough

    7–9 min

    Mix the dough flour, milk, 50 g egg, yeast and salt in a stand-mixer bowl with the dough hook. Knead at the manufacturer’s recommended speed for 5 minutes after the flour is moistened.

    The cook checks a small batch of elastic dough beside four small butter pieces.
    Develop the dough before adding the butter.

    Ready when: The dough gathers together and begins to stretch.

  2. Work in the butter

    5–8 min

    Work the 50 g butter into the dough in small pieces. Continue kneading for 5–8 minutes, scraping the bowl if needed.

    Hands stretch a small patch of smooth enriched dough over a mixer bowl.
    Work in the butter until the dough stretches smoothly.

    Ready when: The dough is smooth and stretchy, with no separate butter pieces.

  3. Let the dough rise

    60–90 min

    Cover the bowl and leave at 22–24°C for 60–90 minutes.

    A covered bowl holds a visibly risen enriched dough.
    Let the dough rise until airy and roughly doubled.

    Ready when: The dough becomes airy and roughly doubles in volume.

  4. Chill before wrapping

    45–60 min

    Press down the dough gently, cover and refrigerate for 45–60 minutes.

    The cook places a covered dough bowl in the refrigerator.
    Chill the dough until it rolls without smearing.

    Ready when: The butter is firm enough that the dough rolls without smearing.

  5. Enclose the whole Brie and seal

    10–15 min

    Line a 30×40 cm baking tray with baking paper. Lightly flour the worktop and roll the dough into a circle about 30 cm across and 6 mm thick to start. Remove all packaging from the chilled Brie, leaving its rind intact. Check the dough against the wheel: it must cover the base, sides and top with small overlaps. Roll it larger and thinner if needed. Put the Brie in the centre, bring the dough over it and gently stretch without tearing until the cheese is fully covered. Spread the overlaps flat and pinch every join closed. Turn the parcel over onto the tray so the joins sit underneath.

    One whole Brie wheel is enclosed in a smooth dough parcel on a lined tray.
    Enclose the chilled Brie and seal the joins underneath.

    Ready when: The cheese is completely enclosed by unbroken dough. The underside has small, flat, sealed overlaps rather than a thick dough knot.

  6. Proof and heat the oven

    45–60 min

    Cover loosely and leave at 22–24°C for 45–60 minutes. Heat the oven to 200°C conventional during the final 20 minutes.

    The dough around one Brie parcel has risen softly on its tray.
    Let the covering puff before glazing.

    Ready when: The dough covering has visibly puffed and a light fingertip dent recovers slowly.

  7. Brush and bake the parcel

    27–37 min

    Brush the parcel lightly with the separate beaten wash egg. Bake for 25–35 minutes, covering loosely with foil if it colours too quickly. Check the thick folded bread near the underside with a probe, avoiding the cheese.

    The cook lifts a tray holding one golden enclosed Brie parcel.
    Brush lightly with egg and bake until the bread is cooked.

    Ready when: The crust is deep golden, the underside is set and the bread at the folds reaches at least 90°C.

  8. Rest and cut into wedges

    20–23 min

    Leave the parcel on the tray for 20 minutes. Move it to a board and cut into eight wedges with a serrated knife.

    Eight wedges of a warm Brie parcel show cooked bread around soft cheese.
    Rest,then divide the warm parcel into eight wedges.

    Ready when: The bread cuts cleanly and the warm cheese is soft without being boiling hot.

What can go wrong, and how can I fix it?

What you noticeLikely causeWhat to do
Cheese escapes through the underside.A seam was open or the rind was cut before wrapping.Let the baked parcel rest on its lined tray before moving it. Keep the rind intact and seal every dough join before proofing.
The underside has a dense dough patch.Too many folds were piled in one place or the parcel was removed too early.If still baking, cover the top loosely and continue until the folded bread is set. Spread the overlaps and check the bread at the seam rather than probing only cheese.
Useful recipe notes

Storage: Serve warm after the stated rest. Refrigerate cooled leftovers within 2 hours of baking and use within 2 days. Reheat individual wedges in an oven until hot through.

Contains: wheat, milk, egg.

This Nepedia version has not been kitchen-tested.

See the detailed method and ratios in , or follow ingredients through the .

Ingredient proportions & recipe details

Brie brioche parcel at a glance

Makes
1 parcel, 8 wedges
Heat
200°C conventional
Baking time
25–35 min
Cuisine / style
France
Leavening
Yeast
Bulk fermentation (including folding)
60–90 min · The dough becomes airy and roughly doubles in volume.
How do the ingredient proportions compare?

Percentages compare each listed weight with the combined flour weight (100%). These are ingredient ratios, not dough hydration; milk, eggs and fillings contain other ingredients as well as water.

Formula componentGramsFlour = 100%
Strong white bread flour250 g100%
Whole milk135 g54%
Beaten whole egg50 g20%
Instant dried yeast7 g2.8%
Fine salt5 g2%
Unsalted butter50 g20%